Pages

Bourbon Chicken


I'm not exactly sure why this is called Bourbon Chicken, because it has no bourbon in it;  however, it tastes remarkably similar to the bourbon chicken you might buy at one of those food kiosks in the mall, which makes it a winner in my book!  I think it would taste even more authentic if you used chicken thigh meat, but I hardly ever buy that.
What do I love about this recipe?

  • It's fast - comes together in 30 minutes or less.
  • It's easy - no complicated instructions or ingredients
  • It's healthy - at least relatively so.  Unless you're avoiding soy.  
  • Number 1 reason - it's Delicious!  I mean really delicious!  All of my children loved it, which doesn't happen all the time, and Grant and I couldn't get enough of it.  I can't wait to make it again!


Recipe: (from Mel's Kitchen Cafe)

2 lbs. boneless skinless chicken breasts or thighs
4 T. oil (I used expeller pressed coconut oil - no flavor)
Cornstarch (for dusting, optional)

Sauce:
1 garlic clove, minced
1/4 t. ground ginger
1/2 t. crushed red pepper flakes
1/4 c. apple juice
1/3 c. light brown sugar
2 T. ketchup
1 T. apple cider vinegar
1/2 c. water
1/3 c. soy sauce (reduced sodium)
Hot cooked rice, for serving

Cut chicken breasts into bite-sized pieces, and if you choose, lightly dust with cornstarch.  (I did not).
Heat oil in your skillet or wok and fry chicken in batches until lightly browned.  Remove to a plate and set aside.

In a bowl, combine all sauce ingredients.  Pour into skillet and bring to a boil.  Add chicken pieces back to the pan, reduce the heat and simmer for 10 minutes.

Serve over hot rice.
reade more... Résuméabuiyad

Mocha Cake Ball Truffles


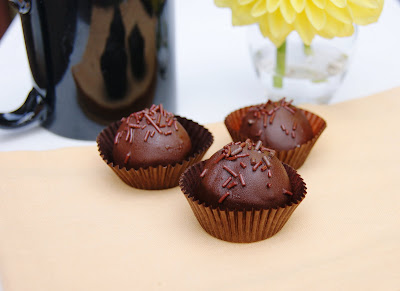
I think this is the last in quite a string of cake ball creations.  I seem to have been on a run of cake ball flavor development!  I tend to do that ... get on a roll with one type of confection and just keep on a-going with the different ideas in my head.  Let's see, this summer there's been Salted Chocolate Cake Balls & Pops, Margarita Cake Ball Truffles, and Funfetti Cake Balls.  Following a similar method, there's also been Oreo Truffles and the-start-of-it-all Chocolate Chip Cookie Dough Truffles & Pops.

And now ... Mocha Cake Ball Truffles!  Of all the varieties I've played with this summer, these are my absolute favorite.  Vanilla cake mixed with rich coffee buttercream, then dunked in dark chocolate coating.  To quote one of my all-time favorite movies, it's scrumdidilyumptious!  (That's from Willy Wonka & The Chocolate Factory, just in case you were wondering.)

If you like coffee sweet treats, try these.  I promise you won't be disappointed.


Mocha Cake Ball Truffles
Source: Concept & process adapted from Bakerella

Click here to view a detailed post about making cake pops and cake balls.

Ingredients
1 baked 9x13" vanilla cake (I used a recipe from scratch, but a box mix also works just fine)
1 to 1 1/2 c. strong coffee buttercream frosting (recipe below)
1 (1 lb.) package dark chocolate candy melts
About 2 T. shortening
Chocolate sprinkles


Directions
1.  Crumble cake into a large bowl, working it into small crumbs. Add frosting and mix until well combined.

2.  Shape into approximately 1" balls, using about 1 T. of the cake mixture per ball; set aside on wax paper. Cover with plastic wrap and refrigerate for about 1 hour, or place in freezer for about 15 minutes.

3.  In a small deep bowl, melt candy melts and shortening together in the microwave per candy melt package directions (typically in 30 second intervals, stirring in between). Use a fork to dip each cake ball in the candy coating, letting excess coating drip off back into the bowl. Place on wax paper. Immediately sprinkle with a few chocolate sprinkles. Let stand for coating to set up.


Strong Coffee Buttercream Frosting
Source: Adapted from The Best Recipe by the editors of Cook's Illustrated magazine

I had to really amp up the coffee in this frosting to get the flavor to come through in the truffles, hence the name Strong Coffee Buttercream.  If you want to frost a cake or cupcakes with Coffee Buttercream, click on the link to use this recipe instead.

Ingredients
3 T. instant coffee granules
1 1/2 T. water
1 1/2 T. vanilla extract
3/4 lb. (3 sticks) unsalted butter, softened
3 c. confectioners' sugar
3 T. milk


Directions
Combine water, coffee granules, and vanilla extract in a small bowl; stir to dissolve coffee.  Set aside.

Beat butter in bowl of an electric mixer on medium speed until fluffy, about 1 minute.  Reduce mixer speed to low.  Add confectioners' sugar, 1 cup at a time, beating for a few seconds between each addition.  Increase mixer speed to medium and beat for about 3 minutes.  Add the coffee mixture and milk; beat on low speed to combine.  Scrape down sides and bottom of the bowl.  Increase mixer speed to medium and beat until fluffy, about 4 minutes.


This post is linked with Savvy HomeMade Monday hosted by Savvy HomeMade A to Z, Recipe Sharing Monday hosted by Jam Hands, Tuesday Tutorials hosted by The Kurtz Corner, Mouthwatering Monday hosted by A Southern Fairytale, Tasty Tuesday hosted by For the Love of Blogs, Crazy Sweet Tuesdays hosted by Crazy for Crust, Mmm ... Dessert hosted by Joy of Desserts, These Chicks Cooked hosted by This Chick Cooks, Cast Party Wednesday hosted by Lady Behind the Curtain, It's a Keeper Thursday hosted by It's a Keeper, Foodie Friday hosted by Designs by Gollum, Fat Camp Friday hosted by Mangoes and Chutney, Friday Potluck hosted by eKat's Kitchen, Friday Favorites hosted by Simply Sweet Home, Sweets This Week hosted by Sugar Bananas, Sweets for a Saturday hosted by Sweet as Sugar Cookies, Sweet Indulgences Sunday hosted by  A Well-Seasoned Life, and Crafty Lassie Tuesday hosted by Sew Stylish Boutique.
reade more... Résuméabuiyad

What a Weather Week....

A couple of days ago, I experienced my first earthquake.  
And the funny thing was, I didn't even know it was an earthquake until after it was over. 
Oh, I knew something weird was happening.  
I just thought it was my kids.  
Absurdly, I thought they were jumping on the bed upstairs and that was causing the whole house to shake. 
Earthquakes just don't happen in Virginia, so it literally didn't even cross my  mind.
So there I was, hollering up the stairs at the kids, 
"WHAT ARE YOU GUYS DOING?????"
and watching them come out of their rooms with puzzled faces saying,
"Nothing, Mom...why is everything shaking?"

Then I looked up in my entryway and saw my chandelier swinging back and forth.  
And I felt pretty dumb for thinking the kids were physically capable of making our whole house rumble.  
Which it did.  
A quick check on facebook confirmed that many of my local friends (and some not local) had also felt their houses shaking, so it was indeed an earthquake.  
I felt dizzy for a couple of hours that afternoon......it was like my whole equilibrium was knocked off course in that few seconds of shaking.  

And now Hurricane Irene is menacing our coastline.....
I pretty much blew off the warnings about her earlier in the week because in the seven+ years we've lived here, none of the hurricane threats have come to fruition, other than a couple of tropical storms and a nor'easter or two.  
Now, it's looking a lot more serious than that.  

We live in a pretty safe place as far as flooding goes, our neighborhood is actually the highest elevation in our whole community, but that doesn't put us out of danger of downed trees, power outages, that sort of thing. 
The last major hurricane that hit this area was Hurricane Isabel - she knocked Virginia for such a loop that there were people out of power for multiple weeks, countless homes damaged by falling trees, that sort of thing. 
Supposedly, if Irene doesn't change course, she could be more intense than Isabel.  

I'm not excited about that. 

I look out my window right now and see the sun shining brightly, a gentle breeze blowing,  a normal summer day.  Yet several people I know are already evacuating the area.  
There are no D batteries to be found in town, so I hear from friends, which is unfortunate because we're running pretty low. 
I did get 12 gallons of drinking water yesterday when I had the chance.  I'm going shopping again tonight to get more non-perishable food and such.  

And I'm praying like crazy that we are spared the horrific damages that people are panicked about.  

Any of you East Coast readers feeling the anxiety also?
reade more... Résuméabuiyad

Magic Hat Hi. P. A. verses Heavy Seas Loose Cannon - a IPA showdown


Hi.P.A.
Magic Hat Brewing Company
Burlington, VT
6.7% ABV
Style: IPA


The second beer I had tonight was a bottled version in a Magic Hat variety pack. The nose has heavy pine and floral notes with just a hint of citrus. The taste is hops on the front and back with a rich malty middle. It's the way I like an IPA: very bold but still drinkable. The hops are strong and the beginning and mellow out at the end. At $16 for a variety 12 pack, it wasn't a bad buy.


Loose Cannon American Hop3 Ale
Heavy Seas Brewing
Baltimore, MD
7.25% ABV
Style: IPA

This was my first beer of the evening, on tap at the bar. The nose was largely pine and citrus (same as the Magic Hat) but without the same bold flavors. The beer was drinkable, but it was not what I would consider an IPA. It did not have bold enough flavors and was, at most, an American pale ale in its flavor profile. When I expected an IPA to start my evening, it was downright boring.

It might not be California, but my beer education on the east coast has begun. I'm looking forward to furthering my knowledge of microbrews out here.
reade more... Résuméabuiyad

Classic No Bake Cookies to the Rescue!!


You know, a lot of my friends think I'm a 'perfect' cook ... which I am soooooo not!  I mess up all the time (and actually seem to have a string of mess-ups going on right now!).  For me, that's actually part of the adventure of cooking ... figuring out what works and what doesn't.  I decided when I started this blog that I'd be man (or in this case, woman) about my bloopers and share them.  Well, not all of them.  Just some.  I do still want you to think I'm at least somewhat of a decent cook!  So I'll share some every now and then, like these Funfetti Cake Balls that started out as a botched up batch of cupcakes, or these Peeps Brownies that just made me think of some horror movie where Easter Peeps were maliciously buried alive, or my oh-so-over-crispy-and-black Sweet Potato Chips.

And then there's this cheesecake.  My poor little Honey Cheesecake that I've been working on developing the recipe for.  As you can see, I'm not at the point of success yet.  Look at those disappointing cracks (they were DEEP!), and how over-browned the sides are! 


Mark and I were going to dinner at my parents' house one night, and I was supposed to bring this cheesecake for dessert.  What to do, what to do??  Well, the first thing I did was cover the cheesecake with chocolate ganache.  When in doubt, cover it!  Frosting, ganache, sprinkles ... they are our friends.

In this case, even ganache couldn't come to the rescue.  The cheesecake cracks were so deep, the ganache just 'fell' in.

Onto another plan.  I looked through my pantry to see what options I had.  It seemed I was lacking one or two ingredients for just about everything that came to mind!  Don't you hate it when that happens??  So I went to the good ol' classic No Bake Cookies.  I quickly whipped them up on the stovetop ...


... dropped them by spoonfuls onto waxed paper ...

... and let them set up.

Then off to my parents we went with No Bakes in tow.  The funny thing is, my Dad was super excited about the cookies!  I guess we just can't resist the simple classics ... after all, they did became classics for a reason.

Perfect with a big glass of milk!

No Bake Chocolate & Peanut Butter Cookies
Source:  My Mom

Ingredients
2 c. sugar
5 T. unsweetened cocoa powder
8 T. (1 stick) butter
1/2 c. milk
1/2 c. peanut butter
2 tsp. vanilla
2 1/2 c. old-fashioned oats


Directions
1.  In a saucepan, mix together the sugar, cocoa powder, butter, and milk.  Bring to a boil and boil for 1 1/2 minutes.

2.  Remove pan from the heat and add the peanut butter, vanilla, and oatmeal.  Stir until well combined.

3.  Drop the oat mixture by spoonfuls onto wax paper and let cool.

Enjoy!

This post is linked with  It's a Keeper Thursday hosted by It's a Keeper, Friday Favorites hosted by Simply Sweet Home, Foodie Friday hosted by Designs by Gollum, Sweets for a Saturday hosted by Sweet as Sugar Cookies, Sweet Indulgences Sunday hosted by A Well-Seasoned Life, and Savory Sunday hosted by The Sweet Details, This Week's Cravings hosted by Mom's Crazy Cooking.
reade more... Résuméabuiyad

Black Bean Soup


This bean, vegetable, and rice soup is so hearty and delicious, you won't even miss the meat.  
We didn't, although it is remarkably similar to our Turkey and Black Bean Soup, which we also love. 
It's nice to know we can have a meatless version that is equally satisfying and delicious.  

I started out with dry beans, soaked overnight, because it's more economical and less sodium - but I'm sure canned beans would work just fine.  The recipe didn't call for rice, but I thought it would be a nice addition.  Turned out well, but I did end up with less liquid than I planned at the end and the "soup" turned into more of a casserole consistency.  We still ate it in a bowl and it was still great, but I think next time I'll add a little more liquid (broth or water) if I add rice.  
You could easily make the soup without rice and serve it on top of cooked rice if you want, we might try that too.  

Recipe:  (modified from Allrecipes)

1 lb. dry black beans (soaked overnight, drained, and rinsed) - can substitute 4 (15 oz) cans black beans
1 quart vegetable broth (or chicken or beef if you prefer)
1-1/2 T. chili powder
1 T. cumin
1-1/2 t. salt
1 t. pepper
1 (14.5 oz) can chili-ready tomatoes (or diced tomatoes)
3-4 large carrots, chopped
2 stalks celery, chopped
1 large onion, chopped
4 cloves garlic, chopped
1/2 c. brown rice (uncooked, optional)
Additional broth or water, if using rice

Combine all ingredients except the rice in a large slow-cooker.  Cook on low heat for 8-10 hours, depending on how hot your slow-cooker gets.  Add uncooked rice and a little additional liquid for the last two hours if desired.  

Serve with shredded cheese, corn chips, corn bread, or on top of hot cooked rice if desired.  
reade more... Résuméabuiyad

Old Fashioned Cornbread - Seriously Good Stuff


This is definitely the best cornbread I've ever made, hands down.  I love the texture, the flavor, everything about it.  It's delicious as leftovers, it doesn't dry out and get super crumbly like most cornbreads I've made.  It was wonderful served with bean soup, a perfect accompaniment to brown beans, and just amazing on its own, either with a little butter or with some honey or molasses drizzled on top for a sweet ending to our dinner.

I had honestly never known that you could grind up popcorn to make corn bread - did you know that?
I also never knew or considered how important it is to have organic popcorn.  Apparently popcorn is one of the most heavily sprayed-with-pesticides crops there is,  and obviously we don't wash it before we pop it.  Not to mention that regular popcorn is a GMO (genetically modified organism), which carries its own set of risks.
You can probably find organic popcorn at health food stores, or order from Amazon.  I got the 5 lb bag of Great Northern Organic Yellow Gourmet Popcorn for less than $8, which I thought was a pretty good deal.

Recipe: (adapted from the Nutrimill owner's manual)

2 cups cornmeal (I grind mine from organic popcorn)
2 cups white whole wheat flour (or all purpose)
1/2 cup sugar
1/2 cup coconut oil, melted (or canola oil)
1 tsp. salt
2 Tbsp. baking powder
1-1/2 cups water
1/2 cup milk
2 eggs
2 Tbsp. coconut oil or bacon grease (butter can be used)

Preheat oven to 400°.  While oven is preheating, put a large (12") cast iron skillet in the oven with the 2 T. oil or bacon grease.
Mix all remaining ingredients in a mixing bowl for two minutes.
Remove the very hot skillet from the oven and pour in batter.  Place back in oven and bake for 15-20 minutes, or until a toothpick inserted in the middle comes out clean.
reade more... Résuméabuiyad

Coconut Flour Pancakes


These are some of the best gluten free pancakes I've ever tried. I discovered this recipe simply because I had a container of coconut flour I had used to make a gluten free cake. Needing to use the rest of it, I've been experimenting with other recipes.

The ratios look off, but this recipe is great for 2 people for breakfast. Coconut flour is a very thirsty flour, so it does need that high a ratio of eggs and milk. They are still light and fluffy, but a little grittier than normal pancakes.

Coconut Flour Pancakes
Ingredients
  • 2 eggs
  • 2 tbsp coconut flour
  • 1 tbsp milk
  • ⅛ tsp baking soda
  • ⅛ tsp cinnamon
  • ⅛ tsp nutmeg
  • 2 tbsp dried coconut
  • 1 tsp honey
Directions
  1. Mix together eggs, milk, baking soda, cinnamon, nutmeg and honey
  2. Add coconut flour and dried coconut, mixing thoroughly until fully combined
  3. Heat skillet with butter. Cook pancakes, flipping once when they begin to bubble.
reade more... Résuméabuiyad

Tarragon Chicken Salad


It's back-to-school time!  The end of this week, I'll be getting to know my 20 new little first grade chicklets!  Of course, that also means I'll be setting my alarm for 5:00 a.m., actually getting up to that alarm, and packing my lunch.  In honor of back-to-school, I decided to share with you one of my favorite pack-your-lunch items ... my Mom's Tarragon Chicken Salad.  I eat this a lot.  I mean really a lot.  At school I don't eat my lunch from a china plate, with a real fork, and a flower dressing up my place setting as you see in this post's photo.  No.  No, at school I eat my chicken salad out of a tupperware container with a plastic fork, half standing and half sitting, with between-bite openings of ketchup packets and milks for my little chicklets.  But I wouldn't  have it any other way!  I love my job.

Happy back-to-school, everyone!


Tarragon Chicken Salad
Source:  My Mom

Ingredients
4 chicken breasts, or a small whole chicken
2 stalks celery, chopped
Dried cranberries or halved grapes, to taste
Chopped pecans, to taste
1 T. dried tarragon
Salt & pepper, to taste
Mayonnaise

Directions
1.  Cook chicken and remove meat from the bone (if necessary); chop into small pieces.  

2.  Combine chicken with remaining ingredients, adding mayonnaise to desired consistency.  

3.  Chill.  Serve with greens or in a sandwich.

Enjoy!


This post is linked with Savory Sunday hosted by The Sweet Details, Recipe Sharing Monday hosted by Jam Hands, These Chicks Cooked hosted by This Chick Cooks, Cast Party Wednesday hosted by Lady Behind the Curtain, It's a Keeper Thursday hosted by It's a Keeper, Friday Favorites hosted by Simply Sweet Home, Friday Potluck hosted by EKat's Kitchen, and Foodie Friday hosted by Designs by Gollum.
reade more... Résuméabuiyad

Sourdough Pizza Crust


Before I begin, let me apologize for the picture. I took beautiful pictures of pizza only to realize after dinner that I had not put my memory card in the camera. I could only take photos of the leftovers, but as you can see, dinner was very popular. I made a zucchini mushroom feta pizza, a tomato basil pizza and an asparagus pancetta.


I also do not believe in tomato sauce on pizzas I make myself, so these are herbed olive oil only.


I got the recipe for this from the Cheeseboard Recipe Book. I lived a 10 minute walk away from the Cheese Board when I was in college. Their pizzas were so delicious. I can do all my own toppings, but their crust is pretty damn good. But nothing I've created is nearly as delicious as their arugula, corn, feta, pine nut and key lime pizza. Mmmmm so damn good. It won't have those great giant blisters like napolitano style pizzas, but it does have a crisp yet chewy California style crust. That in itself is pretty good.


This post has been submitted to Yeastspotting


Sourdough Pizza Dough


Ingredients

  • 16 oz bread flour
  • 1 ½ cups cool water
  • 1 ½ tsp kosher salt
  • 4 oz sourdough starter at 100% hydration
Directions


  • Mix together flour and water. Let rest for 10 minutes
  • Add salt and starter. Mix and knead for 15 minutes or until dough is springy and passes the windowpane test.
  • Place dough in oiled bowl and let proof for 6-8 hours until doubled in size. If resting overnight in refrigerator, let dough come up to temperature for 2 hours before proceeding with recipe
  • Divide dough into 3 pieces and shape into loose rounds. Let rest 20 minutes
  • Stretch dough into 10 inch circles. Preheat oven to 450 degrees.
  • Bake pizza on the bottom rack on a baking sheet for 6 minutes. Move to top rack of the oven and bake 10 more minutes
  • Slide pizza out of pan and finish on the bottom oven rack for 4 minutes.
reade more... Résuméabuiyad

Baked Pasta with Chicken Sausage


Pasta dishes are usually a popular item around our house, not to mention great for pot-lucks or for taking to friends in need.  This one is a really delicious variation that we all very much enjoyed and I'm looking forward to having again.  The flavor of the chicken sausage goes great with the spinach (which is one of those veggies I don't even try to get into my kids apart from a casserole, where they don't even notice it!) and adding a little cream to the tomato sauce takes it to a whole new level of yumminess.  Plus having two kinds of cheeses doesn't hurt anything.  Does it ever?  

It makes a lot, a very full 13x9" pan.  Freezing part is definitely an option, instructions are included at the end.

Note: The original recipe called for using a pound of pasta, which I did, but I felt like the dish would have been slightly better (more saucy, less dry) with a little less pasta, so next time I'll use a 13.25 oz box of whole wheat pasta.  

Recipe (adapted from Mel's Kitchen Cafe)

1 T. olive oil
1 medium red onion, chopped
4 cloves garlic, minced
1 (28 oz) can crushed tomatoes
1/2 t. dried oregano
1/2 t. dried basil (or 1 T. fresh basil, chopped)
1/2 c. heavy cream
1 (13.25 oz) box whole wheat pasta (rigatoni or rotini)
10 oz. frozen spinach, thawed and drained well (can substitute 1 9-oz bag fresh spinach)
12-16 oz. precooked smoked chicken or turkey sausage, halved lengthwise and sliced 1/4"  thick (you'll find this in the same section as the hot dogs, next to precooked kielbasa
8 oz. mozzarella cheese, 4 oz. cut into small cubes and 4 oz. shredded
1/4 c. grated Parmesan cheese (fresh or from a can)

Preheat oven to 400°.
Cook pasta in salted water as directed on box. (If using fresh spinach, add it to the pot of boiling pasta right at the end and cook until wilted.) Drain and return contents to pot. 
Meanwhile, heat oil in a large skillet over medium heat.  Add onion; cook until translucent, about 3 minutes. Stir in garlic.  Cook for another minute.
Stir in tomatoes, oregano, and basil; simmer for 8-10 minutes.  Add cream; cook until warmed through, about  2-3 minutes.  Season sauce with salt and pepper to taste.
Add tomato sauce, sausage, spinach, and cubed mozzarella to the pasta in the pot; toss to coat.  Season with salt and pepper.  Scoop pasta into a lightly greased 13x9" pan (or divide evenly between two 8x8"pans).
Top with grated mozzarella and Parmesan.  Bake until browned and edges are crisp, 20-25 minutes.

*Freezable Meal: Prepare recipe right up until the baking step and then cover with a double layer of aluminum foil. Freeze. Thaw in the refrigerator for 1 to 2 days. To bake, increase baking time to 1 to 1 1/4 hours. If baking from frozen, bake covered for 1 hour and 15 minutes, uncover and bake 30 minutes longer.


reade more... Résuméabuiyad

Funfetti Cake Balls - recovery of an 'oops!'


I have a question.  What do you do when you commit to making a dessert for a friend for her family's beach trip, decide to test out a new vanilla cupcake recipe, bake the cupcakes, and they're absolutely terrible???  I mean horrible.  Dry.  Not a lot of flavor.  A huge 'oops.'  And ... you don't have a lot of time to come up with something else?

Well, one option is to crumble up all the cupcakes, stir in a bunch of vanilla buttercream and a whole lot of rainbow sprinkles, and make funfetti cake balls.  And that's how these funfetti cake balls were born!
Fortunately, I had some yellow candy melts in the pantry leftover from a previous cake pop adventure.  And I always have an assortment of sprinkles on hand ... you just never know when you're going to need them, right?  So I went to work turning the disappointingly failed cupcakes into fun and pretty little cake bites.


Not too bad a recovery of a huge 'oops,' right?!?  Hope they go over well with my friend's family!

I invite you to follow The Kitchen is My Playground with Pinterest, Facebook, Google Friend Connect, Linky Followers, bloglovin', or Feedburner. Buttons are in the right sidebar. I'd love to have you back soon!


Funfetti Cake Balls
Source: Concept & process adapted from Bakerella
Note:  This is just a 'general' method, not really a recipe ... as I was wingin' it the whole way!!
Click here to view a detailed post about making cake pops and cake balls.

Ingredients
1 baked 9x13" cake (or, in my case, a botched up batch of cupcakes!)
1 to 1 1/2 c. vanilla frosting, canned or make your own
1 (1 lb.) package vanilla candy melts, any color
About 2 T. shortening
Rainbow sprinkles
Larger confetti/disc sprinkles for decorating


Directions
1.  Crumble cake (or cupcakes) into a large bowl, working it into small crumbs. Add frosting and mix until well combined. Mix in rainbow sprinkles - I'm not sure how much I used; I just kept pouring them in and stirring until the mixture looked "confetti'ish."

2.  Shape into approximately 1" balls, using about 1 T. of the cake mixture per ball; set aside on wax paper. Cover with plastic wrap and refrigerate for about 1 hour, or place in freezer for about 15 minutes.

3.  In a small deep bowl, melt candy melts and shortening together in the microwave per candy melt package directions (typically in 30 second intervals, stirring in between).

4.  Use a fork to dip each cake ball in the candy coating, letting excess coating drip off back into the bowl. Place on wax paper. Immediately sprinkle with a few large disc/confetti sprinkles (or additional rainbow sprinkles).

5.  Let stand for coating to set up.


This post is linked with Cast Party Wednesday hosted by Lady Behind the Curtain, Extreme Personal Measures, These Chicks Cooked hosted by This Chick Cooks, It's a Keeper Thursday hosted by It's a Keeper, Creative Juice hosted by Momnivore's Dilemma, Foodie Friday hosted by Designs by Gollum, Friday Favorites hosted by Simply Sweet Home, Sweets for a Saturday hosted by Sweet as Sugar Cookies, Sweet Indulgences Sunday hosted by A Well-Seasoned Life, Recipe Sharing Monday hosted by Jam Hands, Savvy Homemade Monday hosted by Home Savvy A to Z, Tasty Tuesday hosted by For the Love of Blogs, Crazy Sweet Tuesdays hosted by Crazy for Crust, Tea Party Tuesday hosted by Sweetology, Sundae Scoop hosted by I {heart} Naptime, This Week's Cravings hosted by Mom's Crazy Cooking, Delicious Dishes hosted by It's a Blog Party!, Wow Me Wednesday hosted by Polka Dots on Parade, and Sharing Sunday hosted by Everyday Sisters.
reade more... Résuméabuiyad

Cheeseboard Bakery Sourdough - Suburban Bread


Despite the amount of bread I bake, I same still relatively new to bread. Artisan bread specifically is a different, difficult beast. The shaping requires talent, as does the slashing and proper baking. You need to know your oven and you have to feel comfortable with your flours and your kneading times. Most of all, you need to be comfortable with your starter, which I'm still figuring out.

I started baking with this bread recipe from the Cheeseboard Recipe Book. It's more complex than a standard white sourdough with a great flavor. Yet it's more simple than recipes from Tartine or a lot of other books. I'm growing out of this recipe, but I figure it's a good place to start when still learning simple sourdough bread baking.

Sourdough - Suburban Bread
Ingredients
  • 22 oz bread flour
  • 3.75 oz whole wheat flour
  • 3 Tbsp wheat bran
  • 2 cups cool water
  • 1 Tbsp and ½ tsp salt
  • 1 cup (5 oz) sourdough starter

Directions
  1. Sift together flours and bran. Add water and stir until moistened and combined.
  2. Let dough rest 10 minutes. Add salt and sourdough starter
  3. Knead for 15 minutes by hand or in stand mixer until bread pulls aways from the sides and is tacky but still springy and passes the window pain test. Do not over knead.
  4. Place in oiled bowl and let rise in warm place for 5 hours or until doubled in size.
  5. Divide dough into two loaves and shape into lose rounds. Let rest 10 minutes.
  6. Shape bread into desired batards or boules and let rest another 4 hours or until increased in size by 1.5
  7. 45 minutes before baking, preheat oven with cast iron skillet in the bottom to 450 degrees.
  8. Just before baking bread slash tops and mist the loaves with water. Pour 1 cup cold water in pan and quickly up bread in oven. Bake for 5 minutes and add another cup of water to pan
  9. Bake 15 more minutes and rotate pan
  10. Bake another 25 minutes for a total baking time of 45 minutes. Let cool before serving.
This post has been submitted to Yeastspotting
reade more... Résuméabuiyad

I'm One of 'The Sweetest' Volunteers


... and that title has nothing to do with my personality!  I've never claimed to be sweet.  I'm kind, caring, somewhat funny, a tiny bit creative ... but I don't know about sweet!

But today I did start something 'Sweet' that I'm really excited about.  I started donating my baked goods to our local Hospice through their 'The Sweetest Volunteers' program.  'The Sweetest Volunteers' bake homemade goodies for Hospice patients and their families, and Hospice nurses then deliver the goodie packages when they make their home visits.  These packages, hopefully, bring at least a tiny bit of comfort to the patients and families during a difficult time.

When I started this blog, I had the goal for it to be about more than cooking, baking, and writing posts about it. I also wanted to turn it into an opportunity for me to give back to the community.  I've spent a few months figuring out the best ways to do that ...

Donating to Hospice is the first way ... inspired by the wonderful Frosting for the Cause project ... and I'm so pleased to have made my first donation today.  I plan to continue giving on a monthly basis (or more) going forward.


Packaging up ...

As this was my first time going through the packaging and donation process, I experimented with a few different types of packages.  Let me tell ya, I sure learned something about myself today -- I am box challenged!  Baking, frosting, and decorating six dozen cupcakes? - no problem!  Folding and assembling cake boxes? - huge problem!!  See that one little plastic clamshell-style 1/2-dozen box in the middle of the picture above?  The one like you get when you buy cupcakes at the grocery store?  I think I'll be going with that type from now on!  Sooooooo much easier.

After packaging, I put little labels on the boxes so goodie recipients would know what they were getting.


Labels

Check out my Giving Back page to learn more about Gaston Hospice and to see other ways I'm giving back to the community.  I'm looking forward to my adventures as one of 'The Sweetest Volunteers!'


Ready for delivery!

reade more... Résuméabuiyad

Taco Salad Dippers


I love meals that combine healthy, frugal, crowd-pleasing, filling, and easy into one pan.  That's exactly what this meal does.  You have meat, rice, and beans all simmering together in a tomato sauce with spices until it comes together into a lovely thick (although not extremely visually appealing, I have to admit) mixture that is delicious served over tortilla chips with cheese, lettuce, tomatoes, and salsa on top - or equally tasty spread over a tortilla and made into a quesadilla.  

This is a recipe that will find it's way into our meal rotation regularly for sure.  

Recipe: (from Mel's Kitchen Cafe)

2 lbs. ground turkey or beef
1 medium onion, chopped
2 cloves garlic, minced
6 cups water
1 cup rice (white or brown)
1 t. oregano
1 T. sugar
2 t. chili powder
2 t. salt
2 t. cumin
2 (8 oz) cans tomato sauce
2 (6 oz) cans tomato paste
1 (15 oz) can pinto or black beans, rinsed and drained

In a large pot, brown the ground turkey or beef with the onion and garlic and cook until the meat is no longer pink.  Drain any grease.  Add the water, rice, seasonings, tomato sauce, tomato paste, and beans.  Bring the mixture to a boil and then reduce the heat and simmer uncovered for 40 minutes, stirring occasionally, watching to make sure it doesn't stick to the bottom of the pot. (If you're using brown rice, it may need to simmer up to 60-70 minutes).
The mixture will seem watery at first, but it will thicken to perfection as the rice absorbs water and all the ingredients meld together.


reade more... Résuméabuiyad

Ethiopian Red Lentils


For a side dish to the Sik Sik Wat in the last post, I made these Ethiopian spiced red lentils. Red lentils are not as good for you as green lentils, being only 11% fiber as opposed to 31%, but they still have plenty of protein and are one of the healthiest foods.


These lentils are spicy and can act as a main dish as opposed to a side dish like I used them. If you prefer a thinner lentil stew, leave the water at 4 cups, but if you prefer a thicker paste, reduce the water to 3 1/2 cups. Either way, this dish is healthy and has great flavors of chili, onion, turmeric and cloves.


Note: you can find recipes for both the niter kibbeh and berbere spice in this post


Ethiopian Red Lentil Stew


Ingredients

  • 1 cup red lentils
  • 4 Tbsp niter kibbeh or clarified butter
  • 1 small onion, finely chopped
  • 4 cloves garlic, minced
  • 2 Tbsp berber seasoning
  • 4 cups water
  • salt to taste
Directions

  1. Melt clarified butter in a large pot. Wash lentils
  2. Add onion and garlic to butter, sautee until soft
  3. Add 1 tbsp of berber seasoning, lentils and water. Simmer for 45 minutes or until walter is almost all evaporated and lentils are soft
  4. Add remaining berber seasoning and salt to taste. Serve immediately.
reade more... Résuméabuiyad

Pea Salad - I didn't think I'd like it either!

I remember well when my Mom told me about this recipe.  We were on the phone discussing recipes for the family cookbook I was pulling together as a gift for our family members.  My immediate thoughts: 

"That.  Sounds. Disgusting.  Peas, hard-boiled egg, pimento, cheddar cheese, and a mayo-based dressing?  All together??  Who thinks of this stuff?  I mean, seriously, were they cleaning out the refrigerator or something???  And she wants to include this recipe in the family cookbook?  I don't even like peas!"

But, it's one of my Dad's favorites.  So (reluctantly on my part), into the family cookbook it went.  That didn't mean I had to try it, though!  Well, not until I set the personal goal of (eventually!) cooking every recipe in our family cookbook ... ya know, kind of like Julie cooks through every recipe in Julia Child's cookbook in the movie Julie and Julia.  Here's our family cookbook ... I'm slowly-but-surely cooking my way through it:


(Sidenote:  I worked with The Great Family Cookbook Project to publish it.  If you're ever considering creating a family cookbook of your own, I highly recommend them... they were wonderful to work with.)

To make sure I actually tried the pea salad, or to at least give it a good shot at being tried, I put it on my "50 Recipes for 2011" Project list.  Then, alas, the day came when I decided to make it.  Having faith in my Mom's culinary taste, I took the plunge when I was having some friends over. 

Generally, my friends know that when they come to my house, they're going to get some truly-Tracey-tried-and-true food ... along with an experiment!  I never fill a guest menu with experimental dishes, but I pretty much always take the opportunity of having the opinions of my friends handy to try out at least one new-to-me dish.  And I typically make the experimental dish be a side, or a dessert when I'm offering a selection of desserts.  Worst case - when I give it a taste test, I can just choose not to serve the dish if it disappoints!

Well, guess what.  I loved the pea salad.  I know, I know ... I should have never doubted my Mother.  At 40'ish years old, you'd think I would have learned that by now.


Pea Salad
Source:  My Mom
Ingredients
1 (20 oz.) package frozen peas (I used a 24 oz. package ~ I couldn't find a 20 oz.)
1 c. chopped celery
1/4 c. chopped green onions (I just put in the whole bunch of green onions, chopped)
2 hard-cooked eggs, chopped
1 c. shredded cheddar cheese
1 (2 oz.) jar pimentos, drained
1/2 c. mayonnaise
3 T. sweet pickle relish
1 tsp. sugar
1 tsp. ground mustard
1 tsp. seasoned salt (I used regular salt)


Directions
1.  Thaw peas by running them under cool water. 

2.  Combine peas, celery, eggs, green onions, cheddar, and pimientos in a large bowl.  In a small bowl, combine mayonnaise, relish, and seasonings; stir into pea mixture. 

3.  Cover and refrigerate until serving.


This post is linked with Savory Sunday hosted by The Sweet Details, Recipe Sharing Monday hosted by Jam Hands, Tasty Tuesday hosted by For the Love of Blogs, Extreme Personal Measures, These Chicks Cooked hosted by This Chick Cooks, It's a Keeper Thursday hosted by It's a Keeper, Cast Party Wednesday hosted by Lady Behind the Curtain, and Potluck Friday hosted by EKat's Kitchen.
reade more... Résuméabuiyad

Sik Sik Wat (Ethiopian stewed beef)


I've always loved Ethiopian food. It's such a fun food to eat with your hands, share with friends, and explore a new culture of spices that are familiar to me, but that I have never used in this way before. In my exploration into Ethiopian food, I discovered a few key components of Ethiopian cuisine that are indispensable. They really are what create the flavors.


1. Teff: a grass native to northeast africa. Until making dinner, I had never heard of teff before. It can be ground into flour and is completely gluten free so it can be used by those with celiacs disease. It has a nutty, earthy flavor and is used to make injera. My injera came out horribly, so the recipe will not be posted. here, but it is an essential ingredient.


2. Berbere: a spice mixture usually containing chili, garlic, ginger, tumeric, fenugreek, allspice and cardamom (among other things). It's the spice powder that's usually added to... everything.


3. Niter Kibbeh: a spiced version of clarified butter, make by infusing the oil with cinnamon, ginger, onion tumeric, fenugreek, etc. Also used in practically everything.


Because of that, this is going to be a really really long post as this will have 3 recipes. You'll get a recipe for the spice, the butter and the main dish (of course, you can use normal clarified butter if you want, and you can use a packaged berbere spice, but what's the fun in that?) You really need these flavors and you can always adjust up the heat. And for a more traditional doro wat, just sub chicken for the beef.


Berbere (Ethiopian Spice)


Ingredients

  • 2 tsp whole cumin
  • 2 tsp red pepper flakes
  • 1 ½ tsp cardamom pods
  • 1 ½ tsp fenugreek
  • 10 whole peppercorns
  • 9 whole allspice berries
  • 6 whole cloves
  • 1 Tbsp salt
  • 1 ½ Tbsp paprika
  • 1 tsp ginger
  • 1 tsp turmeric
  • 1 tsp cayenne pepper
  • ½ tsp nutmeg
  • 1 tsp cinnamon
Directions

  1. Mix together all ground ingredients in a jar
  2. Toast whole spices in pan until they release their aromas
  3. Grind whole spices in spice grinder and mix together
  4. If using in a recipe that calls for paste, add 1 tbsp of red wine and 1 Tbsp of oil for every 3 Tbsp powder.
Wasn't that easy? You can keep it around in a jar for all future uses with vegetables, lentils, and meat!


Niter Kibbeh (Ethiopian spiced butter)


Ingredients

  • 1 lb unsalted butter
  • ½ onion, chopped
  • 3 cloves crushed garlic
  • 2 1 inch pieces of ginger, sliced
  • 1 cinnamon stick
  • 4 cardamom pods
  • 1 tsp fenugreek
  • ½ tsp turmeric
Directions

  1. Simmer all ingredients in saucepan over low heat for 1 hour
  2. Strain out solids and pour off only the fat. Leave the solids
  3. Store in refrigerator.
That was easy too! Keep it in the refrigerator and use it for anything. Now onto the real recipe.


Sik Sik Wat (Ethiopian Stewed Beef)


Ingredients

  • 2 lbs stew beef
  • 1 lemon, juice
  • 2 tsp salt
  • 2 onions, minced
  • 3 cloves garlic, minced
  • 1 Tbsp fresh grated ginger root
  • ¼ cup niter kibbeh, oil or clarified butter
  • 2 Tbsp paprika
  • ¼ - ½ cup berbere paste
  • ¾ cup water or stock
  • ¼ cup red wine
  • 1 tsp + cayenne pepper, depending on taste
  • salt and pepper to taste
  • 4-6 hard boiled eggs (optional)


Directions

  1. Rub stew beef with salt and lemon juice. Let sit for 30 minutes.
  2. Melt down butter in a large pan. Add paprika to color the oil
  3. Add berbere paste and cook for 3 minutes, making sure not to burn.
  4. Add onions, garlic and ginger, cooking for 10 minutes until soft and most moisture is evaporated
  5. Add beef, water, wine and cayenne pepper. Simmer for 45 minutes for until beef is tender and sauce has thickened. Add water as necessary to keep sauce a thick consistency. Season with salt and pepper to taste
  6. Hard boil eggs if using and peel them.
  7. Add eggs to the wat and simmer for 15 more minutes before serving.
reade more... Résuméabuiyad