Pages

Showing posts with label Little Bite Savories. Show all posts

Turkey & Apricot Sliders ~ keep enjoying that Thanksgiving turkey!

Chock full of chopped turkey, apricot preserves, Dijon mustard, and pecans, these baked Turkey and Apricot Sliders aren't your average turkey sandwiches!


Well, it's almost Thanksgiving! That's right, Thanksgiving is next week. Are you ready to gobble 'til you wobble? I know I sure am.

I've said it before, and I'll say it again ... the turkey itself is actually my least favorite part of the Thanksgiving meal. I'm much more interested in all the yummy sides. But come the day after Thanksgiving ... now that's a different story. Then ... then ... I'm all about the turkey leftovers. I like to make little bitty turkey sandwiches, all slathered up with mayo, on leftover rolls. It's my favorite kind of turkey sandwich!

Well, maybe until now ...

Continue Reading >>
Chock full of chopped turkey, apricot preserves, Dijon mustard, and pecans, these baked Turkey and Apricot Sliders aren't your average turkey sandwiches!


Well, it's almost Thanksgiving! That's right, Thanksgiving is next week. Are you ready to gobble 'til you wobble? I know I sure am.

I've said it before, and I'll say it again ... the turkey itself is actually my least favorite part of the Thanksgiving meal. I'm much more interested in all the yummy sides. But come the day after Thanksgiving ... now that's a different story. Then ... then ... I'm all about the turkey leftovers. I like to make little bitty turkey sandwiches, all slathered up with mayo, on leftover rolls. It's my favorite kind of turkey sandwich!

Well, maybe until now ...

Continue Reading >>
reade more... Résuméabuiyad

Turkey Crescent Bites {great for turkey leftovers}

Whip up a simple turkey filling baked between layers of crescent dough, and you've got super tasty Turkey Crescent Bites. It's a perfectly scrumptious way to enjoy those turkey leftovers.


It's almost 'Turkey Day!' And if I'm being 100% honest {which I am}, I have to admit that the actual turkey itself is my least favorite part of Thanksgiving dinner. I'm waaaaaaaaaayyy more interested in all the creamy sides, extra-delicious breads, and dessert sugar.

But give me that turkey leftover the next day, with some good ol' white bread in a sandwich, and I'm in turkey bliss. Now ... mix that leftover turkey with some other goodies, slap it between two layers of crescent roll dough, bake it up, and cut it into little bites? Oh, now I'm in turkey heaven.
Continue Reading >>
Whip up a simple turkey filling baked between layers of crescent dough, and you've got super tasty Turkey Crescent Bites. It's a perfectly scrumptious way to enjoy those turkey leftovers.


It's almost 'Turkey Day!' And if I'm being 100% honest {which I am}, I have to admit that the actual turkey itself is my least favorite part of Thanksgiving dinner. I'm waaaaaaaaaayyy more interested in all the creamy sides, extra-delicious breads, and dessert sugar.

But give me that turkey leftover the next day, with some good ol' white bread in a sandwich, and I'm in turkey bliss. Now ... mix that leftover turkey with some other goodies, slap it between two layers of crescent roll dough, bake it up, and cut it into little bites? Oh, now I'm in turkey heaven.
Continue Reading >>
reade more... Résuméabuiyad

Pork Tenderloin & Pimento Cheese Crostini Melts

Pork tenderloin and pimento cheese, broiled together and topped with crumbled bacon. These Pork Tenderloin and Pimento Cheese Crostini Melts are one very tasty way to enjoy pimento cheese.

Southerners loooooooove their pimento cheese! Even transplanted Southerners, like me. But I have to admit ... it is one of those things I had never even heard of until I moved South. When my brother's mother-in-law ... a true Southern lady ... asked me if I liked pimento cheese, I had no earthly idea what she was talking about. I'm super glad that I do now.

And at one of our {former} local restaurants, I discovered this incredibly delicious way to enjoy pimento cheese.
Continue Reading >>
Pork tenderloin and pimento cheese, broiled together and topped with crumbled bacon. These Pork Tenderloin and Pimento Cheese Crostini Melts are one very tasty way to enjoy pimento cheese.

Southerners loooooooove their pimento cheese! Even transplanted Southerners, like me. But I have to admit ... it is one of those things I had never even heard of until I moved South. When my brother's mother-in-law ... a true Southern lady ... asked me if I liked pimento cheese, I had no earthly idea what she was talking about. I'm super glad that I do now.

And at one of our {former} local restaurants, I discovered this incredibly delicious way to enjoy pimento cheese.
Continue Reading >>
reade more... Résuméabuiyad

Bite-Sized Pepperoni & Sausage Pizza Puffs


Want tasty little bite-sized pizzas to snack on? Well, then you've come to the right place. 'Cause these cute little Pepperoni & Sausage Pizza Puffs are just the perfect little pizza snack! Prepared in mini muffin tins, they're a two-bite bit of pizza snackin' fun.

And did I mention they're easy to make?

Continue Reading >>


Want tasty little bite-sized pizzas to snack on? Well, then you've come to the right place. 'Cause these cute little Pepperoni & Sausage Pizza Puffs are just the perfect little pizza snack! Prepared in mini muffin tins, they're a two-bite bit of pizza snackin' fun.

And did I mention they're easy to make?

Continue Reading >>
reade more... Résuméabuiyad

Barbecue Roasted Mixed Nuts {& the story of a photo shoot}


Okay, these Barbecue Roasted Mixed Nuts ROCK! I absolutely love barbecue potato chips. I mean, like could totally lick the inside of the chip bag kind of love ... but, I can't be left alone with a bag of chips. It's detrimental ... to both me and the chips. Well, I've discovered with these Barbecue Roasted Mixed Nuts, you can get that same great barbecue flavor without the potato chip guilt. Mmmmmmm ~ potato chips step aside ... I've got a new love.

Now, the photo shoot for these ROCKIN' barbecue nuts did NOT rock.

Continue Reading >>


Okay, these Barbecue Roasted Mixed Nuts ROCK! I absolutely love barbecue potato chips. I mean, like could totally lick the inside of the chip bag kind of love ... but, I can't be left alone with a bag of chips. It's detrimental ... to both me and the chips. Well, I've discovered with these Barbecue Roasted Mixed Nuts, you can get that same great barbecue flavor without the potato chip guilt. Mmmmmmm ~ potato chips step aside ... I've got a new love.

Now, the photo shoot for these ROCKIN' barbecue nuts did NOT rock.

Continue Reading >>
reade more... Résuméabuiyad

20 Party Food Favorites {Playground Round-Up}


It's Playground Round-Up time! ... where I highlight treats from the blog related to a particular theme or ingredient. So, what's this Round-Up's theme you ask? Party foods!

'Cause isn't there a big football game coming up or something? Yeh. I think maybe there is.

And we all know we love to enjoy our party foods with our football.

So here are 19 party favorites from the Kitchen is My Playground archives and ...

Continue Reading >>

It's Playground Round-Up time! ... where I highlight treats from the blog related to a particular theme or ingredient. So, what's this Round-Up's theme you ask? Party foods!

'Cause isn't there a big football game coming up or something? Yeh. I think maybe there is.

And we all know we love to enjoy our party foods with our football.

So here are 19 party favorites from the Kitchen is My Playground archives and ...

Continue Reading >>
reade more... Résuméabuiyad

3-Ingredient Crescent Sausage Bites


Shoooooo! Cold weather has finally hit down here in the South. And I. Don't. Like it.

Okay, now I know I really don't have anything even remotely close to being okay to complain about. 'Cause, truly, temperatures in the 20s and 30s are not actually cold. I grew up in Vermont. I do understand what true cold is.

But now ...

Continue Reading >>

Shoooooo! Cold weather has finally hit down here in the South. And I. Don't. Like it.

Okay, now I know I really don't have anything even remotely close to being okay to complain about. 'Cause, truly, temperatures in the 20s and 30s are not actually cold. I grew up in Vermont. I do understand what true cold is.

But now ...

Continue Reading >>
reade more... Résuméabuiyad

Honey Chicken Nuggets {Crazy Cooking Challenge}


It's Crazy Cooking Challenge time!  This month's challenge was FRIED CHICKEN.  To be honest, this month's challenge truly was a challenge for me ... 'cause I'm not a fry-er.  Nope.  I prefer to bake my chicken, and leave my frying to KFC!

But the point of The Challenge is to step outside our comfort zone and try new things, right?  So, a-steppin' I went.

I gave several fried chicken nugget recipes a try, and fell in love with these  Honey Chicken Nuggets from Yummy Inspirations.  Of course, being a beekeeper, I was instantly intrigued that the nuggets were marinated in honey.  I'm always on the lookout for new recipes using honey.

And the honey in these chicken nuggets far exceeded my expectations!  First, it made the chicken so super tender.  Usually I use the ol' southern trick of marinating my chicken in buttermilk, which makes it wonderfully moist and tender.  Well, I now know that honey does the same thing!  And second, the honey gives a delicious sweetness to the flavor of the nuggets.  Mmm, mmmm, good.  I didn't expect the honey flavor to come through so much in the finished nuggets.

I actually liked the nuggets best dipping sauce-less.  But you can also serve 'em up with a quick-and-easy honey mustard dipping sauce on the side.  All I do for my honey mustard is mix together a little spicy brown mustard and pure honey, using a little more honey than mustard.  It's so good!  And so easy.

So, if you're looking for a really tender and wonderfully flavorful chicken nugget, give these little 'honeys' a try!  (I know, I know ... bad pun ... I just couldn't help myself.)


I invite you to follow The Kitchen is My Playground with Pinterest, Facebook, Google Friend Connect, Linky Followers, bloglovin', or Feedburner. Buttons are in the right sidebar. I'd love to have you back soon!


Pan-Fried Honey Chicken Nuggets
Source:  Adapted from Yummy Inspirations
Ingredients
1/2 lb. boneless, skinless chicken breast
2 T. honey
1 egg, beaten
1/2 c. all-purpose flour
1/2 c. panko bread crumbs
Pinch of salt
Oil for frying

Directions
Marinate the chicken:
1.  Cut the chicken into 'nugget-sized' pieces.  

2.  Place chicken pieces in a shallow bowl drizzle with honey; stir to coat.  Place chicken in the refrigerator to marinate in the honey for at least one hour.

Prepare the breading process:
3.  Place beaten egg in a bowl.  Combine flour, panko, and salt in a pie plate or ziptop baggie (I like the baggie method, but either way works just fine!).

Bread the chicken:
4.  Remove a piece chicken from the honey marinade and dip it in the egg.
If using a pie plate for your flour mixture - Roll the egg-dipped chicken nugget in the flour mixture, coating completely; set aside.  Repeat with remaining chicken pieces.

If using the ziptop baggie method - Drop the egg-dipped chicken nugget into the baggie.  Repeat with remaining chicken pieces.  Once all chicken pieces are in the baggie, seal the baggie.  Gently shake the baggie, ensuring that all chicken pieces get completely coated.

Fry the chicken:
5.  Heat a little oil in a large frying pan over medium-high heat.  When oil is hot, place the nuggets in the pan and cook until golden on both side and cooked through, approximately 3 to 4 minutes per side.

Enjoy!


This post is linked with Sundae Scoop, Think Pink Sunday, Scrumptious Sunday, Nifty Thrifty Sunday, On the Menu Monday, Sunday Showcase, Mangia Mondays, Tasty Tuesday, Trick or Treat Tuesday, Totally Tasty Tuesdays, Tuesday Talent Show, Cast Party Wednesday, Whatcha Whipped Up, What I Whipped Up Wednesday, Pin It Thursday, It's a Keeper Thursday, Share Your Creations, Full Plate Thursday, Foodie Friday, Inspiration Friday, Weekend Potluck, Foodie Friday with Diane Balch, Weekend Wrap Up Party, Strut Your Stuff SaturdayGooseberry Patch Recipe Round-Up.
Photobucket

Enjoy visiting the other Crazy Cooking Challenge participants through the linky party below.  Mmmmmm ... Looks like there are some fabulous fried chicken choices!

It's Crazy Cooking Challenge time!  This month's challenge was FRIED CHICKEN.  To be honest, this month's challenge truly was a challenge for me ... 'cause I'm not a fry-er.  Nope.  I prefer to bake my chicken, and leave my frying to KFC!

But the point of The Challenge is to step outside our comfort zone and try new things, right?  So, a-steppin' I went.

I gave several fried chicken nugget recipes a try, and fell in love with these  Honey Chicken Nuggets from Yummy Inspirations.  Of course, being a beekeeper, I was instantly intrigued that the nuggets were marinated in honey.  I'm always on the lookout for new recipes using honey.

And the honey in these chicken nuggets far exceeded my expectations!  First, it made the chicken so super tender.  Usually I use the ol' southern trick of marinating my chicken in buttermilk, which makes it wonderfully moist and tender.  Well, I now know that honey does the same thing!  And second, the honey gives a delicious sweetness to the flavor of the nuggets.  Mmm, mmmm, good.  I didn't expect the honey flavor to come through so much in the finished nuggets.

I actually liked the nuggets best dipping sauce-less.  But you can also serve 'em up with a quick-and-easy honey mustard dipping sauce on the side.  All I do for my honey mustard is mix together a little spicy brown mustard and pure honey, using a little more honey than mustard.  It's so good!  And so easy.

So, if you're looking for a really tender and wonderfully flavorful chicken nugget, give these little 'honeys' a try!  (I know, I know ... bad pun ... I just couldn't help myself.)


I invite you to follow The Kitchen is My Playground with Pinterest, Facebook, Google Friend Connect, Linky Followers, bloglovin', or Feedburner. Buttons are in the right sidebar. I'd love to have you back soon!


Pan-Fried Honey Chicken Nuggets
Source:  Adapted from Yummy Inspirations
Ingredients
1/2 lb. boneless, skinless chicken breast
2 T. honey
1 egg, beaten
1/2 c. all-purpose flour
1/2 c. panko bread crumbs
Pinch of salt
Oil for frying

Directions
Marinate the chicken:
1.  Cut the chicken into 'nugget-sized' pieces.  

2.  Place chicken pieces in a shallow bowl drizzle with honey; stir to coat.  Place chicken in the refrigerator to marinate in the honey for at least one hour.

Prepare the breading process:
3.  Place beaten egg in a bowl.  Combine flour, panko, and salt in a pie plate or ziptop baggie (I like the baggie method, but either way works just fine!).

Bread the chicken:
4.  Remove a piece chicken from the honey marinade and dip it in the egg.
If using a pie plate for your flour mixture - Roll the egg-dipped chicken nugget in the flour mixture, coating completely; set aside.  Repeat with remaining chicken pieces.

If using the ziptop baggie method - Drop the egg-dipped chicken nugget into the baggie.  Repeat with remaining chicken pieces.  Once all chicken pieces are in the baggie, seal the baggie.  Gently shake the baggie, ensuring that all chicken pieces get completely coated.

Fry the chicken:
5.  Heat a little oil in a large frying pan over medium-high heat.  When oil is hot, place the nuggets in the pan and cook until golden on both side and cooked through, approximately 3 to 4 minutes per side.

Enjoy!


This post is linked with Sundae Scoop, Think Pink Sunday, Scrumptious Sunday, Nifty Thrifty Sunday, On the Menu Monday, Sunday Showcase, Mangia Mondays, Tasty Tuesday, Trick or Treat Tuesday, Totally Tasty Tuesdays, Tuesday Talent Show, Cast Party Wednesday, Whatcha Whipped Up, What I Whipped Up Wednesday, Pin It Thursday, It's a Keeper Thursday, Share Your Creations, Full Plate Thursday, Foodie Friday, Inspiration Friday, Weekend Potluck, Foodie Friday with Diane Balch, Weekend Wrap Up Party, Strut Your Stuff SaturdayGooseberry Patch Recipe Round-Up.
Photobucket

Enjoy visiting the other Crazy Cooking Challenge participants through the linky party below.  Mmmmmm ... Looks like there are some fabulous fried chicken choices!
reade more... Résuméabuiyad

Baked Jalapeno Poppers {Eating the Alphabet - Letters I & J}


I'm joining the Eating the Alphabet! challenge hosted each month by Brenda of Meal Planning Magic

The Eating the Alphabet! challenge is a group of bloggers who, each month, will choose a recipe featuring a FRUIT or VEGETABLE or GRAIN or BEAN/LEGUME from a different set of alphabet letters.  Recipes can be sweet or savory, as long as they feature a selection from the month's designated set of letters. 

How fun is that??  And as a 1st grade teacher, how can I possibly resist a challenge named after the alphabet and modeled after the children's book of the same name?  Well, obviously I can't.

Now, I am joining the challenge midstream, so we're on letters I or J this month.  I or J????  To my brain, that left me with either Iceberg lettuce or Jalapenos to choose from.  Couldn't come up with anything else.  Nope, nothin'.  But that's totally okay with me ... 'cause I've been wanting to make these Baked Jalapeno Poppers from Cabot Creamery for quite some time.  Here was just the motivation I needed!

And, oh wow!!!! - Are these ever delicious!  When my husband-of-few-words ... from whom it's a HUGE compliment to get a quiet "it's good" about food ... ate his first popper he said ... and I quote ... "They're good.  Excellent, excellent, excellent.  Mmm!"  That's THREE excellents!  With emphasis!!  That's an incredibly enormous endorsement from the hubby, my friends.

The steps to put these poppers together sound a bit cumbersome, but they're really not ... especially if you have your 'assembly line-up' ready ... fill, egg dip, panko, pan ... fill, egg dip, panko, pan ... Repeat, repeat, repeat.  The poppers actually come together quite quickly, so please don't be scared away.

Here's my 'assembly line-up,' all ready to go:


Mix up a filling of grated sharp cheddar cheese, cream cheese, and chili powder.  Stuff a little bit of the cheese filling into emptied-out jalapeno halves.  I found the easiest way to do the stuffing (and the whole popper assembly process, for that matter) was with the best kitchen utensils I have - my hands!

After filling, dunk each jalapeno half in egg ...

... and then roll it around in panko bread crumbs.  (You could also use regular unflavored bread crumbs, but panko crumbs, which are bigger and crunchier than regular crumbs, give such a wonderful texture and crunch to the poppers!)


Place the poppers on a baking sheet, and bake them up until they're golden brown.


Serve some sour cream alongside for dipping, and you've got a most-excellent spicy treat.  Ummm, you may want to have a beverage handy, though ... these do pack quite a spicy punch.  A wonderfully delicious spicy punch!


I invite you to follow The Kitchen is My Playground with Pinterest, Facebook, Google Friend Connect, Linky Followers, bloglovin', or Feedburner. Buttons are in the right sidebar. I'd love to have you back soon!


Baked Jalapeno Poppers
Source:  Adapted from Cabot Creamery in Cabot, Vermont

Ingredients
12 jalapeno peppers
4 oz. extra sharp cheddar cheese, grated (I use Cabot)
3 oz. cream cheese
1/4 tsp. garlic powder
1/4 tsp. chili powder
2 large eggs
3/4 c. panko bread crumbs
1/2 tsp. salt
Sour cream (for dipping)


Directions
Peppers and Filling:
1.  Cut each jalapeno pepper in half lengthwise.  Scrape out and discard seeds and ribs.

2.  In a small bowl, combine cheddar cheese, cream cheese, garlic powder, and chili powder.

Prepare Your Assembly Line:
3.  In a small shallow bowl, lightly beat eggs until frothy.  In another small shallow bowl, mix together panko bread crumbs and salt.  Lightly spray a baking sheet with cooking spray.  Arrange your 'assembly line' for easy preparation - halved jalapenos, cheese filling mixture, beaten eggs, panko, and then your prepared pan.

Popper Assembly:  
4.  Fill each jalapeno pepper half with a little of the cheese mixture (I found it easiest to just press the cheese filling in with my fingers).  Roll each pepper half in egg, and then in panko (the panko will stick a lot to the cheese filling, but just a little to the jalapeno itself).  Place each pepper on the baking sheet.

Baking:
5.  Bake at 325 degrees until tender and lightly browned, about 30 minutes.  Serve warm with sour cream for dipping.


Enjoy!


This post is linked with Strut Your Stuff Saturday hosted by Six Sisters' Stuff, Weekend Wrap Up hosted by Tater Tots & Jello, Weekend Potluck hosted by The Country Cook, Scrumptious Sunday hosted by Addicted to Recipes, Sundae Scoop hosted by I {heart} Naptime, Think Pink Sundays hosted by Flamingo Toes, On the Menu Monday hosted by Stone Gable, Sunday Showcase hosted by Under the Table and Dreaming, Mangia Mondays hosted by Shine Your Light, Tuesday Tutorials hosted by The Kurtz Corner, Tuesday Talent Show hosted by Chef in Training, Totally Tasty Tuesday hosted by Mandy's Recipe Box, Cast Party Wednesday hosted by Lady Behind the Curtain, Whatcha Whipped Up Wednesday hosted by DJ's Sugar Shack, Share Your Creations hosted by Kristen's Creations, It's a Keeper Thursday hosted by It's a Keeper, Inspiration Friday hosted by At the Picket Fence, Foodie Friday hosted by Rattlebridge Farm, Weekend Potluck hosted by The Country Cook, Just Something I Whipped Up hosted by The Girl Creative, Tutorial Tips & Tidbits hosted by Stone Gable, Full Plate Thursday hosted by Miz Helen's Country Cottage, June P'Inspiration hosted by Jane's Adventures in Dinner, Gooseberry Patch Recipe Round-Up.

I'm joining the Eating the Alphabet! challenge hosted each month by Brenda of Meal Planning Magic

The Eating the Alphabet! challenge is a group of bloggers who, each month, will choose a recipe featuring a FRUIT or VEGETABLE or GRAIN or BEAN/LEGUME from a different set of alphabet letters.  Recipes can be sweet or savory, as long as they feature a selection from the month's designated set of letters. 

How fun is that??  And as a 1st grade teacher, how can I possibly resist a challenge named after the alphabet and modeled after the children's book of the same name?  Well, obviously I can't.

Now, I am joining the challenge midstream, so we're on letters I or J this month.  I or J????  To my brain, that left me with either Iceberg lettuce or Jalapenos to choose from.  Couldn't come up with anything else.  Nope, nothin'.  But that's totally okay with me ... 'cause I've been wanting to make these Baked Jalapeno Poppers from Cabot Creamery for quite some time.  Here was just the motivation I needed!

And, oh wow!!!! - Are these ever delicious!  When my husband-of-few-words ... from whom it's a HUGE compliment to get a quiet "it's good" about food ... ate his first popper he said ... and I quote ... "They're good.  Excellent, excellent, excellent.  Mmm!"  That's THREE excellents!  With emphasis!!  That's an incredibly enormous endorsement from the hubby, my friends.

The steps to put these poppers together sound a bit cumbersome, but they're really not ... especially if you have your 'assembly line-up' ready ... fill, egg dip, panko, pan ... fill, egg dip, panko, pan ... Repeat, repeat, repeat.  The poppers actually come together quite quickly, so please don't be scared away.

Here's my 'assembly line-up,' all ready to go:


Mix up a filling of grated sharp cheddar cheese, cream cheese, and chili powder.  Stuff a little bit of the cheese filling into emptied-out jalapeno halves.  I found the easiest way to do the stuffing (and the whole popper assembly process, for that matter) was with the best kitchen utensils I have - my hands!

After filling, dunk each jalapeno half in egg ...

... and then roll it around in panko bread crumbs.  (You could also use regular unflavored bread crumbs, but panko crumbs, which are bigger and crunchier than regular crumbs, give such a wonderful texture and crunch to the poppers!)


Place the poppers on a baking sheet, and bake them up until they're golden brown.


Serve some sour cream alongside for dipping, and you've got a most-excellent spicy treat.  Ummm, you may want to have a beverage handy, though ... these do pack quite a spicy punch.  A wonderfully delicious spicy punch!


I invite you to follow The Kitchen is My Playground with Pinterest, Facebook, Google Friend Connect, Linky Followers, bloglovin', or Feedburner. Buttons are in the right sidebar. I'd love to have you back soon!


Baked Jalapeno Poppers
Source:  Adapted from Cabot Creamery in Cabot, Vermont

Ingredients
12 jalapeno peppers
4 oz. extra sharp cheddar cheese, grated (I use Cabot)
3 oz. cream cheese
1/4 tsp. garlic powder
1/4 tsp. chili powder
2 large eggs
3/4 c. panko bread crumbs
1/2 tsp. salt
Sour cream (for dipping)


Directions
Peppers and Filling:
1.  Cut each jalapeno pepper in half lengthwise.  Scrape out and discard seeds and ribs.

2.  In a small bowl, combine cheddar cheese, cream cheese, garlic powder, and chili powder.

Prepare Your Assembly Line:
3.  In a small shallow bowl, lightly beat eggs until frothy.  In another small shallow bowl, mix together panko bread crumbs and salt.  Lightly spray a baking sheet with cooking spray.  Arrange your 'assembly line' for easy preparation - halved jalapenos, cheese filling mixture, beaten eggs, panko, and then your prepared pan.

Popper Assembly:  
4.  Fill each jalapeno pepper half with a little of the cheese mixture (I found it easiest to just press the cheese filling in with my fingers).  Roll each pepper half in egg, and then in panko (the panko will stick a lot to the cheese filling, but just a little to the jalapeno itself).  Place each pepper on the baking sheet.

Baking:
5.  Bake at 325 degrees until tender and lightly browned, about 30 minutes.  Serve warm with sour cream for dipping.


Enjoy!


This post is linked with Strut Your Stuff Saturday hosted by Six Sisters' Stuff, Weekend Wrap Up hosted by Tater Tots & Jello, Weekend Potluck hosted by The Country Cook, Scrumptious Sunday hosted by Addicted to Recipes, Sundae Scoop hosted by I {heart} Naptime, Think Pink Sundays hosted by Flamingo Toes, On the Menu Monday hosted by Stone Gable, Sunday Showcase hosted by Under the Table and Dreaming, Mangia Mondays hosted by Shine Your Light, Tuesday Tutorials hosted by The Kurtz Corner, Tuesday Talent Show hosted by Chef in Training, Totally Tasty Tuesday hosted by Mandy's Recipe Box, Cast Party Wednesday hosted by Lady Behind the Curtain, Whatcha Whipped Up Wednesday hosted by DJ's Sugar Shack, Share Your Creations hosted by Kristen's Creations, It's a Keeper Thursday hosted by It's a Keeper, Inspiration Friday hosted by At the Picket Fence, Foodie Friday hosted by Rattlebridge Farm, Weekend Potluck hosted by The Country Cook, Just Something I Whipped Up hosted by The Girl Creative, Tutorial Tips & Tidbits hosted by Stone Gable, Full Plate Thursday hosted by Miz Helen's Country Cottage, June P'Inspiration hosted by Jane's Adventures in Dinner, Gooseberry Patch Recipe Round-Up.
reade more... Résuméabuiyad

Chai-Spiced Mixed Nuts


I'm back from a wonderful Thanksgiving weekend with my family!  I ate way too much food, relaxed watching movies with my Dad, shopped and shared wine with my Mom, watched a "Chopped" marathon on the Food Network (I love that show!), and just generally had a low-key and relaxing weekend.  I hope you had a wonderful Thanksgiving, too!

And now it's time to turn an eye toward Christmas.

About two weeks ago I started planning out Christmastime lessons for my classroom.  I can't believe Christmas is almost here already.  And I absolutely could not believe I had my 'December' folder out at school.  Truly, where is time going?  (As my hubby likes to say, "Life is like a roll of toilet paper ... the closer you get to the end, the faster it goes."  Nice, huh?)  Well, Christmas is almost here.  I've got my tree up ... it's not decorated yet, but the tree itself is up.  That's a start.  Hopefully, hubby will help me get the lights on it tomorrow.  And  I've started my holiday baking ... yay!  That's one of my favorite parts of the Christmas season.

So, in honor of the start of the Christmas season, I decided to share this recipe for Chai-Spiced Mixed Nuts.  These are delicious.  And would be perfect as little gifts or as nibbles at a holiday party.  And you know what else?  They're easy!!  Oh, how I love a recipe that's both delicious and easy! 


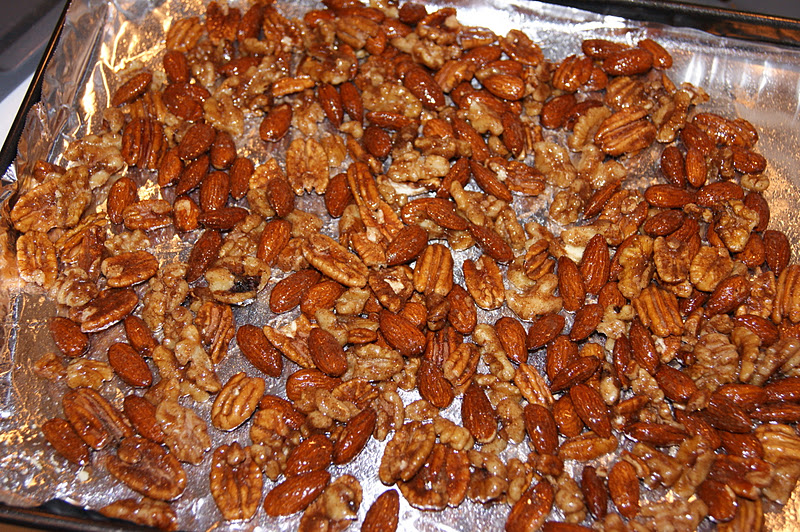
You start by simply tossing a combination of nuts with vanilla-laced egg white ... I used a mix of whole almonds, walnuts, and pecans.  Then sprinkle on a sugar-and-spice mixture, get everything good and coated, ...
Sugar-and-spice goodness

... and spread the nuts in a single layer on a baking sheet.

"Is it time for the sauna??"

Bake 'em up, and they'll develop a fabulously tasty sugar-and-spice flaky coating.  Soooooo good.

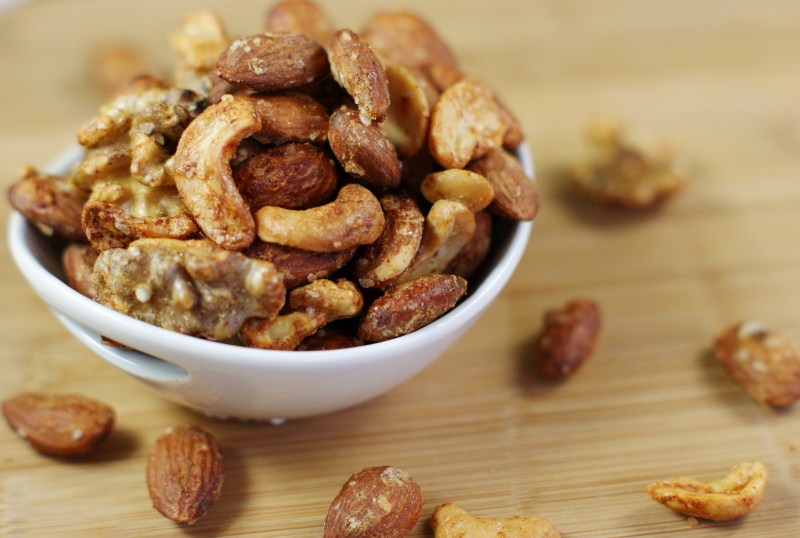
See the flaky sugar-and-spice coating?

Serve up a bowl and enjoy!  I've made two batches already, and shared with friends.  I am a huge chai fan ... so I think I see a few more batches in my near future.  Yum!

A bowl of yummy nibbles


Chai-Spiced Mixed Nuts
Source:  Adapted from Cooking Light magazine

Ingredients
1 T. vanilla extract
1 egg white
3 c. nuts (I used 1 c. each whole almonds, pecan halves, & walnut halves)
1/4 c. sugar
1 tsp. kosher salt
3/4 tsp. ground cinnamon
3/4 tsp. ground allspice
1/4 tsp. ground cardamom


Directions
1.  Combine vanilla extract and egg white in a large bowl; stir with a whisk until foamy.  Stir in nuts.

2.  Combine sugar, salt, cinnamon, allspice, and cardamom in a small bowl.  Sprinkle over nuts, tossing to coat.

3.  Place nut mixture on a baking sheet lined with parchment paper or foil.  Bake at 325 degrees for 15 minutes.  Remove pan from oven.  Turn off oven.

4.  Toss nuts, breaking pieces apart.  Return pan to oven, and leave pan in oven for an additional 10 minutes (with the oven still turned off).

5.  Cool to room temperature.  Store nuts in an airtight container at room temperature for up to a week.

Enjoy!


This post is linked with Sweets for a Saturday hosted by Sweet as Sugar Cookies, Sweet Indulgences Sunday hosted by A Well-Seasoned Life, Think Pink Sundays hosted by Flamingo Toes, Sundae Scoop hosted by I {heart} Naptime, Market Yourself Monday hosted by Sumo's Sweet Stuff, Mangia Mondays hosted by Shine Your Light, The Cure for the Common Monday hosted by Lines Across My Face, Savvy Homemade Monday hosted by Home Savvy A to Z, Tuesday Talent Show hosted by Chef in Training, Crazy Sweet Tuesday hosted by Crazy for Crust, Tea Party Tuesday hosted by Sweetology, Tasty Tuesday hosted by For the Love of Blogs, Tasty Tuesday hosted by Naptime Creations, These Chicks Cooked hosted by This Chick Cooks, Full Plate Thursday hosted by Miz Helen's Country Cottage, Foodie Friday hosted by Designs by Gollum, It's a Keeper Thursday hosted by It's a Keeper, Friday Food hosted by Mom Trends, Mingle Monday hosted by Add a Pinch, A Themed Baker's Sunday hosted by Cupcake Apothecary, Holly Bloggy Christmas Recipe Party hosted by Chef in Training, Christmas in July, Iron Chef Mom.

I'm back from a wonderful Thanksgiving weekend with my family!  I ate way too much food, relaxed watching movies with my Dad, shopped and shared wine with my Mom, watched a "Chopped" marathon on the Food Network (I love that show!), and just generally had a low-key and relaxing weekend.  I hope you had a wonderful Thanksgiving, too!

And now it's time to turn an eye toward Christmas.

About two weeks ago I started planning out Christmastime lessons for my classroom.  I can't believe Christmas is almost here already.  And I absolutely could not believe I had my 'December' folder out at school.  Truly, where is time going?  (As my hubby likes to say, "Life is like a roll of toilet paper ... the closer you get to the end, the faster it goes."  Nice, huh?)  Well, Christmas is almost here.  I've got my tree up ... it's not decorated yet, but the tree itself is up.  That's a start.  Hopefully, hubby will help me get the lights on it tomorrow.  And  I've started my holiday baking ... yay!  That's one of my favorite parts of the Christmas season.

So, in honor of the start of the Christmas season, I decided to share this recipe for Chai-Spiced Mixed Nuts.  These are delicious.  And would be perfect as little gifts or as nibbles at a holiday party.  And you know what else?  They're easy!!  Oh, how I love a recipe that's both delicious and easy! 


You start by simply tossing a combination of nuts with vanilla-laced egg white ... I used a mix of whole almonds, walnuts, and pecans.  Then sprinkle on a sugar-and-spice mixture, get everything good and coated, ...
Sugar-and-spice goodness

... and spread the nuts in a single layer on a baking sheet.

"Is it time for the sauna??"

Bake 'em up, and they'll develop a fabulously tasty sugar-and-spice flaky coating.  Soooooo good.

See the flaky sugar-and-spice coating?

Serve up a bowl and enjoy!  I've made two batches already, and shared with friends.  I am a huge chai fan ... so I think I see a few more batches in my near future.  Yum!

A bowl of yummy nibbles


Chai-Spiced Mixed Nuts
Source:  Adapted from Cooking Light magazine

Ingredients
1 T. vanilla extract
1 egg white
3 c. nuts (I used 1 c. each whole almonds, pecan halves, & walnut halves)
1/4 c. sugar
1 tsp. kosher salt
3/4 tsp. ground cinnamon
3/4 tsp. ground allspice
1/4 tsp. ground cardamom


Directions
1.  Combine vanilla extract and egg white in a large bowl; stir with a whisk until foamy.  Stir in nuts.

2.  Combine sugar, salt, cinnamon, allspice, and cardamom in a small bowl.  Sprinkle over nuts, tossing to coat.

3.  Place nut mixture on a baking sheet lined with parchment paper or foil.  Bake at 325 degrees for 15 minutes.  Remove pan from oven.  Turn off oven.

4.  Toss nuts, breaking pieces apart.  Return pan to oven, and leave pan in oven for an additional 10 minutes (with the oven still turned off).

5.  Cool to room temperature.  Store nuts in an airtight container at room temperature for up to a week.

Enjoy!


This post is linked with Sweets for a Saturday hosted by Sweet as Sugar Cookies, Sweet Indulgences Sunday hosted by A Well-Seasoned Life, Think Pink Sundays hosted by Flamingo Toes, Sundae Scoop hosted by I {heart} Naptime, Market Yourself Monday hosted by Sumo's Sweet Stuff, Mangia Mondays hosted by Shine Your Light, The Cure for the Common Monday hosted by Lines Across My Face, Savvy Homemade Monday hosted by Home Savvy A to Z, Tuesday Talent Show hosted by Chef in Training, Crazy Sweet Tuesday hosted by Crazy for Crust, Tea Party Tuesday hosted by Sweetology, Tasty Tuesday hosted by For the Love of Blogs, Tasty Tuesday hosted by Naptime Creations, These Chicks Cooked hosted by This Chick Cooks, Full Plate Thursday hosted by Miz Helen's Country Cottage, Foodie Friday hosted by Designs by Gollum, It's a Keeper Thursday hosted by It's a Keeper, Friday Food hosted by Mom Trends, Mingle Monday hosted by Add a Pinch, A Themed Baker's Sunday hosted by Cupcake Apothecary, Holly Bloggy Christmas Recipe Party hosted by Chef in Training, Christmas in July, Iron Chef Mom.
reade more... Résuméabuiyad

Spinach Balls


This recipe had me at stuffing.  I love stuffing.  Not that these spinach balls have absolutely anything to do with Thanksgiving, nor should I be even thinking about Thanksgiving in July, but stuffing is my favorite Thanksgiving food.  So mixing seasoned stuffing with a whole lot of spinach and turning it into a two-bite little treat?  Oh, yes, ... I'm all about that.  I whipped up a batch of these little gems this week and popped them in the freezer.  That way I can grab out just a few as I need them for a quick appetizer.  Perfect!  I love dishes that are freezer-friendly like that, allowing me to be at-the-ready with tasty treats.  With summertime company coming, that's what I need! 

So how do we make these Spinach Balls?  Mix up some seasoned stuffing crumbs, a whole lot of frozen spinach (well-drained, of course!), onion, eggs, melted butter, and some Parmesan.


Roll the mixture into little balls and put them on a baking sheet.


Pop them in the oven for a little bit.  They'll bake up into these really yummy stuffing balls!! ... uh, I mean Spinach Balls.  Yes, that's what they are ... Spinach Balls.  But maybe, just for me, I'll start calling them Stuffing Balls.

I invite you to follow The Kitchen is My Playground with Pinterest, Facebook, Google Friend Connect, Linky Followers, bloglovin', or Feedburner. Buttons are in the right sidebar. I'd love to have you back soon!


Spinach Balls
Source:  A friend

Ingredients
2 (10 oz.) packages frozen spinach, thawed & well-drained
2 small onions, very finely chopped (I use a food processor)
2 1/4 c. stuffing with herbs (I use Pepperidge Farm)
6 eggs, beaten
1/2 c. melted butter
1/2 c. Parmesan cheese
2 tsp. garlic salt
1 tsp. black pepper


Directions
1.  Mix all ingredients until well combined.  Form into about 1" balls; place on a baking sheet sprayed with cooking spray.  

2.  Bake at 350 for 20 minutes.  Makes approximately 60 balls.

NOTES:
Spinach balls may be frozen, either baked or unbaked.  (I always freeze mine pre-baked.)
For pre-baked balls:  Remove from freezer about 30 minutes prior to reheating.  Reheat in a 350 degree oven for about 10 minutes.
For unbaked balls:  Remove from freezer 30 minutes before cooking.  Bake as directed (350 for 20 minutes).

Enjoy!


This recipe had me at stuffing.  I love stuffing.  Not that these spinach balls have absolutely anything to do with Thanksgiving, nor should I be even thinking about Thanksgiving in July, but stuffing is my favorite Thanksgiving food.  So mixing seasoned stuffing with a whole lot of spinach and turning it into a two-bite little treat?  Oh, yes, ... I'm all about that.  I whipped up a batch of these little gems this week and popped them in the freezer.  That way I can grab out just a few as I need them for a quick appetizer.  Perfect!  I love dishes that are freezer-friendly like that, allowing me to be at-the-ready with tasty treats.  With summertime company coming, that's what I need! 

So how do we make these Spinach Balls?  Mix up some seasoned stuffing crumbs, a whole lot of frozen spinach (well-drained, of course!), onion, eggs, melted butter, and some Parmesan.


Roll the mixture into little balls and put them on a baking sheet.


Pop them in the oven for a little bit.  They'll bake up into these really yummy stuffing balls!! ... uh, I mean Spinach Balls.  Yes, that's what they are ... Spinach Balls.  But maybe, just for me, I'll start calling them Stuffing Balls.

I invite you to follow The Kitchen is My Playground with Pinterest, Facebook, Google Friend Connect, Linky Followers, bloglovin', or Feedburner. Buttons are in the right sidebar. I'd love to have you back soon!


Spinach Balls
Source:  A friend

Ingredients
2 (10 oz.) packages frozen spinach, thawed & well-drained
2 small onions, very finely chopped (I use a food processor)
2 1/4 c. stuffing with herbs (I use Pepperidge Farm)
6 eggs, beaten
1/2 c. melted butter
1/2 c. Parmesan cheese
2 tsp. garlic salt
1 tsp. black pepper


Directions
1.  Mix all ingredients until well combined.  Form into about 1" balls; place on a baking sheet sprayed with cooking spray.  

2.  Bake at 350 for 20 minutes.  Makes approximately 60 balls.

NOTES:
Spinach balls may be frozen, either baked or unbaked.  (I always freeze mine pre-baked.)
For pre-baked balls:  Remove from freezer about 30 minutes prior to reheating.  Reheat in a 350 degree oven for about 10 minutes.
For unbaked balls:  Remove from freezer 30 minutes before cooking.  Bake as directed (350 for 20 minutes).

Enjoy!


reade more... Résuméabuiyad

Toasted Pesto Rounds {Party Series 8}

Mom preppin' Toasted Pesto Rounds

This is it! ... the last post of the party series from my Mom's wine tasting party.  This last little tidbit of yummy party fare is Toasted Pesto Rounds.  It's basically a basil crostini.  And it's so simple.  Mix up a fresh basil-garlic-Parmesan spread (can you already tell this is going to be good??), slather it on toasted baguette slices, and then broil it until it's melty in the middle and a nice golden brown on the edges.  Pretty easy, isn't it?  And I'll assure you, pretty tasty, too.  Our family doesn't reserve these for just party fare ... we sometimes serve these little toasty bites up as a side.  Use a larger-sized bread instead of baguette, and you have a nice alternative to regular garlic bread.
Tapenade Crostini & Toasted Pesto Rounds

The other treat you see on the party platter is Tapenade Crostini.  I talked about these in this post about making tapenade.  To make these:  spread tapenade on baguette slices, sprinkle on some mozzarella or goat cheese, and top it with a piece of sundried tomato and chopped fresh basil; broil until the cheese is melty.  Another simple one, huh?

Tapenade Crostini ... ready for the broiler

I hope you've enjoyed the party series!  And I hope you've found something to add to your entertaining line-up, or that's sparked an idea for you to try.  I'm looking forward to the next time my Mom and I can spend a couple of days in the kitchen together.  The kitchen is her playground, too!


Toasted Pesto Rounds
Ingredients
1/2 c. thinly-sliced fresh basil leaves
1 clove garlic, minced
1/2 c. grated Parmesan cheese
1/3 c. mayonnaise
24 (1/4"-thick) baguette slices


Directions
1.  Combine sliced basil leaves, Parmesan, minced garlic, and mayonnaise; set aside. (Basil mixture can be refrigerated overnight.)

2.  Arrange bread slices in a single layer on a broiler pan or baking sheet. Broil for about 1 minute until lightly toasted. Remove from oven. 

3.  Turn bread slices over and spread untoasted side evenly with basil mixture. Broil for about 2 minutes or until lightly browned.

NOTE: You can substitute dried basil, if desired. Use a little less than 1/2 cup.

Enjoy!


The {Party Series} Posts:
My Mom Throws a Great Party! {Party Series 1}
Grand Marnier & Spiced Rum Fruit Dip {Party Series 2}
Antipasto Platter with Grape Tomato & Caper Salad {Party Series 3}
Marinated Cheese {Party Series 4}
Mini Mocha-Toffee Crunch Cheesecakes {Party Series 5}
Raspberry Chocolate Truffles & Drunken Cherries {Party Series 6}
Raspberry-Almond, Caramel-Walnut, & Lemon-Coconut Bars {Party Series 7}
Toasted Pesto Rounds {Party Series 8}
Mom preppin' Toasted Pesto Rounds

This is it! ... the last post of the party series from my Mom's wine tasting party.  This last little tidbit of yummy party fare is Toasted Pesto Rounds.  It's basically a basil crostini.  And it's so simple.  Mix up a fresh basil-garlic-Parmesan spread (can you already tell this is going to be good??), slather it on toasted baguette slices, and then broil it until it's melty in the middle and a nice golden brown on the edges.  Pretty easy, isn't it?  And I'll assure you, pretty tasty, too.  Our family doesn't reserve these for just party fare ... we sometimes serve these little toasty bites up as a side.  Use a larger-sized bread instead of baguette, and you have a nice alternative to regular garlic bread.
Tapenade Crostini & Toasted Pesto Rounds

The other treat you see on the party platter is Tapenade Crostini.  I talked about these in this post about making tapenade.  To make these:  spread tapenade on baguette slices, sprinkle on some mozzarella or goat cheese, and top it with a piece of sundried tomato and chopped fresh basil; broil until the cheese is melty.  Another simple one, huh?

Tapenade Crostini ... ready for the broiler

I hope you've enjoyed the party series!  And I hope you've found something to add to your entertaining line-up, or that's sparked an idea for you to try.  I'm looking forward to the next time my Mom and I can spend a couple of days in the kitchen together.  The kitchen is her playground, too!


Toasted Pesto Rounds
Ingredients
1/2 c. thinly-sliced fresh basil leaves
1 clove garlic, minced
1/2 c. grated Parmesan cheese
1/3 c. mayonnaise
24 (1/4"-thick) baguette slices


Directions
1.  Combine sliced basil leaves, Parmesan, minced garlic, and mayonnaise; set aside. (Basil mixture can be refrigerated overnight.)

2.  Arrange bread slices in a single layer on a broiler pan or baking sheet. Broil for about 1 minute until lightly toasted. Remove from oven. 

3.  Turn bread slices over and spread untoasted side evenly with basil mixture. Broil for about 2 minutes or until lightly browned.

NOTE: You can substitute dried basil, if desired. Use a little less than 1/2 cup.

Enjoy!


The {Party Series} Posts:
My Mom Throws a Great Party! {Party Series 1}
Grand Marnier & Spiced Rum Fruit Dip {Party Series 2}
Antipasto Platter with Grape Tomato & Caper Salad {Party Series 3}
Marinated Cheese {Party Series 4}
Mini Mocha-Toffee Crunch Cheesecakes {Party Series 5}
Raspberry Chocolate Truffles & Drunken Cherries {Party Series 6}
Raspberry-Almond, Caramel-Walnut, & Lemon-Coconut Bars {Party Series 7}
Toasted Pesto Rounds {Party Series 8}
reade more... Résuméabuiyad

Warm Rosemary Olives


To quote one of my friends about this little bite:  "The whole is way more than the sum of the parts."  Yup, that's a good way to describe this treat.  It's only four little ingredients, but when put together and heated up, the result is fantabulous.

All you do is toss some olives, fresh rosemary, olive oil, and crushed red pepper on some aluminum foil.  Then seal it up to form a little pouch and toss it in the oven or on the grill.  That's it!


On one of my VERY few camping trips (I'm soooo not a camper ... I need electricity and a sleeping environment that absolutely does not include the potential of critter visitors), we cooked this appetizer over the campfire.  Hey, who says you have to limit campfire cooking to hot dogs??

We invite you to follow The Kitchen is My Playground with Google+, PinterestFacebookTwitter, bloglovin', or Feedburner.  We'd love to have you back soon!


Warm Rosemary Olives
Source:  Adapted from Southern Living
(You in no way, shape, or form, need to be precise with the measurements for this!)

Ingredients
1 (6.25 oz.) jar mixed olives, or about 1 c. olives of any variety mix you'd like
4 or 5 large sprigs fresh rosemary
Sprinkling of crushed red pepper, to taste
1 tsp. extra-virgin olive oil

Directions
1.  Drain olives and place them on a piece of aluminum foil.  Shake on a sprinkling of crushed red pepper.  Lay rosemary sprigs on top and drizzle with extra-virgin olive oil.

2.  Seal aluminum foil to create a pouch and bake at 350 degrees for about 10-15 minutes.  Or, toss the pouch on the grill until olives are heated through.

My Mom discovered it's also tasty to add capers, portabella mushroom slices, or roasted red pepper slices to the packet.  I haven't tried these additions yet, but I absolutely trust her judgment!

Enjoy!


This post is linked with Sharing Sundays hosted by Everyday Sisters, This Week's Cravings hosted by Mom's Crazy Cooking, and Flash-Back Friday hosted by Cookin' for My Captain, Mangia Mondays hosted by Shine Your Light, Creativity Linky PartySaturday Show & Tell, Will Cook for Smiles Award Show, Sundae Scoop, Nifty Thrifty Sunday.


To quote one of my friends about this little bite:  "The whole is way more than the sum of the parts."  Yup, that's a good way to describe this treat.  It's only four little ingredients, but when put together and heated up, the result is fantabulous.

All you do is toss some olives, fresh rosemary, olive oil, and crushed red pepper on some aluminum foil.  Then seal it up to form a little pouch and toss it in the oven or on the grill.  That's it!


On one of my VERY few camping trips (I'm soooo not a camper ... I need electricity and a sleeping environment that absolutely does not include the potential of critter visitors), we cooked this appetizer over the campfire.  Hey, who says you have to limit campfire cooking to hot dogs??

We invite you to follow The Kitchen is My Playground with Google+, PinterestFacebookTwitter, bloglovin', or Feedburner.  We'd love to have you back soon!


Warm Rosemary Olives
Source:  Adapted from Southern Living
(You in no way, shape, or form, need to be precise with the measurements for this!)

Ingredients
1 (6.25 oz.) jar mixed olives, or about 1 c. olives of any variety mix you'd like
4 or 5 large sprigs fresh rosemary
Sprinkling of crushed red pepper, to taste
1 tsp. extra-virgin olive oil

Directions
1.  Drain olives and place them on a piece of aluminum foil.  Shake on a sprinkling of crushed red pepper.  Lay rosemary sprigs on top and drizzle with extra-virgin olive oil.

2.  Seal aluminum foil to create a pouch and bake at 350 degrees for about 10-15 minutes.  Or, toss the pouch on the grill until olives are heated through.

My Mom discovered it's also tasty to add capers, portabella mushroom slices, or roasted red pepper slices to the packet.  I haven't tried these additions yet, but I absolutely trust her judgment!

Enjoy!


This post is linked with Sharing Sundays hosted by Everyday Sisters, This Week's Cravings hosted by Mom's Crazy Cooking, and Flash-Back Friday hosted by Cookin' for My Captain, Mangia Mondays hosted by Shine Your Light, Creativity Linky PartySaturday Show & Tell, Will Cook for Smiles Award Show, Sundae Scoop, Nifty Thrifty Sunday.
reade more... Résuméabuiyad