Pages

Showing posts with label Secret Recipe Club. Show all posts

Triangle Delights - SRC


Need another recipe for a cookie exchange, party, potluck, to give away to friends or neighbors, or just for dessert tonight?  Wow, Christmas season is just so busy, right???

Look no further.  This one will blow your socks off.
And it's ridiculously simple, which makes it even better.

For my Secret Recipe Club assignment this month, I had the pleasure of browsing through Adventures in All Things Food,, where Andrea has tons of great recipes, three adorable children, and a huge, beautiful farm. Oh, and she also has a craft section and does frequent give-aways.  Awesome!

While I was tempted by many recipes, including her Challah Bread and this amazing Chocolate Espresso Bundt Cake, I just couldn't resist trying a cookie which Andrea said was one of her favorites from childhood.
What do you get when you combine graham crackers and a simple sauce of butter and brown sugar with a hint of cinnamon and vanilla with coconut, almonds, and chocolate chips????

A pan of pure deliciousness, that's what. 


I took a big plate of these luscious goodies to our homeschool co-op Christmas party, and they were devoured in minutes.  Frankly, I was disappointed.  Even though I had saved several at home, I was hoping to have a few left over.  I just could not get enough of them.

They're like a combination of Hello Dolly Bars and Toffee, both of which are huge favorites of mine.  I altered the recipe only slightly, adding a half cup more marshmallows because I thought it just didn't look like enough.

These are going into the *BEST* and *MUST MAKE* categories for me.  Thanks so much, Andrea!

Triangle Delights

2 sleeves of graham crackers (all may not be used)
3 1/2 cups mini marshmallows
1 cup butter
1 cup brown sugar
1 tsp. ground cinnamon
1 tsp. vanilla extract
1 cup shredded coconut
1 cup sliced or chopped almonds
1 cup semi-sweet chocolate chips

Preheat oven to 350°.

Line a rimmed cookie sheet or jelly-roll pan with parchment paper, then place graham crackers in a single layer on the bottom of the pan. Cover with marshmallows.

In a medium saucepan over medium heat, combine butter, brown sugar, and cinnamon and stir until butter is melted and sugar is completely dissolved. Remove from heat and add vanilla.

Pour the hot mixture over the marshmallows, then top with coconut, almonds, and chocolate chips.
Bake for 12-15 minutes, or until top is golden brown.

Allow the pan to cool, then use the parchment paper as handles to remove the cookies from the pan to a cutting board.  Slice into 3 inch squares, then into triangles.  A pizza cutter works great for this!


Source: Adapted slightly from Adventures in All Things Food


Need another recipe for a cookie exchange, party, potluck, to give away to friends or neighbors, or just for dessert tonight?  Wow, Christmas season is just so busy, right???

Look no further.  This one will blow your socks off.
And it's ridiculously simple, which makes it even better.

For my Secret Recipe Club assignment this month, I had the pleasure of browsing through Adventures in All Things Food,, where Andrea has tons of great recipes, three adorable children, and a huge, beautiful farm. Oh, and she also has a craft section and does frequent give-aways.  Awesome!

While I was tempted by many recipes, including her Challah Bread and this amazing Chocolate Espresso Bundt Cake, I just couldn't resist trying a cookie which Andrea said was one of her favorites from childhood.
What do you get when you combine graham crackers and a simple sauce of butter and brown sugar with a hint of cinnamon and vanilla with coconut, almonds, and chocolate chips????

A pan of pure deliciousness, that's what. 


I took a big plate of these luscious goodies to our homeschool co-op Christmas party, and they were devoured in minutes.  Frankly, I was disappointed.  Even though I had saved several at home, I was hoping to have a few left over.  I just could not get enough of them.

They're like a combination of Hello Dolly Bars and Toffee, both of which are huge favorites of mine.  I altered the recipe only slightly, adding a half cup more marshmallows because I thought it just didn't look like enough.

These are going into the *BEST* and *MUST MAKE* categories for me.  Thanks so much, Andrea!

Triangle Delights

2 sleeves of graham crackers (all may not be used)
3 1/2 cups mini marshmallows
1 cup butter
1 cup brown sugar
1 tsp. ground cinnamon
1 tsp. vanilla extract
1 cup shredded coconut
1 cup sliced or chopped almonds
1 cup semi-sweet chocolate chips

Preheat oven to 350°.

Line a rimmed cookie sheet or jelly-roll pan with parchment paper, then place graham crackers in a single layer on the bottom of the pan. Cover with marshmallows.

In a medium saucepan over medium heat, combine butter, brown sugar, and cinnamon and stir until butter is melted and sugar is completely dissolved. Remove from heat and add vanilla.

Pour the hot mixture over the marshmallows, then top with coconut, almonds, and chocolate chips.
Bake for 12-15 minutes, or until top is golden brown.

Allow the pan to cool, then use the parchment paper as handles to remove the cookies from the pan to a cutting board.  Slice into 3 inch squares, then into triangles.  A pizza cutter works great for this!


Source: Adapted slightly from Adventures in All Things Food


reade more... Résuméabuiyad

Creamy Au Gratin Potatoes - SRC


If you're looking for a special potato dish for Thanksgiving, Christmas, your birthday, or next Thursday, I've got a winner for you.

Although they take awhile to bake, these potatoes are simple to put together and are definitely worth planning ahead for. They're tender and hearty, enhanced with thinly sliced onions, and drenched with creamy cheese sauce. A potato-lover's dream come true.
 
Although my mom would occasionally make a similar dish called scalloped potatoes when I was growing up, I can't remember ever making them myself.  But when I saw these on my Secret Recipe Club assignment for the month, Cheese Curd in Paradise, I knew I had to make them.  I need more scrumptious side dishes in my repertoire.

Ashley blogs from Wisconsin (hence the "cheese curd" in her blog title), a state that I have never visited but would love to see someday (in the summer, thank you very much).  Any place known for their cheese has to be amazing, right?  I can't imagine my life without cheese.  

She has lots of great recipes, from Pizza Muffins to Pumpkin Truffles, that I'm looking forward to trying - but I am beyond happy to have these potatoes in my life.  While they are a bit on the decadent side, I'll definitely bring out this recipe for special occasions and dinners.  Everyone in my family absolutely loved them.


Creamy Au Gratin Potatoes
Source: Adapted slightly from Cheese Curd In Paradise

6 large russet potatoes, sliced into very thin slices
1/2 large onion, sliced into rings
4 Tbsp. butter
4 Tbsp. all-purpose flour
2 1/2 cups milk
2 cups shredded sharp Cheddar cheese (best if you grate your own!) 
Salt and pepper to taste
Dash paprika

Preheat oven to 400°.
Layer half of the potatoes into bottom of a buttered 13 x 9" pan. Sprinkle lightly with salt and pepper.Top with onion slices, and add the remaining potatoes. Sprinkle again lightly with salt and pepper.  (I like to use Kosher salt.)
In a medium saucepan, melt butter over medium heat.  Mix in the flour and stir constantly with a whisk for one minute.  Slowly stir in milk.  Cook until the mixture has thickened.  Stir in cheddar cheese and continue stirring until melted.  Season cheese sauce with salt and pepper to taste, and add a dash of paprika if desired.  Pour over potatoes and cover the dish with foil.
Bake for 1 1/2 hours.  Remove foil and cook for a few more minutes to slightly brown the top if desired.


If you're looking for a special potato dish for Thanksgiving, Christmas, your birthday, or next Thursday, I've got a winner for you.

Although they take awhile to bake, these potatoes are simple to put together and are definitely worth planning ahead for. They're tender and hearty, enhanced with thinly sliced onions, and drenched with creamy cheese sauce. A potato-lover's dream come true.
 
Although my mom would occasionally make a similar dish called scalloped potatoes when I was growing up, I can't remember ever making them myself.  But when I saw these on my Secret Recipe Club assignment for the month, Cheese Curd in Paradise, I knew I had to make them.  I need more scrumptious side dishes in my repertoire.

Ashley blogs from Wisconsin (hence the "cheese curd" in her blog title), a state that I have never visited but would love to see someday (in the summer, thank you very much).  Any place known for their cheese has to be amazing, right?  I can't imagine my life without cheese.  

She has lots of great recipes, from Pizza Muffins to Pumpkin Truffles, that I'm looking forward to trying - but I am beyond happy to have these potatoes in my life.  While they are a bit on the decadent side, I'll definitely bring out this recipe for special occasions and dinners.  Everyone in my family absolutely loved them.


Creamy Au Gratin Potatoes
Source: Adapted slightly from Cheese Curd In Paradise

6 large russet potatoes, sliced into very thin slices
1/2 large onion, sliced into rings
4 Tbsp. butter
4 Tbsp. all-purpose flour
2 1/2 cups milk
2 cups shredded sharp Cheddar cheese (best if you grate your own!) 
Salt and pepper to taste
Dash paprika

Preheat oven to 400°.
Layer half of the potatoes into bottom of a buttered 13 x 9" pan. Sprinkle lightly with salt and pepper.Top with onion slices, and add the remaining potatoes. Sprinkle again lightly with salt and pepper.  (I like to use Kosher salt.)
In a medium saucepan, melt butter over medium heat.  Mix in the flour and stir constantly with a whisk for one minute.  Slowly stir in milk.  Cook until the mixture has thickened.  Stir in cheddar cheese and continue stirring until melted.  Season cheese sauce with salt and pepper to taste, and add a dash of paprika if desired.  Pour over potatoes and cover the dish with foil.
Bake for 1 1/2 hours.  Remove foil and cook for a few more minutes to slightly brown the top if desired.
reade more... Résuméabuiyad

Classic Peanut Butter Cookies - SRC


We are in the throes of birthday season at my house.
Meaning, three of my five children have October birthdays.
Which translates into a LOT of butter, powdered sugar, and heavy cream, with all the cake and homemade ice cream flying out of my kitchen.

You'd almost think I'd veer away from sweets for my Secret Recipe Club assignment this month. And I honestly tried.  I was assigned to Group B's fearless leader Suzanne's blog, Thru the Bugs on My Windshield.  Suzanne has a great sense of humor and some really great recipes that I wanted to try, like Salsa Verde , Chicken Asparagus Penne Pasta Salad, and Blueberry Delight Coffee Cake (which is in the breakfast category, so it doesn't count as sweets.)

In the end, I was fascinated by the idea of Apricot Empanadas and despite my tumultuous relationship with pie crust, selected them as my new recipe to try.

Unfortunately, I forgot to add apricots to my shopping list and when it came time to make them, I realized my distressing mistake.  I didn't have time this week to return to the store.....so I picked something I already had ingredients for in the pantry.  Peanut Butter Cookies.

I know, I know, everyone knows how to make peanut butter cookies.  But seriously, sometimes I get so distracted by the oreo-stuffed, salted caramel drenched, swiss meringue buttercream covered delicacies that I forget the tried and true, simple recipes.

These were awesome.
My husband loved them.
My kids gobbled them up with gusto.
And I relished the soft, slightly chewy cookies with just one prominent flavor, peanut butter.  And the little crunch of sugar on the outside sealed the deal.

Peanut butter cookies should never be forgotten.

P.S. Yes, I've tried the popular 3 ingredient peanut butter cookies - 1 cup pb, 1 cup sugar, 1 egg.  
They're good.  Great if you're in a pinch and out of flour or need to bake gluten free. But these are better.  And don't take much longer.  Really. 

P.P.S. Her recipe said to roll the dough in 1 inch balls and that you'd get 4 dozen cookies.  Apparently I'm incapable of rolling balls that size.....I ended up with just 31 cookies.  And they weren't huge, either.   

Classic Peanut Butter Cookies

1/2 cup butter, room temperature
1/2 cup granulated sugar
1/2 cup packed brown sugar
1/2 cup peanut butter (I used smooth, but crunchy would work also)
1 egg
1 tsp. vanilla extract
1 1/4 cups flour (I used part whole wheat, part all-purpose)
3/4 tsp. baking soda
1/2 tsp. baking powder
1/4 tsp. salt
Granulated sugar, for rolling

Preheat oven to 375°.

Thoroughly cream butter, sugars, peanut butter, egg, and vanilla.  Sift together dry ingredients; blend into creamed mixture.  Shape into small balls; roll in granulated sugar. Place 2" apart on ungreased baking sheet.  Press tops gently with a fork or meat mallet.  Bake for 8-10 minutes, or until set.  Cool slightly; remove from cookie sheet.

Makes 30-40 cookies.

Source: Thru the Bugs on my Windshield, originally from Better Homes and Gardens New Cookbook

We are in the throes of birthday season at my house.
Meaning, three of my five children have October birthdays.
Which translates into a LOT of butter, powdered sugar, and heavy cream, with all the cake and homemade ice cream flying out of my kitchen.

You'd almost think I'd veer away from sweets for my Secret Recipe Club assignment this month. And I honestly tried.  I was assigned to Group B's fearless leader Suzanne's blog, Thru the Bugs on My Windshield.  Suzanne has a great sense of humor and some really great recipes that I wanted to try, like Salsa Verde , Chicken Asparagus Penne Pasta Salad, and Blueberry Delight Coffee Cake (which is in the breakfast category, so it doesn't count as sweets.)

In the end, I was fascinated by the idea of Apricot Empanadas and despite my tumultuous relationship with pie crust, selected them as my new recipe to try.

Unfortunately, I forgot to add apricots to my shopping list and when it came time to make them, I realized my distressing mistake.  I didn't have time this week to return to the store.....so I picked something I already had ingredients for in the pantry.  Peanut Butter Cookies.

I know, I know, everyone knows how to make peanut butter cookies.  But seriously, sometimes I get so distracted by the oreo-stuffed, salted caramel drenched, swiss meringue buttercream covered delicacies that I forget the tried and true, simple recipes.

These were awesome.
My husband loved them.
My kids gobbled them up with gusto.
And I relished the soft, slightly chewy cookies with just one prominent flavor, peanut butter.  And the little crunch of sugar on the outside sealed the deal.

Peanut butter cookies should never be forgotten.

P.S. Yes, I've tried the popular 3 ingredient peanut butter cookies - 1 cup pb, 1 cup sugar, 1 egg.  
They're good.  Great if you're in a pinch and out of flour or need to bake gluten free. But these are better.  And don't take much longer.  Really. 

P.P.S. Her recipe said to roll the dough in 1 inch balls and that you'd get 4 dozen cookies.  Apparently I'm incapable of rolling balls that size.....I ended up with just 31 cookies.  And they weren't huge, either.   

Classic Peanut Butter Cookies

1/2 cup butter, room temperature
1/2 cup granulated sugar
1/2 cup packed brown sugar
1/2 cup peanut butter (I used smooth, but crunchy would work also)
1 egg
1 tsp. vanilla extract
1 1/4 cups flour (I used part whole wheat, part all-purpose)
3/4 tsp. baking soda
1/2 tsp. baking powder
1/4 tsp. salt
Granulated sugar, for rolling

Preheat oven to 375°.

Thoroughly cream butter, sugars, peanut butter, egg, and vanilla.  Sift together dry ingredients; blend into creamed mixture.  Shape into small balls; roll in granulated sugar. Place 2" apart on ungreased baking sheet.  Press tops gently with a fork or meat mallet.  Bake for 8-10 minutes, or until set.  Cool slightly; remove from cookie sheet.

Makes 30-40 cookies.

Source: Thru the Bugs on my Windshield, originally from Better Homes and Gardens New Cookbook
reade more... Résuméabuiyad

Enchilada Stuffed Shells -SRC


Have you ever made a new recipe full of delicious ingredients that you know your family loves yet had skeptical, dubious children take one look and declare,  "I don't LIKE that!" before they've even tasted it?

It drives me crazy.

My 3.5 year old Ellia is a real master at that kind of stuff. If she even thinks a dish might have onions in it, she automatically doesn't want to eat it.  What makes it even worse is that she really doesn't mind onions, it's the 6 year old (Annika) who does.  Ellia just wants to be like Annika, so she has to copy the onion-hating.

There was one time recently that Ellia was eating her peanut butter and jelly sandwich for lunch and she excitedly announced, "You can't even taste the onions!!!!"  

Yep.  I can't taste onions in my PB&J either.  Wonder why that is.

I use onions a lot in my cooking, so there are many opportunities to use that phrase, I suppose.

So there was a small amount of skepticism when this dinner was presented, but once the reluctant eaters were persuaded to take a bite, there were no more complaints and the plates were emptied.  Hurray!  Score for Mom!

Many thanks to Grandma Loy's Kitchen, whose blog I was assigned to for this month's Secret Recipe Club.
Grandma Loy has lots of down-to-earth recipes with simple ingredients and easy preparation - like her Herbed Potato Frittata (which I made a version of on Saturday and it was amazing!), Apple Pear Streusel Pie,  and Easy Pretzel Pralines (definitely trying those this fall).
I have really enjoyed reading through her blog and pinning all sorts of new things to try.

But I couldn't resist this entree option - I love enchiladas and pasta is always a hit with my family.....so I just knew these would be delicious.  When Annika came in and saw me filling the shells, she was less than impressed with how the filling looked....but I made her take a little bite and she was immediately convinced.....this was an awesome meal. :)   She couldn't wait to tell the others how good dinner was going to be!  And we all thoroughly enjoyed it.

I included our favorite enchilada sauce that I use for this recipe - Grandma Loy has her own version that you can also check out.  Or you can just use canned sauce.

P.S.  This would make a GREAT potluck meal.
P.P.S. I bet it would also freeze really well....although I haven't tried it yet.

Enchilada Stuffed Shells
adapted  from Grandma Loy's Kitchen

1 lb ground turkey or beef
1 small onion, chopped
1/2 cup red pepper, chopped
1 large garlic clove, minced
1 1/2 cups frozen whole kernel corn
1 can (15 oz) pinto or black beans, drained and rinsed
4 oz. cream cheese
1 tsp. chili powder
1/2 tsp. cumin
Salt and pepper to taste
2 (10 oz) cans enchilada sauce OR homemade recipe below
20 jumbo pasta shells, cooked according to package directions
2 cups shredded cheese - cheddar and Monterey Jack combined, divided use

Brown ground turkey or beef with onion, red pepper, and garlic.  I like to sprinkle with garlic salt for flavor.  Drain if necessary.  Add corn, beans, cream cheese, chili powder, cumin, salt, and pepper and 2/3 cup enchilada sauce.  Let cook for ~10 minutes.  Cool slightly.  Spoon about 2 heaping Tablespoons meat mixture into each cooked pasta shell. Place in a greased 13 x 9" dish.  Sprinkle each shell with some of the cheese. Pour remaining enchilada sauce over the shells.  Cover with foil and bake for 15 minutes at 350°F. Remove foil and sprinkle with remaining cheese. Bake 5-10 minutes longer.

Makes 10 servings of 2 shells each.

Enchilada Sauce: (makes enough for a double batch of stuffed shells  - freeze half for another time if you don't need a double batch)
2 T. olive oil
1 T. flour
1/4 c. chili powder
2 c. chicken broth
10 oz. tomato paste
1 t. oregano
1 t. cumin
1/2 t. salt

In a large saucepan or skillet, heat 2 T. oil and then add flour, smoothing and stirring with a wooden spoon.  Cook for 1 minute.  Add chili powder and cook for 30 seconds.  Add 2 cups broth, tomato paste, oregano, cumin and salt.  Stir to combine.  Bring to a boil and reduce heat to medium/low. Simmer for 10-15 minutes to allow flavors to develop.


Have you ever made a new recipe full of delicious ingredients that you know your family loves yet had skeptical, dubious children take one look and declare,  "I don't LIKE that!" before they've even tasted it?

It drives me crazy.

My 3.5 year old Ellia is a real master at that kind of stuff. If she even thinks a dish might have onions in it, she automatically doesn't want to eat it.  What makes it even worse is that she really doesn't mind onions, it's the 6 year old (Annika) who does.  Ellia just wants to be like Annika, so she has to copy the onion-hating.

There was one time recently that Ellia was eating her peanut butter and jelly sandwich for lunch and she excitedly announced, "You can't even taste the onions!!!!"  

Yep.  I can't taste onions in my PB&J either.  Wonder why that is.

I use onions a lot in my cooking, so there are many opportunities to use that phrase, I suppose.

So there was a small amount of skepticism when this dinner was presented, but once the reluctant eaters were persuaded to take a bite, there were no more complaints and the plates were emptied.  Hurray!  Score for Mom!

Many thanks to Grandma Loy's Kitchen, whose blog I was assigned to for this month's Secret Recipe Club.
Grandma Loy has lots of down-to-earth recipes with simple ingredients and easy preparation - like her Herbed Potato Frittata (which I made a version of on Saturday and it was amazing!), Apple Pear Streusel Pie,  and Easy Pretzel Pralines (definitely trying those this fall).
I have really enjoyed reading through her blog and pinning all sorts of new things to try.

But I couldn't resist this entree option - I love enchiladas and pasta is always a hit with my family.....so I just knew these would be delicious.  When Annika came in and saw me filling the shells, she was less than impressed with how the filling looked....but I made her take a little bite and she was immediately convinced.....this was an awesome meal. :)   She couldn't wait to tell the others how good dinner was going to be!  And we all thoroughly enjoyed it.

I included our favorite enchilada sauce that I use for this recipe - Grandma Loy has her own version that you can also check out.  Or you can just use canned sauce.

P.S.  This would make a GREAT potluck meal.
P.P.S. I bet it would also freeze really well....although I haven't tried it yet.

Enchilada Stuffed Shells
adapted  from Grandma Loy's Kitchen

1 lb ground turkey or beef
1 small onion, chopped
1/2 cup red pepper, chopped
1 large garlic clove, minced
1 1/2 cups frozen whole kernel corn
1 can (15 oz) pinto or black beans, drained and rinsed
4 oz. cream cheese
1 tsp. chili powder
1/2 tsp. cumin
Salt and pepper to taste
2 (10 oz) cans enchilada sauce OR homemade recipe below
20 jumbo pasta shells, cooked according to package directions
2 cups shredded cheese - cheddar and Monterey Jack combined, divided use

Brown ground turkey or beef with onion, red pepper, and garlic.  I like to sprinkle with garlic salt for flavor.  Drain if necessary.  Add corn, beans, cream cheese, chili powder, cumin, salt, and pepper and 2/3 cup enchilada sauce.  Let cook for ~10 minutes.  Cool slightly.  Spoon about 2 heaping Tablespoons meat mixture into each cooked pasta shell. Place in a greased 13 x 9" dish.  Sprinkle each shell with some of the cheese. Pour remaining enchilada sauce over the shells.  Cover with foil and bake for 15 minutes at 350°F. Remove foil and sprinkle with remaining cheese. Bake 5-10 minutes longer.

Makes 10 servings of 2 shells each.

Enchilada Sauce: (makes enough for a double batch of stuffed shells  - freeze half for another time if you don't need a double batch)
2 T. olive oil
1 T. flour
1/4 c. chili powder
2 c. chicken broth
10 oz. tomato paste
1 t. oregano
1 t. cumin
1/2 t. salt

In a large saucepan or skillet, heat 2 T. oil and then add flour, smoothing and stirring with a wooden spoon.  Cook for 1 minute.  Add chili powder and cook for 30 seconds.  Add 2 cups broth, tomato paste, oregano, cumin and salt.  Stir to combine.  Bring to a boil and reduce heat to medium/low. Simmer for 10-15 minutes to allow flavors to develop.


reade more... Résuméabuiyad

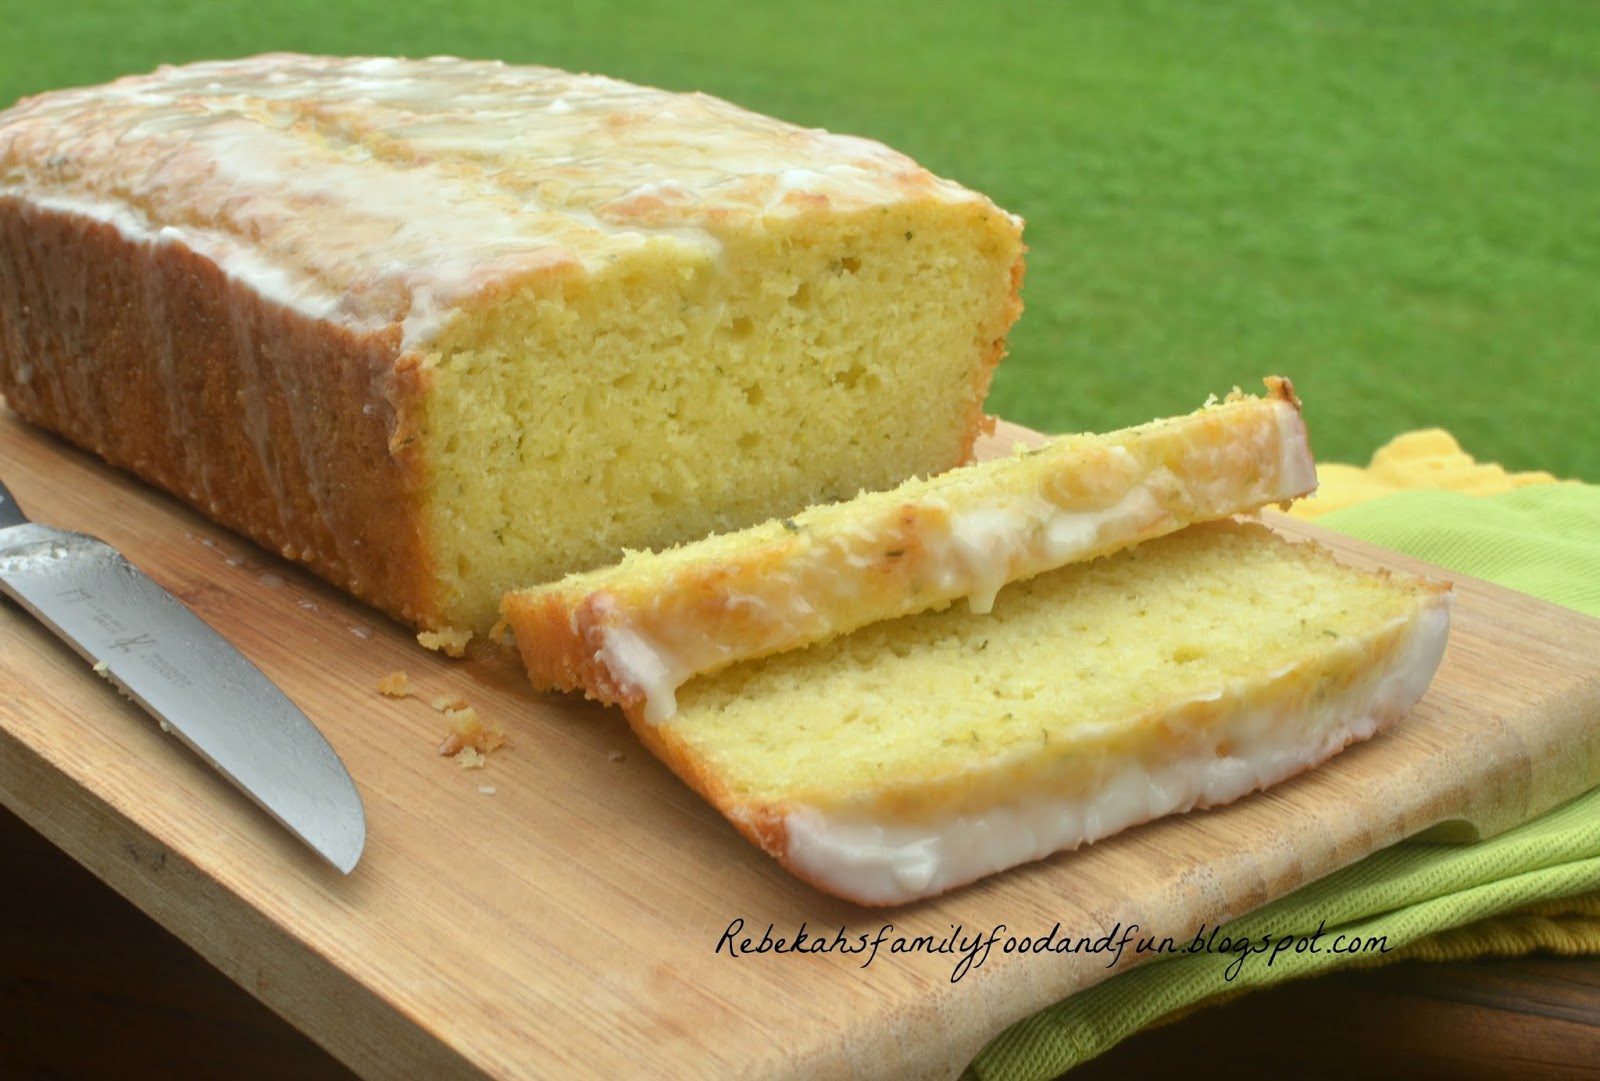
Lemon Zucchini Bread - SRC


This month I had the pleasure of getting introduced to Lea Ann from Cooking...On the Ranch for my Secret Recipe Club assignment. Lea Ann lives in Colorado and has seriously one of the best views in the entire world from her little town.  You HAVE to click over to her About page to see it.  Go ahead....I'll wait.

Didn't I tell you???  Looks like a little piece of heaven to me. I need to go on vacation there.

So I was tempted by so many recipes on her blog - from Chicken Macaroni Salad (definitely making that one soon - I bought the ingredients for it, just haven't gotten to it yet) to this mouth-watering Baked Zucchini and Tomato side dish.....but I had some organic zucchini that was desperately calling to me from the bottom drawer of the fridge to be used soon, and I had never tried Lemon Zucchini Bread before, so that was the big winner.

I was the designated "snack-bringer" to my ladies' Bible study that week, so I decided to double the recipe and share this treat with friends.  And I must say, it was a HUGE hit.  I got loads of compliments from the ladies and kids alike.....and everyone was super surprised that the bread had zucchini in it.

That's mostly because of an error I made.

See, I just got my first food processor a few weeks ago and was super excited to use it to shred the zucchini. Sooooo much faster than hand-grating it, right?
But silly me, I neglected to take the blade out of the bottom of the processor, so the zucchini got not only grated, but basically pureed.  It was a nice, fine pulp.

I just tossed it in the bread anyways and it essentially disappeared.  I don't think anyone would have guessed that there was zucchini in the bread - but it definitely did its magic of adding moisture to the bread.

The best part was the glaze - the tangy, vibrant lemon glaze.  It just made the bread explode with flavor.

You really have to try it - Lea Ann swore it was amazing and she was Oh. So. Right.
Definitely double the recipe - you'll be so glad you did.

Next year I am totally planting some zucchini in my yard so I can make this bread all summer long.


Lemon Zucchini Bread
Adapted slightly from Cooking...On the Ranch
(makes one 9x5" loaf)

2 cups unbleached all-purpose flour
2 tsp. baking powder
1/2 tsp. salt
2 eggs
1/2 cup oil (I used expeller-pressed coconut oil)
2/3 cup sugar
1/2 cup buttermilk
Juice of 1 lemon (or 2 Tbsp. lemon juice)
Zest of 1 lemon
1 cup grated zucchini

Glaze:
1 cup powdered sugar
Juice of half a lemon (or 1 Tbsp. lemon juice)

Preheat oven to 350°.
In a large bowl, blend flour, baking powder, and salt; set aside.
In a medium bowl, beat 2 eggs well, then add oil and sugar and blend well.  Add the buttermilk, lemon juice and lemon zest and stir to combine.  Fold in the zucchini.
Add wet mixture to dry mixture and blend gently; don't over mix.
Pour batter into a greased 9x5" loaf pan and bake for 40-50 minutes, or until a toothpick inserted in center comes out clean.  Cool in pan 10 minutes, then remove to a wire rack to cool completely.

Combine glaze ingredients in a small bowl - add more juice or sugar if necessary to make a good drizzling consistency.  You don't want it really thick, but super liquidy isn't good either!  Spoon glaze over bread evenly and let set before serving.

    This month I had the pleasure of getting introduced to Lea Ann from Cooking...On the Ranch for my Secret Recipe Club assignment. Lea Ann lives in Colorado and has seriously one of the best views in the entire world from her little town.  You HAVE to click over to her About page to see it.  Go ahead....I'll wait.

    Didn't I tell you???  Looks like a little piece of heaven to me. I need to go on vacation there.

    So I was tempted by so many recipes on her blog - from Chicken Macaroni Salad (definitely making that one soon - I bought the ingredients for it, just haven't gotten to it yet) to this mouth-watering Baked Zucchini and Tomato side dish.....but I had some organic zucchini that was desperately calling to me from the bottom drawer of the fridge to be used soon, and I had never tried Lemon Zucchini Bread before, so that was the big winner.

    I was the designated "snack-bringer" to my ladies' Bible study that week, so I decided to double the recipe and share this treat with friends.  And I must say, it was a HUGE hit.  I got loads of compliments from the ladies and kids alike.....and everyone was super surprised that the bread had zucchini in it.

    That's mostly because of an error I made.

    See, I just got my first food processor a few weeks ago and was super excited to use it to shred the zucchini. Sooooo much faster than hand-grating it, right?
    But silly me, I neglected to take the blade out of the bottom of the processor, so the zucchini got not only grated, but basically pureed.  It was a nice, fine pulp.

    I just tossed it in the bread anyways and it essentially disappeared.  I don't think anyone would have guessed that there was zucchini in the bread - but it definitely did its magic of adding moisture to the bread.

    The best part was the glaze - the tangy, vibrant lemon glaze.  It just made the bread explode with flavor.

    You really have to try it - Lea Ann swore it was amazing and she was Oh. So. Right.
    Definitely double the recipe - you'll be so glad you did.

    Next year I am totally planting some zucchini in my yard so I can make this bread all summer long.


    Lemon Zucchini Bread
    Adapted slightly from Cooking...On the Ranch
    (makes one 9x5" loaf)

    2 cups unbleached all-purpose flour
    2 tsp. baking powder
    1/2 tsp. salt
    2 eggs
    1/2 cup oil (I used expeller-pressed coconut oil)
    2/3 cup sugar
    1/2 cup buttermilk
    Juice of 1 lemon (or 2 Tbsp. lemon juice)
    Zest of 1 lemon
    1 cup grated zucchini

    Glaze:
    1 cup powdered sugar
    Juice of half a lemon (or 1 Tbsp. lemon juice)

    Preheat oven to 350°.
    In a large bowl, blend flour, baking powder, and salt; set aside.
    In a medium bowl, beat 2 eggs well, then add oil and sugar and blend well.  Add the buttermilk, lemon juice and lemon zest and stir to combine.  Fold in the zucchini.
    Add wet mixture to dry mixture and blend gently; don't over mix.
    Pour batter into a greased 9x5" loaf pan and bake for 40-50 minutes, or until a toothpick inserted in center comes out clean.  Cool in pan 10 minutes, then remove to a wire rack to cool completely.

    Combine glaze ingredients in a small bowl - add more juice or sugar if necessary to make a good drizzling consistency.  You don't want it really thick, but super liquidy isn't good either!  Spoon glaze over bread evenly and let set before serving.
      reade more... Résuméabuiyad

      Busy Day Goulash - SRC


      We have really been loving our new church and getting to know the families there.  It's not a big church, probably around 200 people or so.  I recently became acquainted with a really great lady named Ginny.  Shortly after, we became Facebook friends - and I saw on her page that she had a food blog, Cooking with Chopin, Living with Elmo.

      "That's awesome!" I thought to myself. "We have something else in common!"

      As I browsed through her blog, admiring her fantastic recipes and gorgeous photography, it quickly became apparent that Ginny and I had something else in common.

      She is a member of the Secret Recipe Club also!!

      She's in Group A - and I hadn't run across her before.  It was such a thrill to both of us to discover that we actually met someone in person who was a member of the club.  What are the odds, ya know?  Super cool.

      Anyway.  On to July's feature.

      I had the great pleasure of being assigned to Miz Helen's Country Cottage  for the Secret Recipe Club this month.  This delightful lady is just the sort of person you'd love to have as a next door neighbor.  A mom of 7, grandma to 13, and great-grandma to 3, she's gifted with hospitality, has gorgeous gardens and landscaping, something scrumptious always baking, and has tips for home-keeping from canning to meal-planning.  Not to mention a lengthy list of recipes, with tempting titles like Key Lime Cake, Cream Puffs, and Baked Tilapia Cakes.

      Now if only I can get her to move from Texas to Northwest Arkansas......

      This Busy Day Goulash jumped out at me.....because as a mom of 5 kids, I have lots of busy days.  Don't we all???  And I love using my slow-cooker in the summer - saves heating up the oven and all that jazz.

      This dinner is easy to get together and cooks in just a few hours. It's a great combination of meat, veggies, pasta, and cheese, making a very satisfying meal that will please the whole crew.

      I changed just a few things, using vegetable broth instead of beef and omitting 2 tsp. cinnamon (I just didn't think my family would like that....).

      My only issue was that the pasta was a little overcooked - my family didn't complain and rather liked the noodles a little mushy - but I would have preferred them a bit firmer. That could just be because my slow-cooker cooks really hot and fast.  So next time I'll wait an hour or so to add the pasta.

      All in all, it was a great meal that lasted us for two dinners and I will definitely add it to the menu rotation.

      Thanks, Miz Helen!!

      Busy Day Goulash
      adapted slightly from Miz Helen's Country Cottage

      2 lbs lean ground beef or ground turkey
      2 medium onions, chopped
      1 green pepper, chopped
      1 1/2 cups tomato sauce or 1 (14 oz) can
      1 3/4  cups frozen corn
      1 qt. vegetable broth or beef broth
      1 Tbsp. chili powder
      1 Tbsp. oregano
      1 Tbsp. parsley
      2 tsp. cinnamon (I omitted)
      2 cups dry pasta (I used Cellentani)
      Salt and Pepper to taste
      Dash of Cayenne pepper
      1 cup sharp cheddar cheese, grated
      1 cup Monterrey Jack cheese, grated

      Brown ground turkey, onion, and pepper in a hot skillet.  Add 1/2 cup water to the skillet to remove all the goodies from the bottom if you want. Pour the mixture into the slow cooker.  Add the remaining ingredients, except for cheese.  Mix well and cover the slow cooker.  (Note: I will add the pasta after the first hour next time)
      Cook on high for 1 hour, then on low for 3 hours.  At the end of 3 hours, put the cheeses on top of the Goulash, replace the lid and cook for 30 more minutes on low.

      We have really been loving our new church and getting to know the families there.  It's not a big church, probably around 200 people or so.  I recently became acquainted with a really great lady named Ginny.  Shortly after, we became Facebook friends - and I saw on her page that she had a food blog, Cooking with Chopin, Living with Elmo.

      "That's awesome!" I thought to myself. "We have something else in common!"

      As I browsed through her blog, admiring her fantastic recipes and gorgeous photography, it quickly became apparent that Ginny and I had something else in common.

      She is a member of the Secret Recipe Club also!!

      She's in Group A - and I hadn't run across her before.  It was such a thrill to both of us to discover that we actually met someone in person who was a member of the club.  What are the odds, ya know?  Super cool.

      Anyway.  On to July's feature.

      I had the great pleasure of being assigned to Miz Helen's Country Cottage  for the Secret Recipe Club this month.  This delightful lady is just the sort of person you'd love to have as a next door neighbor.  A mom of 7, grandma to 13, and great-grandma to 3, she's gifted with hospitality, has gorgeous gardens and landscaping, something scrumptious always baking, and has tips for home-keeping from canning to meal-planning.  Not to mention a lengthy list of recipes, with tempting titles like Key Lime Cake, Cream Puffs, and Baked Tilapia Cakes.

      Now if only I can get her to move from Texas to Northwest Arkansas......

      This Busy Day Goulash jumped out at me.....because as a mom of 5 kids, I have lots of busy days.  Don't we all???  And I love using my slow-cooker in the summer - saves heating up the oven and all that jazz.

      This dinner is easy to get together and cooks in just a few hours. It's a great combination of meat, veggies, pasta, and cheese, making a very satisfying meal that will please the whole crew.

      I changed just a few things, using vegetable broth instead of beef and omitting 2 tsp. cinnamon (I just didn't think my family would like that....).

      My only issue was that the pasta was a little overcooked - my family didn't complain and rather liked the noodles a little mushy - but I would have preferred them a bit firmer. That could just be because my slow-cooker cooks really hot and fast.  So next time I'll wait an hour or so to add the pasta.

      All in all, it was a great meal that lasted us for two dinners and I will definitely add it to the menu rotation.

      Thanks, Miz Helen!!

      Busy Day Goulash
      adapted slightly from Miz Helen's Country Cottage

      2 lbs lean ground beef or ground turkey
      2 medium onions, chopped
      1 green pepper, chopped
      1 1/2 cups tomato sauce or 1 (14 oz) can
      1 3/4  cups frozen corn
      1 qt. vegetable broth or beef broth
      1 Tbsp. chili powder
      1 Tbsp. oregano
      1 Tbsp. parsley
      2 tsp. cinnamon (I omitted)
      2 cups dry pasta (I used Cellentani)
      Salt and Pepper to taste
      Dash of Cayenne pepper
      1 cup sharp cheddar cheese, grated
      1 cup Monterrey Jack cheese, grated

      Brown ground turkey, onion, and pepper in a hot skillet.  Add 1/2 cup water to the skillet to remove all the goodies from the bottom if you want. Pour the mixture into the slow cooker.  Add the remaining ingredients, except for cheese.  Mix well and cover the slow cooker.  (Note: I will add the pasta after the first hour next time)
      Cook on high for 1 hour, then on low for 3 hours.  At the end of 3 hours, put the cheeses on top of the Goulash, replace the lid and cook for 30 more minutes on low.
      reade more... Résuméabuiyad

      Quick Lemon Cake - SRC


      Welcome to summer!

      We finished up school a couple of weeks ago, just in time for our visit from Grant's parents (all the way from California).  This was their first visit to my home state of Arkansas and we had a great time exploring around, boating on a couple of area lakes, touring museums, and even taking a short vacation to Branson.  It was a terrific way to kick-start our summer break.

      For my Secret Recipe Club assignment this month, I had the pleasure of perusing Jane's Adventures in Dinner, where Jane, who was trained as a chef and is now a teacher, has an amazing collection of scrumptious sounding recipes......like Smoked Chicken and Cheese Popovers, Slow cooker Chicken Parmesan, and  Oven Fried Onion Rings among many others.

      But I just couldn't resist the appeal of this quick and easy Lemon Cake.  One of the flavors that just screams "Summer!" to me is lemon.  Creamy lemon bars, ice-cold glasses of lemonade, lemon cookies.....everything bright and fresh. Well, if you can stand heating up the oven to bake, a lemon cake is a wonderful treat to enjoy.....pretty much any time.

      Jane calls  it a "Two Minute" cake.....not because it is fast to whip up, but because it disappears in about two minutes.  I enforced portion control and managed to make it last over two meals - but I'm sure my kiddos would  have devoured the whole thing in a single sitting if I had let them.

      It's a dense cake - with the surprising addition of cornmeal.  It has no oil or butter - but is made moist by lots of yogurt.  I just used plain, but I'm sure you could use vanilla or even lemon yogurt with great results.
      My favorite part was the glaze - bursting with flavor from the lemon zest and juice....it just complements the cake perfectly.

      Quick Lemon Cake
      adapted slightly from Jane's Adventures in Dinner

      Cake:
      2 cups plain yogurt
      Zest and juice from 1 large lemon
      2 eggs
      1 cup sugar
      1 tsp. baking powder
      1 tsp. baking soda
      3/4 cup cornmeal
      2-1/2 cups all-purpose flour

      Glaze:
      Zest and juice from 1 large lemon
      1 cup powdered sugar, sifted

      Preheat oven to 350°.
      Butter and flour a bundt pan - set aside.
      In a large mixing bowl, combine yogurt, lemon zest and juice, eggs, and sugar.  Stir well.  Add in the baking powder, baking soda, cornmeal, and flour.  Fold gently until combined.  Don't overstir.  Pour into prepared pan and bake for 30-35 minutes, or until a toothpick comes out clean.
      Cool for a few minutes in the pan, then loosen edges and remove from pan to a platter.
      Use a toothpick to poke little holes all over the top of the cake.
      In a small bowl, combine lemon juice and zest with powdered sugar.  Pour slowly over warm cake.  The glaze will sink in and basically disappear....but don't worry, you'll still taste it!


      Welcome to summer!

      We finished up school a couple of weeks ago, just in time for our visit from Grant's parents (all the way from California).  This was their first visit to my home state of Arkansas and we had a great time exploring around, boating on a couple of area lakes, touring museums, and even taking a short vacation to Branson.  It was a terrific way to kick-start our summer break.

      For my Secret Recipe Club assignment this month, I had the pleasure of perusing Jane's Adventures in Dinner, where Jane, who was trained as a chef and is now a teacher, has an amazing collection of scrumptious sounding recipes......like Smoked Chicken and Cheese Popovers, Slow cooker Chicken Parmesan, and  Oven Fried Onion Rings among many others.

      But I just couldn't resist the appeal of this quick and easy Lemon Cake.  One of the flavors that just screams "Summer!" to me is lemon.  Creamy lemon bars, ice-cold glasses of lemonade, lemon cookies.....everything bright and fresh. Well, if you can stand heating up the oven to bake, a lemon cake is a wonderful treat to enjoy.....pretty much any time.

      Jane calls  it a "Two Minute" cake.....not because it is fast to whip up, but because it disappears in about two minutes.  I enforced portion control and managed to make it last over two meals - but I'm sure my kiddos would  have devoured the whole thing in a single sitting if I had let them.

      It's a dense cake - with the surprising addition of cornmeal.  It has no oil or butter - but is made moist by lots of yogurt.  I just used plain, but I'm sure you could use vanilla or even lemon yogurt with great results.
      My favorite part was the glaze - bursting with flavor from the lemon zest and juice....it just complements the cake perfectly.

      Quick Lemon Cake
      adapted slightly from Jane's Adventures in Dinner

      Cake:
      2 cups plain yogurt
      Zest and juice from 1 large lemon
      2 eggs
      1 cup sugar
      1 tsp. baking powder
      1 tsp. baking soda
      3/4 cup cornmeal
      2-1/2 cups all-purpose flour

      Glaze:
      Zest and juice from 1 large lemon
      1 cup powdered sugar, sifted

      Preheat oven to 350°.
      Butter and flour a bundt pan - set aside.
      In a large mixing bowl, combine yogurt, lemon zest and juice, eggs, and sugar.  Stir well.  Add in the baking powder, baking soda, cornmeal, and flour.  Fold gently until combined.  Don't overstir.  Pour into prepared pan and bake for 30-35 minutes, or until a toothpick comes out clean.
      Cool for a few minutes in the pan, then loosen edges and remove from pan to a platter.
      Use a toothpick to poke little holes all over the top of the cake.
      In a small bowl, combine lemon juice and zest with powdered sugar.  Pour slowly over warm cake.  The glaze will sink in and basically disappear....but don't worry, you'll still taste it!


      reade more... Résuméabuiyad

      Enchilada Meatballs - SRC


      Happy Belated Mothers Day to all of you dedicated, terrific moms.  I hope your day was full of blessings with your family.  

      We have a Mother's Day tradition of going out for Mexican food around dinner time. It all started the first year we were in Virginia, which was my first Mother's Day as a mom.  We were originally going to the Outback for dinner, but upon discovering the wait was 2 hours, we changed our mind real quick on that one.  

      A quick drive around that part of town revealed that all the restaurants were packed to the gills.  
      We had a 6 month old with us....and waiting super long was not an option.  We ended up deciding to try this small Mexican restaurant in another part of town and were delighted to get seated right away, served quickly, had a delicious meal, and even got 1/2 price for my meal.  Oh, and a free dessert for me.  :)  And I just remembered - Corban drank from a straw for the first time at the restaurant that night.  We were so impressed at such a young baby doing that.  
      We were out of there and home watching the season finale of Survivor (yes, I'm an addict) before we even would have been seated at the Outback.  

      So our tradition has continued to this day.  And I love it! 
      This year we got the pleasure of being with my parents and younger sister also, which made it even better.  

      Tex-Mex cuisine has always been a favorite of mine, and fortunately Grant and the kids agree.  So it wasn't hard to pick something fun like Enchilada Meatballs for my Secret Recipe Club feature this month.
        
      My assigned blog was Angela's Kitchen, which is an amazing resource for anyone looking for gluten-free or dairy-free recipes.  Angela is quite the expert in gluten and dairy free recipe development and living and teaches classes, consults, and speaks in various outlets.  

      She has lots of recipes that interest me......such as Sundried Tomato Stuffed Chicken,  Teriyaki Chicken,
      and Better Than Nutrigrain Bars...and even plenty of baked goods, although most of those required specialty ingredients that I don't have on hand.  

      I did not make these meatballs gluten free or dairy free - I had my regular cornbread leftover from dinner the night before and I used real cheddar cheese on top, but Angela's recipe will tell you how to do it if you desire. 

      We loved the meatballs - they are moist and just a little spicy - which can be altered depending on what kind of enchilada sauce you use. They make a great dinner served with Mexican rice and a salad, or they would be a fun appetizer or hor d'oeurve for a party as well.  

      Enchilada Meatballs
      adapted from Angela's Kitchen

      2 pounds ground turkey or beef
      2 cups crumbled corn bread (I used leftovers of this recipe)
      1/4 cup minced fresh cilantro (I omitted - hubby doesn't like it)
      1/2 tsp. salt
      1/2 tsp. ground black pepper
      2 cups enchilada sauce, divided (I used homemade from this recipe)
      Shredded sharp cheddar cheese - optional

      Preheat oven to 350°F.  
      In a large bowl, mix together, ground turkey, corn bread, cilantro (if using), salt, pepper, and 1/2 cup enchilada sauce. Form into 1-inch meatballs with your hands, or use a medium cookie scoop, which I prefer.   Put meatballs on a rack on a rimmed baking sheet, or just line the sheet with foil and place the meatballs on that.  Bake for 15-20 minutes, until cooked through.  Put in a serving dish.

      Heat remaining enchilada sauce and pour over meatballs.  Sprinkle with cheddar cheese and snipped cilantro if desired.  

      ------------------------------------------------------------------------------------------------------------
      To freeze: After cooking, allow meatballs to cool completely.  Place in a large freezer bag, remove as much air as possible, seal, label, and freeze. Put remaining enchilada sauce in a smaller freezer bag, removing as much air as possible, seal, and freeze. Package both bags together.

      To serve: Thaw.  Pour sauce over meatballs in a baking dish or sauce pan. Heat through.


      Happy Belated Mothers Day to all of you dedicated, terrific moms.  I hope your day was full of blessings with your family.  

      We have a Mother's Day tradition of going out for Mexican food around dinner time. It all started the first year we were in Virginia, which was my first Mother's Day as a mom.  We were originally going to the Outback for dinner, but upon discovering the wait was 2 hours, we changed our mind real quick on that one.  

      A quick drive around that part of town revealed that all the restaurants were packed to the gills.  
      We had a 6 month old with us....and waiting super long was not an option.  We ended up deciding to try this small Mexican restaurant in another part of town and were delighted to get seated right away, served quickly, had a delicious meal, and even got 1/2 price for my meal.  Oh, and a free dessert for me.  :)  And I just remembered - Corban drank from a straw for the first time at the restaurant that night.  We were so impressed at such a young baby doing that.  
      We were out of there and home watching the season finale of Survivor (yes, I'm an addict) before we even would have been seated at the Outback.  

      So our tradition has continued to this day.  And I love it! 
      This year we got the pleasure of being with my parents and younger sister also, which made it even better.  

      Tex-Mex cuisine has always been a favorite of mine, and fortunately Grant and the kids agree.  So it wasn't hard to pick something fun like Enchilada Meatballs for my Secret Recipe Club feature this month.
        
      My assigned blog was Angela's Kitchen, which is an amazing resource for anyone looking for gluten-free or dairy-free recipes.  Angela is quite the expert in gluten and dairy free recipe development and living and teaches classes, consults, and speaks in various outlets.  

      She has lots of recipes that interest me......such as Sundried Tomato Stuffed Chicken,  Teriyaki Chicken,
      and Better Than Nutrigrain Bars...and even plenty of baked goods, although most of those required specialty ingredients that I don't have on hand.  

      I did not make these meatballs gluten free or dairy free - I had my regular cornbread leftover from dinner the night before and I used real cheddar cheese on top, but Angela's recipe will tell you how to do it if you desire. 

      We loved the meatballs - they are moist and just a little spicy - which can be altered depending on what kind of enchilada sauce you use. They make a great dinner served with Mexican rice and a salad, or they would be a fun appetizer or hor d'oeurve for a party as well.  

      Enchilada Meatballs
      adapted from Angela's Kitchen

      2 pounds ground turkey or beef
      2 cups crumbled corn bread (I used leftovers of this recipe)
      1/4 cup minced fresh cilantro (I omitted - hubby doesn't like it)
      1/2 tsp. salt
      1/2 tsp. ground black pepper
      2 cups enchilada sauce, divided (I used homemade from this recipe)
      Shredded sharp cheddar cheese - optional

      Preheat oven to 350°F.  
      In a large bowl, mix together, ground turkey, corn bread, cilantro (if using), salt, pepper, and 1/2 cup enchilada sauce. Form into 1-inch meatballs with your hands, or use a medium cookie scoop, which I prefer.   Put meatballs on a rack on a rimmed baking sheet, or just line the sheet with foil and place the meatballs on that.  Bake for 15-20 minutes, until cooked through.  Put in a serving dish.

      Heat remaining enchilada sauce and pour over meatballs.  Sprinkle with cheddar cheese and snipped cilantro if desired.  

      ------------------------------------------------------------------------------------------------------------
      To freeze: After cooking, allow meatballs to cool completely.  Place in a large freezer bag, remove as much air as possible, seal, label, and freeze. Put remaining enchilada sauce in a smaller freezer bag, removing as much air as possible, seal, and freeze. Package both bags together.

      To serve: Thaw.  Pour sauce over meatballs in a baking dish or sauce pan. Heat through.

      reade more... Résuméabuiyad

      No-Knead Dinner Rolls - SRC


      I am not capable of a low-carb diet.  
      There, I said it.

      I can avoid processed foods with no problem, but you'd better believe I am more than happy to make and bake from-scratch carbohydrate delights.  And I don't think they're the enemy.  I just think all things should be eaten in moderation.

      These dinner rolls were so yummy, my family found it hard to eat them in moderation. I made them for Resurrection Sunday dinner, for which we had 5 adult family members joining us.  I only made a half batch (24) because I thought that would be plenty, with all the other food we were consuming.  Although we did have 3 left over, I think if I had made all 48 rolls, lots more would have been eaten.  And there were great disputes over who got to eat those 3 rolls the next day.

      I enjoyed perusing Betcha Can't Eat Just One  as my assigned blog for the Secret Recipe Club this month.  Katie  has some incredible baked goods and seriously MAD cake decorating skills.  I was so tempted by her Neopolitan Whoopie Pies and  I am totally making these Peanut Butter Cups as soon as I can come up with an excuse for them.

      But in the end, these dinner rolls made the cut for being my highlighted recipe from her blog.  I am so glad I made them!  I've been wanting to make my own crescent rolls for ages and for whatever reason, never got around to it.  The fact that these require no kneading and no electric mixer was a huge draw - I don't mind kneading or anything, but just that extra time and effort can be a deterrent in making my own bread sometimes.  I did cut down a little on the butter in the dough, and used half white whole wheat flour, although you can certainly use only all-purpose if you prefer.

      The rolls are tender and just faintly sweet.  I'll try making them with honey also.....I love bread with honey.
      They're a perfect accompaniment to just about any entree and I'm sure a basket of them would disappear in no time.

      My kids are begging me to make these rolls again soon.....and I'm looking forward to it!

      No-Knead Dinner Rolls
      adapted slightly from Betcha Can't Eat Just One
      Makes 48 rolls - can be easily cut in half for 24 rolls (still use 1 egg)

      1-1/2 cups milk
      5 Tbs. butter
      1/3 cup sugar + 1 Tbsp.
      2 cups warm water
      2 Tbsp. yeast
      1 Tbsp. salt
      1 egg
      9-10 cups flour (I used half all-purpose, half white whole wheat)
      1/4 - 1/2 cup butter (I went on the lighter side here, but I'm sure the whole amount would be delicious!)

      Start by scalding the milk with 5 Tbsp. butter and 1/3 cup sugar. You can do this for 2 minutes in the microwave or use a pot on the stove.  Cut the butter into pieces for easier melting, but don't worry if it doesn't melt completely.

      Stir 1-2 cups of flour into the hot milk mixture to cool it down a bit.  Once you know it's not really hot, stir in the egg and salt.  KEEP track of how much flour you're adding!!!

      In a large bowl, combine the warm water with the yeast and remaining Tbsp. sugar.  Add the milk mixture to the yeast mixture and stir it all together with a wooden spoon.  Add the remaining flour and mix until all the flour has been moistened. The dough will be fairly sticky.

      Cover with a moist dish towel or greased plastic wrap and set in a warm place (I prefer my oven with the light on) to rise for 1 hour or until doubled.

      Line two sheet pans with parchment paper or grease them very well.

      Gently deflate the dough and remove from the bowl onto a lightly floured work area.  Divide into 4 equal sections.

      Roll each section into a circle, about the size of a large dinner plate. Smear each circle of dough with softened butter - I used about 1 Tbsp. but you can use more if you want.

      Using a bench scraper or a pizza cutter, divide the dough into 4 wedges.  Cut each wedge into 3 sections.

      Roll up each section from the wide edge of the triangle.  Place fairly close together on the baking sheet with the tail of the triangle on tucked under the bottom. Place 24 rolls on each pan.

      Let rise for 1 hour or until doubled in size.  Preheat oven to 350°F. Bake rolls for 15-20 minutes or until  golden brown.

      Once removed from oven, run a stick of butter over the tops of the rolls for a delicious buttery glaze!

      I am not capable of a low-carb diet.  
      There, I said it.

      I can avoid processed foods with no problem, but you'd better believe I am more than happy to make and bake from-scratch carbohydrate delights.  And I don't think they're the enemy.  I just think all things should be eaten in moderation.

      These dinner rolls were so yummy, my family found it hard to eat them in moderation. I made them for Resurrection Sunday dinner, for which we had 5 adult family members joining us.  I only made a half batch (24) because I thought that would be plenty, with all the other food we were consuming.  Although we did have 3 left over, I think if I had made all 48 rolls, lots more would have been eaten.  And there were great disputes over who got to eat those 3 rolls the next day.

      I enjoyed perusing Betcha Can't Eat Just One  as my assigned blog for the Secret Recipe Club this month.  Katie  has some incredible baked goods and seriously MAD cake decorating skills.  I was so tempted by her Neopolitan Whoopie Pies and  I am totally making these Peanut Butter Cups as soon as I can come up with an excuse for them.

      But in the end, these dinner rolls made the cut for being my highlighted recipe from her blog.  I am so glad I made them!  I've been wanting to make my own crescent rolls for ages and for whatever reason, never got around to it.  The fact that these require no kneading and no electric mixer was a huge draw - I don't mind kneading or anything, but just that extra time and effort can be a deterrent in making my own bread sometimes.  I did cut down a little on the butter in the dough, and used half white whole wheat flour, although you can certainly use only all-purpose if you prefer.

      The rolls are tender and just faintly sweet.  I'll try making them with honey also.....I love bread with honey.
      They're a perfect accompaniment to just about any entree and I'm sure a basket of them would disappear in no time.

      My kids are begging me to make these rolls again soon.....and I'm looking forward to it!

      No-Knead Dinner Rolls
      adapted slightly from Betcha Can't Eat Just One
      Makes 48 rolls - can be easily cut in half for 24 rolls (still use 1 egg)

      1-1/2 cups milk
      5 Tbs. butter
      1/3 cup sugar + 1 Tbsp.
      2 cups warm water
      2 Tbsp. yeast
      1 Tbsp. salt
      1 egg
      9-10 cups flour (I used half all-purpose, half white whole wheat)
      1/4 - 1/2 cup butter (I went on the lighter side here, but I'm sure the whole amount would be delicious!)

      Start by scalding the milk with 5 Tbsp. butter and 1/3 cup sugar. You can do this for 2 minutes in the microwave or use a pot on the stove.  Cut the butter into pieces for easier melting, but don't worry if it doesn't melt completely.

      Stir 1-2 cups of flour into the hot milk mixture to cool it down a bit.  Once you know it's not really hot, stir in the egg and salt.  KEEP track of how much flour you're adding!!!

      In a large bowl, combine the warm water with the yeast and remaining Tbsp. sugar.  Add the milk mixture to the yeast mixture and stir it all together with a wooden spoon.  Add the remaining flour and mix until all the flour has been moistened. The dough will be fairly sticky.

      Cover with a moist dish towel or greased plastic wrap and set in a warm place (I prefer my oven with the light on) to rise for 1 hour or until doubled.

      Line two sheet pans with parchment paper or grease them very well.

      Gently deflate the dough and remove from the bowl onto a lightly floured work area.  Divide into 4 equal sections.

      Roll each section into a circle, about the size of a large dinner plate. Smear each circle of dough with softened butter - I used about 1 Tbsp. but you can use more if you want.

      Using a bench scraper or a pizza cutter, divide the dough into 4 wedges.  Cut each wedge into 3 sections.

      Roll up each section from the wide edge of the triangle.  Place fairly close together on the baking sheet with the tail of the triangle on tucked under the bottom. Place 24 rolls on each pan.

      Let rise for 1 hour or until doubled in size.  Preheat oven to 350°F. Bake rolls for 15-20 minutes or until  golden brown.

      Once removed from oven, run a stick of butter over the tops of the rolls for a delicious buttery glaze!
      reade more... Résuméabuiyad

      SRC: Eggless Chocolate Cake with Peanut Butter Frosting


      I am very thankful that none of my children have food allergies.  A couple of my older brother's children do and it can make things rather challenging.  This cake, for example, would be a no-no because of the peanut butter frosting.  However, the cake unfrosted would be a great option for my niece Eva, since she's allergic to dairy and eggs....and this cake has neither.  That's really hard to find in baked goods.

      That's why I chose this recipe to make for the Secret Recipe Club this month.  The blog I was assigned is called This Mama Cooks, where Anne-Marie's mission is to help busy families get on the road to living a more healthy lifestyle by sharing good-for-you recipes and lifestyle tips.  She even covers health topics like vitamins and nutrition, dental health and braces, skin products, exercise, and weight loss.  

      I found several recipes I want to try, like Chicken, Sweet Potato and Apple Skillet, Slow Cooker Machaca Beef , and Huevos Rancheros.... but I just couldn't resist trying an eggless cake.  I made one about 10 years ago and remember really liking it......but for some reason hadn't made it again.  So I figured it was about time I gave it a shot again.  

      I really like this cake.  Now, I'm not gonna lie, it won't replace Hershey's Dark Chocolate Cake as my favorite go-to chocolate cake recipe,  but it is a delicious alternative and sure does accommodate people with allergies better.  And even if you don't have allergies, it's great to make if you're having that cake craving and don't have an egg in the house.  

      I did change up the frosting recipe, by using my favorite peanut butter frosting from Ina Garten......one that I also used on my birthday cake last year.  But really you could use whatever frosting you like.  

      Eggless Chocolate Cake with Peanut Butter Frosting
      (Cake from This Mama Cooks, frosting from Ina Garten)

      3 cups flour
      2 cups sugar
      1 tsp. salt
      1 tsp. baking soda
      9 Tbs. cocoa, sifted (1/2 cup plus 1 Tbs)
      2 cups cold water
      2 Tbs. white vinegar
      3/4 cup oil (I used expeller pressed coconut oil)
      2 tsp. vanilla extract

      Preheat oven to 350°.
      Mix all ingredients in a large bowl using an electric mixer.  Combine well, but don't overbeat.
      Pour into a greased 13 x 9 baking pan.
      Bake for 30-40 minutes, or until a toothpick comes out clean.
      Cool completely before frosting.


      Peanut Butter Frosting: 
      1 cup powdered sugar
      1 cup creamy peanut butter
      5 Tbs. unsalted butter, room temperature
      3/4 tsp. vanilla extract
      1/4 tsp. salt
      1/3 cup heavy cream
      Grated chocolate for garnish, optional

      Place the sugar, peanut butter, butter, vanilla, and salt in the bowl of an electric mixer fitted with a paddle attachment.  Mix on medium-low speed until creamy, scraping down the bowl with a rubber spatula as you work.  Add the cream and beat on high speed until the mixture is light and smooth.


      I am very thankful that none of my children have food allergies.  A couple of my older brother's children do and it can make things rather challenging.  This cake, for example, would be a no-no because of the peanut butter frosting.  However, the cake unfrosted would be a great option for my niece Eva, since she's allergic to dairy and eggs....and this cake has neither.  That's really hard to find in baked goods.

      That's why I chose this recipe to make for the Secret Recipe Club this month.  The blog I was assigned is called This Mama Cooks, where Anne-Marie's mission is to help busy families get on the road to living a more healthy lifestyle by sharing good-for-you recipes and lifestyle tips.  She even covers health topics like vitamins and nutrition, dental health and braces, skin products, exercise, and weight loss.  

      I found several recipes I want to try, like Chicken, Sweet Potato and Apple Skillet, Slow Cooker Machaca Beef , and Huevos Rancheros.... but I just couldn't resist trying an eggless cake.  I made one about 10 years ago and remember really liking it......but for some reason hadn't made it again.  So I figured it was about time I gave it a shot again.  

      I really like this cake.  Now, I'm not gonna lie, it won't replace Hershey's Dark Chocolate Cake as my favorite go-to chocolate cake recipe,  but it is a delicious alternative and sure does accommodate people with allergies better.  And even if you don't have allergies, it's great to make if you're having that cake craving and don't have an egg in the house.  

      I did change up the frosting recipe, by using my favorite peanut butter frosting from Ina Garten......one that I also used on my birthday cake last year.  But really you could use whatever frosting you like.  

      Eggless Chocolate Cake with Peanut Butter Frosting
      (Cake from This Mama Cooks, frosting from Ina Garten)

      3 cups flour
      2 cups sugar
      1 tsp. salt
      1 tsp. baking soda
      9 Tbs. cocoa, sifted (1/2 cup plus 1 Tbs)
      2 cups cold water
      2 Tbs. white vinegar
      3/4 cup oil (I used expeller pressed coconut oil)
      2 tsp. vanilla extract

      Preheat oven to 350°.
      Mix all ingredients in a large bowl using an electric mixer.  Combine well, but don't overbeat.
      Pour into a greased 13 x 9 baking pan.
      Bake for 30-40 minutes, or until a toothpick comes out clean.
      Cool completely before frosting.


      Peanut Butter Frosting: 
      1 cup powdered sugar
      1 cup creamy peanut butter
      5 Tbs. unsalted butter, room temperature
      3/4 tsp. vanilla extract
      1/4 tsp. salt
      1/3 cup heavy cream
      Grated chocolate for garnish, optional

      Place the sugar, peanut butter, butter, vanilla, and salt in the bowl of an electric mixer fitted with a paddle attachment.  Mix on medium-low speed until creamy, scraping down the bowl with a rubber spatula as you work.  Add the cream and beat on high speed until the mixture is light and smooth.


      reade more... Résuméabuiyad

      Chocolate Chip Pull Apart Bread - SRC


      This month I had the pleasure of being assigned to The Tasty Cheapskate for the Secret Recipe Club, where Jeanie highlights frugal recipes, eating well, and uses lots of butter.  I know we'd be great friends!
      And she even has 4 kiddos, around the same age as mine.  She's got a great sense of humor and is very entertaining to read....and man, does she have some fantastic recipes.

      I had such a hard time picking one to make for today.....with choices like Brownies with Browned Butter Frosting (I am SO making those....soon.), No-Rise Cinnamon Rolls with Blueberry Filling , Double Chocolate Breakfast Cookies (yes, yes, yes!) and Diana's Apple Cake of Awesomeness (which I actually made, and it was delicious!).

      I ended up settling on this pull-apart bread - because I have been wanting to try different versions of  pull-apart bread for months and hadn't gotten around to it.

      So it's basically a sweet and tender yeast dough, rolled flat and brushed with butter, coated with cinnamon and sugar, and sprinkled with chocolate chips. You cut it into strips, stack them on top of each other, cut the stack into sections, and stick them in a loaf pan.  Once it's baked, you slather it with a lovely cream cheese frosting and try to keep from eating the whole loaf before dinner.

      I only have two things that I will change the next time I make this....

      First, I'll add a little salt to the dough, maybe half a teaspoon.  I think all yeast doughs need a little bit of salt.  I'm changing the recipe to reflect that preference.

      Second, I won't sprinkle the chocolate chips on until I'm stacking the strips of dough....because they all just kept falling off when I moved the strips.

      Thanks, Jeanie, for such a scrumptious bread, and I love your blog and great collection of recipes!

      Chocolate Chip Pull-Apart Bread (adapted slightly from The Tasty Cheapskate)

      Bread:
      1/4 cup butter, melted
      1/3 cup milk
      1/4 cup warm water
      1/4 cup sugar
      1 T. yeast
      1-1/2 tsp. vanilla
      2 eggs, beaten
      2-3/4 cups flour (plus a little more if necessary)
      1/2 tsp. salt

      Filling:
      1/4 cup butter, softened or melted
      1/4 cup white sugar
      1/4 cup brown sugar
      1 tsp. cinnamon (optional)
      2/3 cup chocolate chips, chopped

      Frosting:
      1/2 package cream cheese (4 oz), softened
      2-1/2 T. butter, softened
      1/2 T. sour cream (optional)
      1/2 cup plus 2 T. powdered sugar
      1/2 tsp. vanilla extract

      To make the dough, heat milk, butter, and water together in microwave or on the stove until the butter melts. Cool (if necessary) to about 110°.
      Mix in sugar and yeast.  Add beaten eggs and vanilla and stir well.
      Stir in 1 cup flour.  Then add the second cup.  Knead in an electric mixer with the dough hook or turn out to a floured surface and knead by hand.  Add additional flour as necessary to make a slightly firm dough.

      Put in a greased bowl, cover with greased wax paper or a wet towel, and let it rise until doubled, about an hour.

      Once it's risen, punch it down, then put on a lightly floured surface and roll it out to about 12x20".
      Spread softened or melted butter all over the dough.
      Combine the sugars and cinnamon and sprinkle evenly over the top.

      Cut the dough into 6 even strips.  Sprinkle some chocolate chunks on the bottom strip, then top with another strip.  Sprinkle that strip with chocolate and top with another strip.  Continue until you have one nice stack.
      Cut the stack into 6 equal chunks.
      Place the chunks in a greased 8x5" bread pan with the cut sides up.
       Let rise for 20-40 minutes.  Place pan on a cookie sheet in case it overflows (mine did...maybe my pan was too small!) and bake at 350° for 30-40 minutes, or until browned and no longer gooey.
      Remove from oven and let cool in pan for 10 minutes.  Loosen the sides and turn it onto a plate (right side up) to cool completely.

      To make frosting, beat together the cream cheese, butter, and sour cream.  Add vanilla.  Beat in powdered sugar until smooth.  Spread over bread while it's still warm.


      This month I had the pleasure of being assigned to The Tasty Cheapskate for the Secret Recipe Club, where Jeanie highlights frugal recipes, eating well, and uses lots of butter.  I know we'd be great friends!
      And she even has 4 kiddos, around the same age as mine.  She's got a great sense of humor and is very entertaining to read....and man, does she have some fantastic recipes.

      I had such a hard time picking one to make for today.....with choices like Brownies with Browned Butter Frosting (I am SO making those....soon.), No-Rise Cinnamon Rolls with Blueberry Filling , Double Chocolate Breakfast Cookies (yes, yes, yes!) and Diana's Apple Cake of Awesomeness (which I actually made, and it was delicious!).

      I ended up settling on this pull-apart bread - because I have been wanting to try different versions of  pull-apart bread for months and hadn't gotten around to it.

      So it's basically a sweet and tender yeast dough, rolled flat and brushed with butter, coated with cinnamon and sugar, and sprinkled with chocolate chips. You cut it into strips, stack them on top of each other, cut the stack into sections, and stick them in a loaf pan.  Once it's baked, you slather it with a lovely cream cheese frosting and try to keep from eating the whole loaf before dinner.

      I only have two things that I will change the next time I make this....

      First, I'll add a little salt to the dough, maybe half a teaspoon.  I think all yeast doughs need a little bit of salt.  I'm changing the recipe to reflect that preference.

      Second, I won't sprinkle the chocolate chips on until I'm stacking the strips of dough....because they all just kept falling off when I moved the strips.

      Thanks, Jeanie, for such a scrumptious bread, and I love your blog and great collection of recipes!

      Chocolate Chip Pull-Apart Bread (adapted slightly from The Tasty Cheapskate)

      Bread:
      1/4 cup butter, melted
      1/3 cup milk
      1/4 cup warm water
      1/4 cup sugar
      1 T. yeast
      1-1/2 tsp. vanilla
      2 eggs, beaten
      2-3/4 cups flour (plus a little more if necessary)
      1/2 tsp. salt

      Filling:
      1/4 cup butter, softened or melted
      1/4 cup white sugar
      1/4 cup brown sugar
      1 tsp. cinnamon (optional)
      2/3 cup chocolate chips, chopped

      Frosting:
      1/2 package cream cheese (4 oz), softened
      2-1/2 T. butter, softened
      1/2 T. sour cream (optional)
      1/2 cup plus 2 T. powdered sugar
      1/2 tsp. vanilla extract

      To make the dough, heat milk, butter, and water together in microwave or on the stove until the butter melts. Cool (if necessary) to about 110°.
      Mix in sugar and yeast.  Add beaten eggs and vanilla and stir well.
      Stir in 1 cup flour.  Then add the second cup.  Knead in an electric mixer with the dough hook or turn out to a floured surface and knead by hand.  Add additional flour as necessary to make a slightly firm dough.

      Put in a greased bowl, cover with greased wax paper or a wet towel, and let it rise until doubled, about an hour.

      Once it's risen, punch it down, then put on a lightly floured surface and roll it out to about 12x20".
      Spread softened or melted butter all over the dough.
      Combine the sugars and cinnamon and sprinkle evenly over the top.

      Cut the dough into 6 even strips.  Sprinkle some chocolate chunks on the bottom strip, then top with another strip.  Sprinkle that strip with chocolate and top with another strip.  Continue until you have one nice stack.
      Cut the stack into 6 equal chunks.
      Place the chunks in a greased 8x5" bread pan with the cut sides up.
       Let rise for 20-40 minutes.  Place pan on a cookie sheet in case it overflows (mine did...maybe my pan was too small!) and bake at 350° for 30-40 minutes, or until browned and no longer gooey.
      Remove from oven and let cool in pan for 10 minutes.  Loosen the sides and turn it onto a plate (right side up) to cool completely.

      To make frosting, beat together the cream cheese, butter, and sour cream.  Add vanilla.  Beat in powdered sugar until smooth.  Spread over bread while it's still warm.


      reade more... Résuméabuiyad

      Chipotle Chicken Taco Salad - SRC


      We have been in our new house for just over a week now.....and while we only have a couple of photos on the wall (where the previous owners had left nails), we have gotten through enough of the boxes to find the essentials and settle in, somewhat.
      Having the flu sweep through our family certainly hasn't helped the process. It's hard to get anything done when you're caring for sick kiddos.  And poor Grant was hit hardest of all.  Me, well, I'm escaping with just a few days of body aches and some serious congestion - no body-racking coughs or fevers.
      Blech.

      But it's reveal day for my Secret Recipe Club group - so I had to make a little time for blogging.

      This time I was assigned to La Phemme Phoodie.  Wendy is a lawyer by day, a foodie all the rest of the time.  She has some great articles on her blog about legal issues in food blogging, such as Recipe Attribution
      and Trademark Infringement, along with several others.   She also has quite a few gluten-free recipes that sound so tempting, like Chocolate Chip Cookie Dough Cupcakes and Lemon Blueberry Bars with Coconut Crust..

      But when I saw the recipe for this salad, I knew I just had to try it.  The spicy chipotle peppers are tempered by the mellow sour cream and tangy lime juice in the dressing, and the combination of crisp greens with the Tex-Mex ingredients is delightful.

      The dressing is very thick, so it doesn't pour very well, but when you give everything good toss, it ends up coating the salad quite nicely.  The original recipe called for quite a bit of cilanto.  They say either you love or hate cilantro. Grant is definitely in the "hate" category.  He despises the stuff.  So I left it out.

      The recipe also called for avocado - but since I seem to have developed a sensitivity to it (it gives me a horrible stomach ache for hours afterwards - has anyone else ever heard of/experienced that??) I omitted it also.

      I decided to saute the chicken in barbecue sauce instead of just plain roasting it - we loved it, but you could certainly cook the chicken seasoned however you prefer.

      My girls thought this was a little on the spicy side, but Grant, Corban, and I thought it was great.  Grant even went so far as to say it was one of his favorite meals.  Hands down.  He doesn't say that often, so I know that it's a real winner.

      Thanks, Wendy, for inspiring this awesome salad!!

      Chipotle Chicken Taco Salad (adapted from La Phemme Phoodie)

      Dressing:
      2/3 cup light sour cream
      1 T. minced chipotle chile, canned in adobe sauce
      1 tsp. ground cumin
      1 tsp. ground chili powder
      4-5 tsp. fresh lime juice
      1/2 tsp. salt
      1/2 tsp. sugar
      1/3 cup chopped fresh cilantro (optional)

      Salad:
      1-1/2 lbs boneless, skinless chicken breasts
      1 T. oil
      1/4 cup barbecue sauce

      3 cups chopped fresh spinach leaves
      3-4 cups shredded romaine lettuce
      1 cup diced tomatoes
      1/3 cup thinly sliced red onion
      1 (15 oz) can black beans, rinsed and drained
      1 cup frozen corn (toss in colandar with beans and rinse with hot water to thaw)
      1 cup shredded sharp cheddar cheese
      1/2 cup diced peeled avocado (optional)

      Corn chips, for serving

      DIRECTIONS:

      To prepare dressing, combine the first 7 ingredients, whisking well.  Stir in cilantro, if desired.  Set aside.

      To prepare salad, begin with the chicken.  (If you have leftover roasted or cooked chicken, you can substitute it with no problems).  Cut the chicken into bite-sized pieces.  Heat the oil in a large skillet, add chicken and barbecue sauce, and cook over medium heat until no pink remains in chicken.

      In a large bowl, combine the spinach, romaine, tomatoes, red onion, beans, corn, cheese, avocado, and cooked chicken.  Pour dressing over the top and stir gently to coat evenly. Serve immediately.

      If you think you'll have leftovers, I recommend keeping the chicken and dressing in separate containers from the salad, so nothing gets soggy or wilted.

      I forgot to add the cheese for the photos.  We added it at the table.  Delish! 


      Linked to Trick or Treat Tuesday

      We have been in our new house for just over a week now.....and while we only have a couple of photos on the wall (where the previous owners had left nails), we have gotten through enough of the boxes to find the essentials and settle in, somewhat.
      Having the flu sweep through our family certainly hasn't helped the process. It's hard to get anything done when you're caring for sick kiddos.  And poor Grant was hit hardest of all.  Me, well, I'm escaping with just a few days of body aches and some serious congestion - no body-racking coughs or fevers.
      Blech.

      But it's reveal day for my Secret Recipe Club group - so I had to make a little time for blogging.

      This time I was assigned to La Phemme Phoodie.  Wendy is a lawyer by day, a foodie all the rest of the time.  She has some great articles on her blog about legal issues in food blogging, such as Recipe Attribution
      and Trademark Infringement, along with several others.   She also has quite a few gluten-free recipes that sound so tempting, like Chocolate Chip Cookie Dough Cupcakes and Lemon Blueberry Bars with Coconut Crust..

      But when I saw the recipe for this salad, I knew I just had to try it.  The spicy chipotle peppers are tempered by the mellow sour cream and tangy lime juice in the dressing, and the combination of crisp greens with the Tex-Mex ingredients is delightful.

      The dressing is very thick, so it doesn't pour very well, but when you give everything good toss, it ends up coating the salad quite nicely.  The original recipe called for quite a bit of cilanto.  They say either you love or hate cilantro. Grant is definitely in the "hate" category.  He despises the stuff.  So I left it out.

      The recipe also called for avocado - but since I seem to have developed a sensitivity to it (it gives me a horrible stomach ache for hours afterwards - has anyone else ever heard of/experienced that??) I omitted it also.

      I decided to saute the chicken in barbecue sauce instead of just plain roasting it - we loved it, but you could certainly cook the chicken seasoned however you prefer.

      My girls thought this was a little on the spicy side, but Grant, Corban, and I thought it was great.  Grant even went so far as to say it was one of his favorite meals.  Hands down.  He doesn't say that often, so I know that it's a real winner.

      Thanks, Wendy, for inspiring this awesome salad!!

      Chipotle Chicken Taco Salad (adapted from La Phemme Phoodie)

      Dressing:
      2/3 cup light sour cream
      1 T. minced chipotle chile, canned in adobe sauce
      1 tsp. ground cumin
      1 tsp. ground chili powder
      4-5 tsp. fresh lime juice
      1/2 tsp. salt
      1/2 tsp. sugar
      1/3 cup chopped fresh cilantro (optional)

      Salad:
      1-1/2 lbs boneless, skinless chicken breasts
      1 T. oil
      1/4 cup barbecue sauce

      3 cups chopped fresh spinach leaves
      3-4 cups shredded romaine lettuce
      1 cup diced tomatoes
      1/3 cup thinly sliced red onion
      1 (15 oz) can black beans, rinsed and drained
      1 cup frozen corn (toss in colandar with beans and rinse with hot water to thaw)
      1 cup shredded sharp cheddar cheese
      1/2 cup diced peeled avocado (optional)

      Corn chips, for serving

      DIRECTIONS:

      To prepare dressing, combine the first 7 ingredients, whisking well.  Stir in cilantro, if desired.  Set aside.

      To prepare salad, begin with the chicken.  (If you have leftover roasted or cooked chicken, you can substitute it with no problems).  Cut the chicken into bite-sized pieces.  Heat the oil in a large skillet, add chicken and barbecue sauce, and cook over medium heat until no pink remains in chicken.

      In a large bowl, combine the spinach, romaine, tomatoes, red onion, beans, corn, cheese, avocado, and cooked chicken.  Pour dressing over the top and stir gently to coat evenly. Serve immediately.

      If you think you'll have leftovers, I recommend keeping the chicken and dressing in separate containers from the salad, so nothing gets soggy or wilted.

      I forgot to add the cheese for the photos.  We added it at the table.  Delish! 


      Linked to Trick or Treat Tuesday
      reade more... Résuméabuiyad

      Pumpkin Pie Snickerdoodle Blondies - SRC


      I am really loving the Secret Recipe Club.  This month was especially fun because I was assigned to a fellow baker's blog - the Secrets from the Cookie Princess.  Colleen is a gal after my own heart for sure - she loves baking for friends, family, co-workers, and her husband and has a great variety of 
      amazing goodies and treats.....and several savory options as well.  

      I was tempted to try all sorts of delicacies - like Brown Sugar Cinnamon Biscotti, Pecan Pie Cookies (wouldn't those be great for Thanksgiving???) and Mint Fudge Swirls (a beautiful cookie for Christmas), but since we were having an early "Thanksgiving" dinner with some friends in a couple of days and I was responsible for dessert, these bars jumped out at me.

      I was not disappointed. The lightly spiced snickerdoodle cookie is a perfect base for the pumpkin layer - which is flavored like pumpkin pie, but with some flour added in, it's a bit thicker and sturdier than pie. The cinnamon and sugar on top add just the right amount of extra sweetness and spice, and of course, I couldn't resist adding some whipped cream on top, 'cause you can't have pumpkin desserts without whipped cream.  

      These bars were popular with our guests and I was more than happy to have a few left over for munching the next day.  Grant wasn't the biggest fan, because he prefers pumpkin in cheesecake - but the kids and I loved them.  

      You can store them at room temperature, unless you've already piped the whipped cream on top, in which case, keep them in the fridge.  They taste great either way.

      Pumpkin Pie Snickerdoodle Blondies (from Secrets from the Cookie Princess)

      Snickerdoodle Layer:
      3 cups all purpose flour
      2 tsp. baking powder
      1 tsp. salt
      1 tsp. cinnamon
      1-1/2 cups brown sugar, packed
      1 cup butter, room temperature
      2 eggs
      1 tsp. vanilla extract

      Pumpkin Pie Layer:
      1/2 cup butter, softened
      1 cup sugar
      1 (15 oz) can pure pumpkin puree
      2 eggs
      1 cup flour
      1 tsp. baking powder
      1 tsp. salt
      1 tsp. pumpkin pie spice

      Topping:
      2 Tbs. sugar
      2 tsp. cinnamon

      Optional - but highly recommended
      1/2 cup heavy cream
      3 Tbs. powdered sugar
      1/2 tsp. vanilla extract

      Preheat oven to 350°.

      Snickerdoodle Layer:
      Sift together flour, baking powder, salt, and cinnamon. Set aside.  In the bowl of a stand mixer using the paddle attachment, beat butter and brown sugar until fluffy.  Add eggs and vanilla and beat until smooth, scraping the sides of the bowl as needed.
      Gradually add the flour mixture and mix until well blended.  The batter with be thick. 

      Lightly grease a 13 x 9" pan and lay a piece of parchment paper across the pan, leaving overhang on the edges.  This will make it easier to get the bars out of the pan later.
      Spread the snickerdoodle batter into the lined pan and press into an even layer.  Use your fingers  - it's a bit sticky and the paper may slide about, but try to get it even.

      Bake for 4 minutes.

      Pumpkin Pie layer:
      Use the same bowl from the snickerdoodle batter.  Mix the butter and sugar together until fluffy, then add pumpkin, eggs, and vanilla and mix until combined, scraping the sides of the bowl as needed.  Add flour, baking powder, salt, and pumpkin pie spice and mix to combine.
      Pour the pumpkin mixture over the slightly baked snickerdoodle batter and smooth the layer over the top.
      In a small bowl, mix topping ingredients (sugar and cinnamon) and sprinkle evenly over the pumpkin pie layer.

      Bake for 37-45 minutes or until a toothpick inserted into the center of the pan comes out clean.  
      Remove from oven and cool on a wire rack for about an hour.  Bars may deflate slightly and the top layer will have a pie-like texture.  The edges will be more firm.

      After bars have cooled completely, gently lift the bars out of the pan using the parchment as a sling.  Cut into squares.  Store in an airtight container.

      Before serving:

      Whipped Cream (optional):
      In a chilled mixing bowl, beat cream on medium/high speed for 30 seconds.  Add powdered sugar and vanilla extract and continue to beat until stiff peaks form. 
      Put into a large pastry bag fitted with a large star tip and pipe whipped cream on each square. 


      I am really loving the Secret Recipe Club.  This month was especially fun because I was assigned to a fellow baker's blog - the Secrets from the Cookie Princess.  Colleen is a gal after my own heart for sure - she loves baking for friends, family, co-workers, and her husband and has a great variety of 
      amazing goodies and treats.....and several savory options as well.  

      I was tempted to try all sorts of delicacies - like Brown Sugar Cinnamon Biscotti, Pecan Pie Cookies (wouldn't those be great for Thanksgiving???) and Mint Fudge Swirls (a beautiful cookie for Christmas), but since we were having an early "Thanksgiving" dinner with some friends in a couple of days and I was responsible for dessert, these bars jumped out at me.

      I was not disappointed. The lightly spiced snickerdoodle cookie is a perfect base for the pumpkin layer - which is flavored like pumpkin pie, but with some flour added in, it's a bit thicker and sturdier than pie. The cinnamon and sugar on top add just the right amount of extra sweetness and spice, and of course, I couldn't resist adding some whipped cream on top, 'cause you can't have pumpkin desserts without whipped cream.  

      These bars were popular with our guests and I was more than happy to have a few left over for munching the next day.  Grant wasn't the biggest fan, because he prefers pumpkin in cheesecake - but the kids and I loved them.  

      You can store them at room temperature, unless you've already piped the whipped cream on top, in which case, keep them in the fridge.  They taste great either way.

      Pumpkin Pie Snickerdoodle Blondies (from Secrets from the Cookie Princess)

      Snickerdoodle Layer:
      3 cups all purpose flour
      2 tsp. baking powder
      1 tsp. salt
      1 tsp. cinnamon
      1-1/2 cups brown sugar, packed
      1 cup butter, room temperature
      2 eggs
      1 tsp. vanilla extract

      Pumpkin Pie Layer:
      1/2 cup butter, softened
      1 cup sugar
      1 (15 oz) can pure pumpkin puree
      2 eggs
      1 cup flour
      1 tsp. baking powder
      1 tsp. salt
      1 tsp. pumpkin pie spice

      Topping:
      2 Tbs. sugar
      2 tsp. cinnamon

      Optional - but highly recommended
      1/2 cup heavy cream
      3 Tbs. powdered sugar
      1/2 tsp. vanilla extract

      Preheat oven to 350°.

      Snickerdoodle Layer:
      Sift together flour, baking powder, salt, and cinnamon. Set aside.  In the bowl of a stand mixer using the paddle attachment, beat butter and brown sugar until fluffy.  Add eggs and vanilla and beat until smooth, scraping the sides of the bowl as needed.
      Gradually add the flour mixture and mix until well blended.  The batter with be thick. 

      Lightly grease a 13 x 9" pan and lay a piece of parchment paper across the pan, leaving overhang on the edges.  This will make it easier to get the bars out of the pan later.
      Spread the snickerdoodle batter into the lined pan and press into an even layer.  Use your fingers  - it's a bit sticky and the paper may slide about, but try to get it even.

      Bake for 4 minutes.

      Pumpkin Pie layer:
      Use the same bowl from the snickerdoodle batter.  Mix the butter and sugar together until fluffy, then add pumpkin, eggs, and vanilla and mix until combined, scraping the sides of the bowl as needed.  Add flour, baking powder, salt, and pumpkin pie spice and mix to combine.
      Pour the pumpkin mixture over the slightly baked snickerdoodle batter and smooth the layer over the top.
      In a small bowl, mix topping ingredients (sugar and cinnamon) and sprinkle evenly over the pumpkin pie layer.

      Bake for 37-45 minutes or until a toothpick inserted into the center of the pan comes out clean.  
      Remove from oven and cool on a wire rack for about an hour.  Bars may deflate slightly and the top layer will have a pie-like texture.  The edges will be more firm.

      After bars have cooled completely, gently lift the bars out of the pan using the parchment as a sling.  Cut into squares.  Store in an airtight container.

      Before serving:

      Whipped Cream (optional):
      In a chilled mixing bowl, beat cream on medium/high speed for 30 seconds.  Add powdered sugar and vanilla extract and continue to beat until stiff peaks form. 
      Put into a large pastry bag fitted with a large star tip and pipe whipped cream on each square. 


      reade more... Résuméabuiyad

      Dried Cherry Bagels - SRC


      It's Secret Recipe Club time again!

      This month I was assigned to Veggie Converter, where Kristi enjoys blogging about food she makes for herself, a vegetarian, her husband, a meat eater, and their two undecided kids.  In 2011, Kristi completed a challenge to create a different family-friendly vegetarian meal for each of the 365 days in the year. I think that is truly impressive! 

      Since I am trying to make more meatless meals for our family, I found her blog to be a great resource and inspiration. Knowing me, though, I was most drawn to the baked goods, like Carrot Spice Muffins, Crockpot Cheesecake with Cookie Crust, and Chocolate Chip Quinoa Muffins.  

      I finally decided on making bagels.  Hers were made with dried blueberries - but since I couldn't bear to pay $3 for a 3 oz package of those, I substituted dried cherries instead.

      I have made bagels once before - and while they turned out okay, I hadn't been particularly inspired to make them again.  These, however, were so scrumptious and wildly popular with my children, I'm sure I'll make them many times.  They were really good fresh on the first day.  But truth be told - I liked them even better lightly toasted on the second day.  With just a smear of butter, maybe a dab of jam.....yum.  

      The recipe may look long and involved, but it's really not.  You do have to plan ahead, but I thought it was great to have bagels ready to boil and bake first thing in the morning.  I'll admit, it took longer than I was anticipating because I could only boil 3 at a time, so at 2 minutes per batch, that took me 8 minutes, plus the time to get them in and out of the water.  Then after they bake, you're supposed to let them sit for 15 minutes before eating.....we didn't quite make it that long. The children were gnawing on their fingers begging for breakfast like they hadn't eaten in days.  Nothing like the smell of fresh bagels to make you hungry in the morning!

      Dried Cherry Bagels (adapted from Veggie Converter)
      Yield: 12 large bagels

      Sponge:
      1 tsp. instant yeast
      4 cups bread flour
      2-1/2 cups water, room temperature

      Dough:
      1 tsp. instant yeast
      3-3/4 cups white whole wheat flour
      2-3/4 tsp. salt
      1 T. brown sugar or sucanat
      1 cup dried cherries, chopped

      For cooking:
      1 T. baking soda

      Directions:
      To make the sponge, in your stand-mixer bowl, stir the yeast into the flour.  Add the water and whisk well.  Cover the bowl and leave at room temperature for 2 hours. It should double in size and fall when the bowl is tapped against the counter.
      To make the dough, add the yeast to the sponge and stir. Add 3 cups of the flour, the salt and brown sugar. Stir slowly with the dough hook until the dough turns into a ball. Slowly add the remaining flour to stiffen the dough. 
      Add cherries gradually while kneading 6 minutes by machine (or 10 minutes by hand on a lightly floured surface).  If you try to add the cherries all at once, it's likely that they won't incorporate into the dough very well and you'll end up with a pile of cherry bits at the bottom of the bowl.
      Divide the dough into 12 equal pieces and form into balls. Cover and let rest for 20 minutes. Spray two large sheet pans with oil or cooking spray. Shape the bagels by poking a hole in the center with your thumb and spinning the dough around your thumb to form about a 2 1/2-inch hole. Set the bagels on the sheet pans at least 2 inches apart.
      Cover and let rest for 20 minutes. At this point you do a “float test” to see if the bagel dough is ready for retardation in the fridge. Drop one bagel in a bowl of water. If it floats within 10 seconds (mine floated immediately), you’re good to go and you just pat that one off and set it back on the pan. If not, return it to the pan and check every 10-20 minutes with the float test.
      Once your bagels are ready, cover them with plastic wrap or foil and place them in the refrigerator overnight (or up to 2 days).
      When you’re ready to boil and bake your bagels, preheat your oven to 500°. Bring a large pot of water to boil with 1 tablespoon of baking soda. Boil as many bagels at a time that fit comfortably in your pot (mine fits 3) for 1 minute per side (2 minutes per side for chewier bagels). Remove with a slotted spatula to a drying rack and repeat with remaining bagels.
      Respray baking sheets and divide bagels among sheets. Bake at 500° for 5 minutes. Switch the pans to the opposite shelves and rotate each pan 180 degrees. After rotation, turn oven down to 450°. Bake an additional 8-10 minutes, depending on desired golden-brownness. Cool on a rack for at least 15 minutes before cutting and serving.


      It's Secret Recipe Club time again!

      This month I was assigned to Veggie Converter, where Kristi enjoys blogging about food she makes for herself, a vegetarian, her husband, a meat eater, and their two undecided kids.  In 2011, Kristi completed a challenge to create a different family-friendly vegetarian meal for each of the 365 days in the year. I think that is truly impressive! 

      Since I am trying to make more meatless meals for our family, I found her blog to be a great resource and inspiration. Knowing me, though, I was most drawn to the baked goods, like Carrot Spice Muffins, Crockpot Cheesecake with Cookie Crust, and Chocolate Chip Quinoa Muffins.  

      I finally decided on making bagels.  Hers were made with dried blueberries - but since I couldn't bear to pay $3 for a 3 oz package of those, I substituted dried cherries instead.

      I have made bagels once before - and while they turned out okay, I hadn't been particularly inspired to make them again.  These, however, were so scrumptious and wildly popular with my children, I'm sure I'll make them many times.  They were really good fresh on the first day.  But truth be told - I liked them even better lightly toasted on the second day.  With just a smear of butter, maybe a dab of jam.....yum.  

      The recipe may look long and involved, but it's really not.  You do have to plan ahead, but I thought it was great to have bagels ready to boil and bake first thing in the morning.  I'll admit, it took longer than I was anticipating because I could only boil 3 at a time, so at 2 minutes per batch, that took me 8 minutes, plus the time to get them in and out of the water.  Then after they bake, you're supposed to let them sit for 15 minutes before eating.....we didn't quite make it that long. The children were gnawing on their fingers begging for breakfast like they hadn't eaten in days.  Nothing like the smell of fresh bagels to make you hungry in the morning!

      Dried Cherry Bagels (adapted from Veggie Converter)
      Yield: 12 large bagels

      Sponge:
      1 tsp. instant yeast
      4 cups bread flour
      2-1/2 cups water, room temperature

      Dough:
      1 tsp. instant yeast
      3-3/4 cups white whole wheat flour
      2-3/4 tsp. salt
      1 T. brown sugar or sucanat
      1 cup dried cherries, chopped

      For cooking:
      1 T. baking soda

      Directions:
      To make the sponge, in your stand-mixer bowl, stir the yeast into the flour.  Add the water and whisk well.  Cover the bowl and leave at room temperature for 2 hours. It should double in size and fall when the bowl is tapped against the counter.
      To make the dough, add the yeast to the sponge and stir. Add 3 cups of the flour, the salt and brown sugar. Stir slowly with the dough hook until the dough turns into a ball. Slowly add the remaining flour to stiffen the dough. 
      Add cherries gradually while kneading 6 minutes by machine (or 10 minutes by hand on a lightly floured surface).  If you try to add the cherries all at once, it's likely that they won't incorporate into the dough very well and you'll end up with a pile of cherry bits at the bottom of the bowl.
      Divide the dough into 12 equal pieces and form into balls. Cover and let rest for 20 minutes. Spray two large sheet pans with oil or cooking spray. Shape the bagels by poking a hole in the center with your thumb and spinning the dough around your thumb to form about a 2 1/2-inch hole. Set the bagels on the sheet pans at least 2 inches apart.
      Cover and let rest for 20 minutes. At this point you do a “float test” to see if the bagel dough is ready for retardation in the fridge. Drop one bagel in a bowl of water. If it floats within 10 seconds (mine floated immediately), you’re good to go and you just pat that one off and set it back on the pan. If not, return it to the pan and check every 10-20 minutes with the float test.
      Once your bagels are ready, cover them with plastic wrap or foil and place them in the refrigerator overnight (or up to 2 days).
      When you’re ready to boil and bake your bagels, preheat your oven to 500°. Bring a large pot of water to boil with 1 tablespoon of baking soda. Boil as many bagels at a time that fit comfortably in your pot (mine fits 3) for 1 minute per side (2 minutes per side for chewier bagels). Remove with a slotted spatula to a drying rack and repeat with remaining bagels.
      Respray baking sheets and divide bagels among sheets. Bake at 500° for 5 minutes. Switch the pans to the opposite shelves and rotate each pan 180 degrees. After rotation, turn oven down to 450°. Bake an additional 8-10 minutes, depending on desired golden-brownness. Cool on a rack for at least 15 minutes before cutting and serving.

      reade more... Résuméabuiyad