Pages

Showing posts with label vegetarian. Show all posts

Skillet Baked Pasta - Vegetarian


Everywhere in the blog world, all I see is pumpkin and apple, pumpkin and apple, with a little more pumpkin added in for good measure.

Not trying to complain or anything - I adore pumpkin in so many things and appreciate new ideas in the fall.
It just kind of strikes me as funny, since most of these recipes use canned pumpkin, which is available year-round, so you really don't have to make pumpkin stuff only in the fall. Really. I like pumpkin in May.  Don't you?

That's why I either buy a few pumpkins when they're cheap and cook them, puree, and freeze in 2 cup portions or buy a bunch of cans on clearance after Thanksgiving.  I do the same with sweet potatoes.  I had such a great stash last year.....but ended up eating it in a huge rush and giving away quite a bit when we moved.  My freezer has been bare of sweet potatoes and pumpkin this entire year.  Gonna have to remedy that soon.

All that to say, I have YET to make anything with pumpkin or sweet potato this fall.
It's heresy for a food blogger, I know.  But it is what it is.
(I have made apple butter and apple sauce, for the record).

Maybe you'll enjoy seeing something else anyways. :)

How about a vegetarian pasta meal???

Most of the vegetarian meals I make revolve around beans or lentils. For the protein, ya know.

But when I saw this dish from the Girl Who Ate Everything, I couldn't resist giving it a try.
Now, I think it would be totally awesome with some crumbled cooked sausage, or sliced smoked sausage, or even diced, cooked chicken breast.  I may try one of those sometime.
But I have to say - it was totally awesome as is. 

The pasta cooks right in the tomato sauce and water, along with some spices and sauteed garlic - then you add some heavy cream  and Parmesan cheese - oh, and can't forget the basil!  I wish I had had some fresh on hand....but even the dried worked well.  Then you top the whole thing with dollops of ricotta cheese and sprinkle mozzarella over all that.  And into the oven it goes, to get all nice and golden and toasty.

Come on, now....tell me your mouth isn't watering.

A little indulgent?

Okay, maybe a little.

But completely worth it.

And I didn't miss the meat at all.

Skillet Baked Pasta 

6 garlic cloves, minced
4 tsp. olive oil, divided use
1/2 tsp. red pepper flakes
salt and pepper
1 (28 oz) can crushed tomatoes
3 cups water
12 oz. ziti pasta (3 3/4 cups)
4 oz (1/2 cup) whole-milk ricotta
1/2 cup heavy cream
1/2 cup Parmesan cheese, grated
1/4 cup chopped fresh basil (or 1 Tbsp. dried)
1 cup mozzarella cheese, shredded

Instructions:
  • Preheat oven to 475°.
  • Combine 1 Tbsp. oil, garlic, pepper flakes, and 1/2 tsp. salt in a 12 inch oven safe skillet and saute over medium-high heat until fragrant, about 1 minute.
  • Add crushed tomatoes, water, ziti, and 1/2 tsp. salt.
  • Cover and cook, stirring often and adjusting heat as needed to maintain a vigorous simmer, until ziti is almost tender, 15-18 minutes. Make sure you don't overcook - it will continue to cook in the oven.
  • Meanwhile, combine ricotta, remaining 1 tsp. oil, 1/8 tsp salt, and 1/8 tsp pepper in a bowl.  Set aside.
  • Stir cream, Parmesan, and basil into the skillet and season with salt and pepper to taste. 
  • At this point, if your skillet isn't oven safe, transfer pasta into a shallow 2 quart casserole dish before sprinkling with the ricotta and cheese and baking. 
  • Add dollops of the ricotta mixture with a spoon and sprinkle mozzarella evenly over ziti. 
  • Transfer skillet to oven and bake until cheese has melted and browned, about 10 minutes. Let cook slightly and sprinkle with additional basil. Serve. 

Source: The Girl Who Ate Everything, , originally from America's Test Kitchen Family Cookbook


reade more... Résuméabuiyad

Spinach Strawberry Salad with Strawberry Vinaigrette


I can't think of a kind of salad I enjoy more than spinach with strawberries.  
Add in some candied almonds and it's practically dessert.  
Seriously.
And y'all know how I like dessert. 

Ahem.

So when we had some spinach and strawberries on hand last week, I had to make a salad.  My dear friend Christen makes an awesome spinach salad with bacon and strawberries - I wanted to make it but didn't have raspberry vinegar for the dressing, or any spare bacon lying around (what was the matter with me...we should always have bacon!) so I had to search for something else. 

When I saw this strawberry vinaigrette, I knew I had to try it.  
It's simple, goes together quickly, and only has 2 Tablespoons of oil in the whole batch - so it must be low fat....right????
And it adds simply marvelous strawberry flavor to the spinach salad.  I just loved it.  


Spinach Strawberry Salad with Strawberry Vinaigrette
(dressing from The Gracious Pantry)

Dressing:
(makes 1 1/3 cups)

1/2 pound fresh strawberries
2 Tbsp. honey (or more to taste if your berries aren't very sweet)
2 Tbsp. apple cider vinegar (use organic, raw vinegar if possible)
2 Tbsp. olive oil
1/4 tsp. salt
1/4 tsp. ground black pepper

Place all ingredients in a blender and blend until smooth. Adjust honey to taste.

Salad:
1/4 cup sliced/slivered almonds
2 Tbsp. granulated sugar
8-10 cups fresh spinach
Sliced strawberries

In a small skillet over medium heat, stir almonds and sugar until sugar is dissolved and almonds are toasted. Be careful not to scorch them, stirring often and reducing the heat if necessary.  The sugar takes several minutes to melt.  Pour onto a plate and crumble into pieces once cool.

In a large bowl, toss spinach, sliced strawberries, and candied almonds. Pour dressing over to taste.
reade more... Résuméabuiyad

Cheesy Bacon Lentils


So Hurricane Sandy has come and gone, and we were among the very fortunate ones.

We had steady rain for probably 55 hours straight and some heavy wind, especially last night, but while the news of our region was filled with videos and photos of flooded streets and buildings, nearly submerged cars, and gigantic waves, we are far enough removed from low ground and water that we weren't really affected at all.  We didn't even lose power, which was my greatest concern.

But our prayers are definitely with those who were so devastated by the storm - I can only imagine how difficult it must be.

We actually got to enjoy some extra time with Grant - since the Army post where he works was closed yesterday.I know some people go a little stir crazy when they are house-bound for a few days, but I really enjoy it.  With no option of really going out, we got stuff done around the house and I spent some time cooking and baking.

I made cheesy potato soup for our lunch yesterday, a delicious new peanut butter banana bread (that ended up getting eaten before I took photos - guess I'll have to make it again!), simmered chili in the crockpot today, and baked a couple of new desserts for a dinner with friends tomorrow.  Yep, our house has smelled pretty good the past couple of days!

Anyways.
After posting a lot of sweets lately, I figured I'd better even the tables a little and show you we don't only survive on sugar and butter.

There's bacon too!

This simple and frugal dish combines our favorite breakfast meat with lentils, onion, and cheese and a few spices...couldn't get much easier than that.  And the entire family really liked it.  For two dinners in a row.
That makes it a success, in my book.

You could make it vegetarian if you wanted - I'm sure it would still be tasty - but honestly, we enjoyed it so much with the smoky flavor of the bacon, I don't think I'll ever leave it out.

Serve with a nice green salad and some bread if you like.

Cheesy Bacon Lentils - (adapted from The Cheapskate Cook)

1 (1 lb) package lentils, soaked 24 hours*
4 cups broth (chicken, vegetable, beef) or water
1 medium onion, finely chopped
1 bay leaf
Sea salt and pepper, to taste
6 oz (about 8 or 9 pieces) turkey bacon, cooked and crumbled
2-1/2 cups cheddar cheese, shredded (I use sharp white cheddar)

In a saucepan, combine lentils, broth, onion, and bay leaf.
Bring to a boil, then reduce heat to low, cover and simmer for 10-15 minutes, stirring occasionally.
Preheat oven to 400°F.
Drain excess liquid.
Turn off heat, remove bay leaf and add salt, pepper, bacon, and 1-1/2 cups cheese into lentils, stirring until cheese melts.
Evenly spread mixture into a lightly greased casserole dish and top with remaining cheese.
Bake 20-30 minutes until golden and bubbly.

*Soaking the lentils is an optional step.  It's an easy way to help your body digest the nutrients found in the lentils.  The day before making this dish, pour the lentils into a strainer, rinse them with water, and then pour them into a large bowl.  Fill the bowl with filtered water to 1 inch above the lentils.  Allow them to soak for 24-72 hours, changing the water every 12 hours.  Drain the soaking water before using them in this recipe.  If you choose not to soak the lentils, simply rinse them in a strainer and increase the stock/water to 5 or 6 cups.
reade more... Résuméabuiyad

Easy Coffee Cake


I used to make sour cream coffee cake but it was never good as a spur of the moment weekend breakfast because I never have sour cream in the house. I started to like this recipe a lot more, which I got from my boyfriend's mother. This is a much more reasonable spur of the moment coffee cake. It uses ingredients you always find in your kitchen.

Coffee Cake

Ingredients

  • 1 egg
  • 1/2 cup sugar
  • 1/2 cup milk
  • 2 tbsp melted butter
  • 1 cup flour
  • 2 tsp baking powder
  • 1/2 tsp salt` 
Ingredients for topping
  • 1/4 cup packed brown sugar
  • 1 Tbsp melted butter
  • 1 tsp cinnamon
  • 1 Tbsp flour
Directions
  1. Beat egg, milk and melted butter. Mix in butter
  2. Mix the dry ingredients and add those to the wet ingredients. Mix until just combined
  3. Pour mix into greased loaf or cake pan. Top with brown sugar topping (you can double the topping if desired)
  4. Bake at 375 for 20-25 minutes, depending on the thickness of the loaf. It will look very skinny but it will rise quite a bit.


reade more... Résuméabuiyad

Mexican Bean Casserole


In our quest to eat less meat, I tend to gravitate towards bean dishes for our vegetarian options. 

This is a ridiculously simple meal that goes together in minutes and bakes quickly, so dinner is on the table in hardly any time at all. 
It's not overly spicy but definitely has a little kick - and when combined with the chips and salad ingredients, it tastes like a meatless taco salad.  We didn't miss the meat a bit. 

The big surprise was who liked it the most - little 10 month old Miranda.  That girl loves beans. We actually all loved it, except occasionally picky Ellia ("I don't LIKE beans," she wailed)- but she's 2 and that's her prerogative.
I've made it at least three times in the past month and a half, so that's saying something.  I don't repeat meals that frequently if they're not big favorites. 

Mexican Bean Casserole (adapted from Love Bakes Good Cakes)

Note: You may choose to use an envelope of taco seasoning in place of the spices if desired.  I have not tried this option and cannot testify of its results. 

2 cans (16 oz. each) pinto beans, rinsed and drained
2 cans (16 oz. each) black beans, rinsed and drained
8 oz. frozen corn (or 1 can (15 oz) whole kernel corn, drained)
1 can (14.5 oz.) diced fire roasted tomatoes, drained slightly
1 can (8 oz) tomato sauce
1 Tbs. chili powder
1/4 tsp. garlic powder
1/4 tsp. onion powder
1/4 tsp. dried oregano
1-1/2 tsp. ground cumin
1 tsp. salt
1 tsp. black pepper
2 cups (8 oz) shredded cheddar cheese

Optional - corn chips, lettuce, sour cream, jalapenos, black olives, and tomatoes/salsa

Preheat oven to 350°.

In a large bowl, combine all of the ingredients except the cheese and mix well. Pour evenly into a 13 x 9" pan.  Sprinkle with cheese. 
Bake, uncovered, for 20-25 minutes or until heated through.

Serve with chips, lettuce, sour cream, jalapenos, black olives, and tomatoes/salsa if desired.

Linked to Trick or Treat Tuesday and 4 Moms Share Vegetarian Recipes
reade more... Résuméabuiyad

Cinnamon Lime Panna Cotta


I thought I posted this recipe a long time ago, but looking back I realize I had not. I'm not sure why, especially since it's easy and very tasty and looks fancy. It can be made hours ahead, making it a perfect dinner party food.

Try it next time.

Cinnamon Lime Panna Cotta

Ingredients

  • 1 ½ cups milk
  • 2 cups heavy cream
  • 3 sheets gelatin
  • ½ cup sugar
  • 2 zested limes
  • 1 cinnamon stick
  • ½ tsp vanilla

Directions
  1. Bloom gelatin in ½ cup milk
  2. Combine cream sugar, milk, lime and cinnamon. Simmer until sugar dissolves
  3. Let zest and cinnamon steep in milk for half an hour
  4. Add gelatin and stir until dissolved.
  5. Divide into individual servings. Chill until fully set. Garnish with lime zest and cinnamon shavings
reade more... Résuméabuiyad

Rye Hot Dog Buns


Sometimes, I love a good hot dog, but the hot dog buns always leave much to be desired. I finally made my own hot dog buns and they weren't difficult at all. They were somewhat sweet with a not too strong rye and caraway flavor. They were soft and toasted perfectly. This is a hot dog that will go great with strong mustard and kraut. Do not sully this dog with ketchup.

The cool thing about hot dog buns is making them with the slit down the middle. How do you get them to stay attached? I didn't initially understand how to make these buns, but I've attached a diagram that should explain how to make these. Try them for your next BBQ. I guarantee you won't want to go back to regular hot dog buns.

This post has been submitted to Yeastspotting

Rye Hot Dog Buns

Ingredients

  • ¾ cup rye flour
  • ¾ cup milk
  • ½ cup onion, diced
  • 3 tbsp honey
  • 2 Tbsp butter
  • 1 Tbsp yeast
  • 3 cups AP flour
  • ¾ cup water
  • 1 Tbsp caraway
  • 2 tsp salt
  • 1 egg white
  • 2 Tbsp water

Directions

  1. Puree onion in a blender to make an onion smoothie. If it won’t puree, add the honey to the blender as well.
  2. Combine rye flour, milk, yeast, onion, honey and butter in mixing, bowl. Stir and let rest 10 minutes
  3. Add water, salt, caraway and 2 ½ cup of water. Mix and add more flour as necessary until dough pulls away from the bowl.
  4. Knead until smooth. Place in greased bowl and let rest for 1 hour
  5. After an hour, gently de-gas dough and divide dough into 13 pieces. Roll each piece into a 6 or 7 inch tube and line them up on a piece of parchment paper is ½ inch of space in between each.
  6. Let dough rest until about 20 minutes until tubes have begun to grow together
  7. Mix egg white and 2 Tbsp water together. Brush dough with egg white and let dough rest another 15 minutes
  8. Bake buns at 350 degrees for 20 minutes. Let dough rest of pan another 5 minutes before transferring the parchment paper to a cooling rack. Let cool 30 minutes
  9. Now here’s the cool part!
  10. Slice completely down the center of each tube (lengthwise). Where you sliced will be the sides of the hot dog bun, and where the buns grew together is the split down the middle. You will end up with 12 hot dog buns and 2 slices of rye bread to eat immediately.
  11. Serve with hot dogs, or anything else delicious.


in the diagram, the black rectangles are the tubes of dough. The red dotted lines are cut lines. Where I have marked is one hot dog bun. And the blue arrows are the awesome end pieces you get to eat right away when you slice the buns


reade more... Résuméabuiyad

Daring Bakers "Crazy for Crackers" cheddar rosemary walnut edition


It's time for another challenge from The Daring Kitchen.

Our July 2012 Daring Bakers' Host was Dana McFarland and she challenged us to make homemade crackers! Dana showed us some techniques for making crackers and encouraged us to use our creativity to  make each cracker our own way my using ingredients we love.

I opted to follow one of the recipes she provided because we had all of the ingredients in house. I've also made crackers in the past like wheat thins, so I wanted to do something I had not done before. Hand rolling my wheat thins did not work out so well, as they were never thin enough. This time, I decided to try slicing the crackers like icebox cookies.

The crackers turned out well and I loved the flavor profile, but I was not a fan of making crackers in this style. My cuts were never quite even, and because I used almonds instead of walnuts, it was more difficult to get even cuts. I would make this recipe again though.

Cheddar Rosemary Walnut Crackers

Ingredients

  • 1/2 cup (1 stick) softened unsalted butter
  • 2 1/4 cup shredded cheddar cheese
  • 1 1/4 cup AP flour
  • 1 tsp salt
  • 1/2 cup chopped walnuts
  • 1 Tbsp chopped rosemary
  • A couple cracks of fresh black pepper
Directions
  1. Mix together softened butter with cheese, flour and salt until uniform paste forms. Add in rosemary and walnuts and mix until uniform.
  2. Roll dough into a cylinder in plastic wrap and freeze at least one hou
  3. Thinly slice crackers (no thicker than 1/5inch) and bake on parchment paper at 325 degrees for about 10-12 minutes
reade more... Résuméabuiyad

Banana Apple Baked Oatmeal


Oatmeal is a perfect breakfast food. It's full of fiber, including soluble fiber (which helps lower cholesterol). Yet even though oatmeal is a great breakfast food, it gets boring very quickly.

I found this recipe for a baked oatmeal that makes about 4 servings. You can keep them multiple days and just heat it up in the morning. Its a new, interesting way of doing oatmeal. Best of all, it has a little crunch from the quinoa.


Baked Oatmeal

Ingredients

  • ½ cup rolled oats
  • ¼ cup quinoa
  • ¼ cup wheat bran
  • ½ tsp baking powder
  • ¼ tsp salt
  • 1 tsp cinnamon
  • 1 cup milk
  • 1 egg
  • 1 tsp vanilla
  • 2 bananas
  • 1 cup frozen berries or sliced apples

Directions
  1. Mix together oats, quinoa, bran, baking powder, salt and cinnamon
  2. In a separate bowl, mix together milk, egg, vanilla, and one mashed banana. Mix with the dry ingredients
  3. Great a loaf pan and lay 1 sliced banana along the bottom and half the berries. Pour in oat mixture and top with remaining berries
  4. Bake at 375 for 40 minutes or until golden and slightly puffed.


reade more... Résuméabuiyad

Papusas! An El Salvadorian Specialty with vinegar cabbage slaw and pico de gallo


I had my first papusa 2 years ago in the Mission District in San Francisco. It was 1:30 am, and I was drunk. There was a woman who spoke no English who sold these from a cart out front of the bars. They would come off her griddle piping hot and oozing with cheese. They were perfect, magically circles at the wee hours of the morning.

I learned how to make papusas recently from the El Salvadorian women at my work. Now that I live in DC, there is a much larger population of El Salvadorian immigrants than there ever was in California. That means I might not get as much Mexican food as I would like, but I get plenty of papusas.

Papusas are made with Maseca, a cornmeal treated with lime. It has a very fine consistency and a somewhat acidic flavor that is great for tortillas. Papusas are normally served with a vinegar based slaw and a sauce that tastes like a very thin, somewhat reduced salsa that is served warm. I made a pico de gallo to go with mine at home. Papusas are also very versatile, and can be filled with cheese, beans, meat, or any combination for those. But the main reason I love papusas is because the ratios are amazingly easy to remember.


It's 1 to 1.


Papusas


Ingredients

  • 1 part maseca (about 1 cup will yield generous main dish portions for 2 people)
  • 1 part water
  • Beans/cooked meat/desired filling
  • Melting cheese, like monterey jack or mozzarella
Directions
  1. If using multiple filling ingredients, mix as desired. I used cheese, black beans and red bell pepper. Mash beans or grind meat slightly to make a more uniform filling that will hold its shape well.
  2. Mix maseca and water until a paste forms. It will hold its shape, but it will be moist
  3. Break off a ball about 2 inches in diameter and pat into a circle about 1/4 inch thick. Wet your hands with water or oil as necessary to prevent cornmeal from sticking. 
  4. Form a small cup with your hands and place filling in the center. Be generous. I use a large tablespoon, but only do what you are comfortable with.
  5. Fold sides up around the filling and slowly begin patting the papusa into a circle again. Be sure not to leave any tears otherwise the cheese will melt out of the papusa. Pat out to into a circle no thicker than half an inch.
  6. Place papusas in a hot, lightly greased cast iron skillet and cook until done (until marked on both sides. See picture). Serve immediately
You can stop here if you want, or you can continue with the slaw, which is great for any old day, any old BBQ or to replace any old salad

Vinegar Slaw

Ingredients
  • 1/2 head green or red cabbage, shredded
  • 2 carrots, julienned
  • sprigs of cilantro
  • red wine vinegar
  • olive oil
  • oregano
  • cumin
  • salt and pepper
Directions
  • Shred carrots and cabbage into a large bowl. Tear whole cilantro leaves from stems and gently toss with cabbage
  • Separately, mix vinegar, olive oil, oregano and cumin in desired proportions. Should about 1 Tbsp of oil to 3 or 4 Tbsp vinegar. 
  • Dress cabbage as desired. Season with salt and pepper to taste and refrigerate until ready to serve.
Even though I'd recommend the reduced warm salsa, I'll include the pico de gallo recipe because I know how to do it, and because it's an easy addition to any taco night or party.

Pico de Gallo

Ingredients
  • 5 large tomatoes, diced
  • 2medium red onions, minced
  • 1 bunch cilantro,
  • 2 cloves minced garlic
  • 1 jalapeno pepper, stemmed and seeded, minced
  • lime juice
  • salt and pepper to taste
Directions
  1. Mix tomatoes, onion, cilantro and garlic together in a large bowl. Lightly toss when stirring so as not to break the tomatoes too much. Add more or less onion if desired, but it should look pretty even.
  2. Add lime juice, salt and pepper to taste. If you want more heat, add another jalapeno or a couple dashes of hot sauce
  3. Refrigerate until serving
reade more... Résuméabuiyad

Dutch Crunch Bread


I consider Dutch Crunch the perfect sandwich bread for anything with a lighter flavor (fish, chicken, turkey, etc). For all things like roast beef and pastrami, rye bread will always be the winner. But after seeing so many posts for Dutch Crunch rolls after it was assigned for a Daring Bakers challenge, I knew I had to give it a shot.


That night, I had these rolls with a baked basa (a Vietnamese freshwater fish similar to catfish) sandwich with red wine vinegar coleslaw. It was delicious. I'm sure it would be perfect with tuna melts as well.


This post has been submitted to Yeastspotting


Dutch Crunch Bread

Ingredients

  • 2 ¼ tsp dry yeast
  • 1 ¼ cup warm milk
  • 1 ½ Tbsp sugar
  • 2 Tbsp veg oil
  • 1 ½ tsp salt
  • about 3 ½ cups bread flour

Ingredients for topping
  • 4 ½ tsp dry yeast
  • 1 cup warm water
  • 2 Tbsp sugar
  • 2 Tbsp veg oil
  • ½ tsp salt
  • 1 ½ cups rice flour

Directions
  1. For the bread, combine yeast, milk and sugar to let yeast proof
  2. Add vegetable oil, salt and 2 cups of flour. Mix until it comes together
  3. Add more bread flour about ¼ cup at a time until dough pulls away from the sides of the bowl. Knead dough until springy and elastic
  4. Place in oiled bowl covered until doubled in size (1 hour)
  5. Divide dough into 8 pieces and shape into a ball. Cover and let rest 15 minutes while preparing the topping
  6. For the topping, mix all ingredients together until a stiff consistency of icing (it should just drip slowly off the whisk. Let rest for 15 minutes
  7. Coat rolls liberally with the topping and let rest another 15-20 minutes
  8. Bake at 375 degrees 25-30 minutes until well browned.
reade more... Résuméabuiyad

Sunomono


Sunomono has always been one of my favorite salads. It's just Japanese quick pickles with seaweed and a dashi sauce, but it's so light and refreshing. It's sweet and savory with an herbal quality as well. It makes a perfect summer salad and a great accompaniment to any meal. If necessary, you can make it a couple days ahead of time too and the pickles will keep their fantastic crunch.


Traditionally, you want to use Japanese cucumbers that have been rubbed with kosher salt to remove the bitterness. They're relatively small and very thin, but they can occasionally be hard to find in your grocery store. You should not use regular cucumbers, but you can use English cucumbers (the hydroponically grown ones wrapped in plastic). The salad is traditionally dressed with Sanbaizu, meaning "three flavors". 


Sunomono


Ingredients

  • 5 very firm Japanese or English cucumbers, sliced
  • 2 or 3 shiso leaves
  • wakame seaweed to taste
  • kosher salt
  • Sanbaizu dressing (recipe follows)
Directions
  1. Slice cucumbers very thin on a mandolin and salt liberally with kosher salt. They should taste oversalted. 
  2. After about 20 minutes, squeeze the cucumbers in your hands. The salt will draw out the water and make the cucumbers crunchy. If the cucumbers aren't crunchy yet, leave them for another 10 minutes. If they're too salty, rinse them in water and squeeze. The cucumbers can be made about 4 days ahead if you squeeze the water out every day.
  3. When you want to serve the cucumbers, take a couple tablespoons of dried wakame seaweed and rehydrate them in cool water. Squeeze the water out and toss with the cucumbers as much as desired (about 2 parts cucumber to 1 part seaweed)
  4. Chiffonade the shiso and mix with the cucumbers and seaweed.
  5. Dress the salad with sanbaizu and garnish with sesame seeds.
Sanbaizu
  • 3/4 cup dashi
  • 1/4 cup soy sauce
  • 3 Tbsp rice vinegar
  • 2 Tbsp sugar
  • 2 Tbsp mirin
Directions
  1. Mix all ingredients together and serve.
reade more... Résuméabuiyad

Kaleidoscope Cookies


A couple weeks back I was at home alone and got a craving for something sweet. I originally was going to pour myself a bowl of my boyfriend's sugar cereal and found the following recipe on the back of the box. It sounded like a much more delicious use for store brand Fruity Pebbles.


It appealed to my inner child for a multitude of reasons. The main reason was, of course, that they were colorful. They were chewy and crisp at the same time, like a perfect oatmeal cookie. Except unlike an oatmeal cookie, there was none of that pesky fiber. They even have that great, somewhat artificial fruit taste that that type of cereal always has. I'm ashamed that this cookie is as great as it is.


Kaleidoscope Cookies
Ingredients

  • ½ cup butter or margarine, softened
  • ¾ cup sugar
  • 1 egg
  • 1 tsp vanilla
  • 1 cup flour
  • 1 tsp baking powder
  • 2 cups fruity pebbles cereal

Directions
  1. Cream together butter and sugar until fluffy. Add egg and vanilla.
  2. Add in flour and baking powder and mix until incorporated. Fold in fruity pebbles cereal.
  3. Scoop cookies onto prepared baking sheet and bake for 12 minutes at 325 or until lightly browned around the edges.


reade more... Résuméabuiyad

Irish Soda Scones: A delicious St. Patrick's Day Surprise


When I lived in Berkeley, I loved St. Patrick's day at Cheeseboard bakery. They would make these great loaves of Irish soda bread that were better than I'd had anywhere else. Of course, they made authentic soda bread. Of course, most people find authentic Irish soda bread absolutely disgusting. It's normally dry, unsweetened and as dense as a brick. But I find that it goes wonderfully with tea. It's perfect for breakfast.

I was upset to find out that the Irish soda bread recipe was not in the Cheeseboard recipe book. Instead, they had an Irish soda scones recipe. It's different. It's lighter than a normal Irish soda bread and it's more tender due to the greater butter content. It still has a strong caraway flavor and is only sweetened by the raisins. But it was a great recipe and much more popular with everyone else than normal Irish soda bread. 


Best of all, it went great with a Guinness. Happy St. Patty's Day!


Cheeseboard Irish Soda Scones

Ingredients

  • 3 ½ cups AP flour
  • ¾ tsp baking soda
  • 1 tbsp bakingpowder
  • ½ tsp salt
  • ¾ cup rolled oats
  • 2 Tbsp caraway
  • 1 ¼ cups unsalted butter, cut into 1 inch cubes
  • 1 cup golden raisins
  • 1 ½ cups buttermilk

Directions

  1. Mix together flour, soda, baking powder, salt, oats and caraway in mixer. Add butter and mix for 4 minutes or until butter is the size of small peas
  2. Add raisins and buttermilk. Mix until just combined and moistened. Let rest 10 minutes for oats to absorb liquid
  3. Roll out  dough on floured surface to 1 inch thick. Fold in half and roll out in opposite direction 1 inch. Repeat 2 more times.
  4. Cut resulting rectangle into 12 squares. Cut a defined cross into the top of the scones (about halfway down) going horizontal/vertical, NOT diagonal to the corners
  5. Place on prepared baking sheet and bake for 30 minutes or until the tops are golden brown. These are sweetened by only the raisins, and a great with a cup of tea.
reade more... Résuméabuiyad

Crispy Baked Zucchini Fries


I don't know about you guys, but we're pretty hum-drum around here when it comes to side dishes.
Let's face it. 
Life is busy, getting an entree on the table can be hard enough, and there just isn't time for being fancy about our veggies.
I mainly resort to steaming them, although roasting or boiling or sauteing are occasionally an option I choose.
I only really get fancy for holiday meals or sometimes company.

Crispy baked zucchini fries are definitely worth the extra effort, though. 

The panko adds a wonderful crunch to the tender zucchini strips inside and the seasoning takes a rather plain veggie to something really tasty. 

Grant declared them a new favorite for sure. 

Recipe: from Confections of a Foodie Bride

1/4 cup whole wheat flour
2 eggs
2 T. water
2 cups Panko breadcrumbs
Salt
Pepper
1/2 tsp garlic powder
1/4 tsp cayenne pepper
1 lb zucchini, cut into 4-5-inch sticks


Preheat oven to 425° and line a baking sheet with parchment (or whatever non-stick method you prefer).
Place flour in a large zipper bag.
Whisk eggs with 2 Tbsp water and place in a shallow dish.
Place Panko, salt, pepper, garlic powder, and cayenne pepper in a shallow dish and mix to combine.
Place zucchini in the bag with the flour and shake until well coated. Dip the zucchini into the egg and then into the panko, turning to coat well.
Place breaded zucchini on the baking sheet.
Bake 18-20 minutes, until golden brown.

Serve with your favorite dipping sauce (ranch, marinara, or barbecue sauce)

They're best the first day, but to store leftovers, store in a single layer on a plate, wrapped with plastic wrap.  Reheat at 375° for 5-7 minutes, until heated through.
reade more... Résuméabuiyad

Homemade Heath Bars


Heath bars are one of those fantastic chocolates I remember from my childhood. They were one of my favorites and they're still one of my mix-in toppings of choice when you can pick toppings from an ice cream shop. These are super easy to make and not nearly as finicky as most candies can be. You can stir and let the sugar crystalize as much as you want and they'll still be great.


Butter Toffee heath bars (makes about 90 bite sized pieces)
Ingredients

  • 1 lb unsalted butter
  • 2 ⅔ cup sugar
  • ⅓ cup water
  • ¼ cup corn syrup
  • pinch of salt
  • melted chocolate for covering
Directions
  1. Cook sugar, butter, water and corn syrup and salt until it reaches 290 degrees (hard crack stage) while stirring constantly. (Normally you don't want to stir sugar for candy because you don't want this to crystalize. But because you want this one to have that hard crystal structure that breaks apart and dissolves on your tongue, stirring is just fine).
  2. Remove from heat and pour over parchment paper until completely cooled.
  3. Break into pieces and dip in chocolate to finish.
reade more... Résuméabuiyad

Fluffy Buttermilk Pancakes


Yesterday was IHOP free pancake day: an amazing day of the year. I haven't eaten at an IHOP in ages, but given that it was my day off, I thought pancakes still sounded like a fabulous idea.

These pancakes are extremely light and fluffy. They taste like the ones you would get at a place like IHOP, and they go perfectly with real maple syrup. Best of all, the ratios are equal numbers of everything, and are therefore super super easy to remember.

Ingredients

  • 1 cup flour
  • 1 egg
  • 1 cup buttermilk (maybe a little more to the right consistency)
  • 1 tsp baking powder
  • 1 tsp baking soda
  • 1 Tbsp melted butter
  • 1 Tbsp sugar (I always add just a little bit more butter and sugar)
Directions
  1. Mix together all dry ingredients
  2. Add egg, butter and buttermilk, mixing gently. Don't remove all the lumps
  3. Cook pancakes on heated pan. Flip when bubbles form on one side and stay (just like normal pancake instructions)
reade more... Résuméabuiyad

Lemon Caper Quinoa Patties


Quinoa has been one of my favorite foods since my college days at Berkeley. I lived with quite a few vegetarians/vegans in a cooperative house and had to get used to cooking all sorts of things I'd never cooked before. Quinoa was by far my favorite discovery. It's full of protein and fiber. It's gluten free, and it's one of the best ancient grains. It takes on whatever flavors you impart into it, and it creates a very filling side or main dish.


I could spend an entire post extolling the virtues of quinoa, but for now I'll give you one of my favorite quinoa main dish recipes. I love capers, so I added some extra. You can reduce the amount if it suits you.


Quinoa Patties (makes 8)
Ingredients
  • 1 ⅓ cups cooked quinoa
  • splash soy sauce
  • 1 ½ Tbsp capers
  • 2 Tbsp fresh chopped parsley
  • 1 egg
  • ½ chopped onion
  • 1 minced garlic clove
  • 3 Tbsp whole wheat flour
  • ¼ tsp salt
  • ¼ tsp pepper
  • pinch of allspice
  • zest of one lemon
  • juice of ½ lemon
  • pinch cayenne pepper
  • olive oil for frying

Directions
  1. Cook quinoa with a splash of soy sauce in the water. You’ll have 1 serving of leftovers if you do ¾ cup quinoa with 1 ½ cup water. Bring water to a boil, add rinsed quinoa and simmer covered until liquid is absorbed.
  2. While quinoa is cooking, mix together all other ingredients except olive oil.
  3. Form quinoa into patties and fry until crispy on both sides. Serve with a small dollop of greek yogurt and chives if desired.
reade more... Résuméabuiyad

Portugese Sweet Bread (Pao Doce)


When I was much younger, I remember getting sweet bread three times per year. My grandmother and aunt would make large batches at Easter, Christmas and Mardi Gras, before the start of lent and our requisite fasting. By large batches, I mean 10 loaves at a time to eat on the big feast days and send to other family members. It has a lot of eggs and butter, making it similar to panettone but not as sweet. It's got a nice kick from the spices and it is a great snack at all times of the day. Most of all, you can make this any time of year, not just on holidays. It's too good to relegate to just those days.

This recipe is pretty difficult to do without a stand mixer. The batter will be sticky and loose, almost like cake batter. I've scaled down the recipe to make only 2 loaves, which seems like a much more reasonable amount for any regular occasion. 

This post has been submitted to Yeastspotting


Azores Sweet Bread

Ingredients (2 loaves)
  • 1 ⅔ lbs AP flour
  • 1 pack dry yeast
  • 10 eggs
  • 2 sticks butter, melted
  • 1 cup sugar
  • ⅓ cup powdered sugar
  • 2 tsp lemon extract
  • ½ tsp cinnamon
  • ½ tsp nutmeg

Directions
  1. Dissolve yeast with 1 tsp sugar and 3 Tbsp of warm water for 10 minutes until frothy.
  2. Whisk together egg, sugar, spices and lemon. Slowly add melted butter
  3. Add yeast and flour. Mix and knead for 15 minutes.
  4. Cover with plastic wrap and blankets and let rise for 4 hours.
  5. Divide dough into greased loaf pans and let rise for 4 more hours. Make sure not to fill the pans more than halfway, to allow enough space to proof and finish in the oven.
  6. Bake at 300 for 10 minutes. Reduce heat to 285 and continue baking another 25 minutes or until a tester is clean.
reade more... Résuméabuiyad

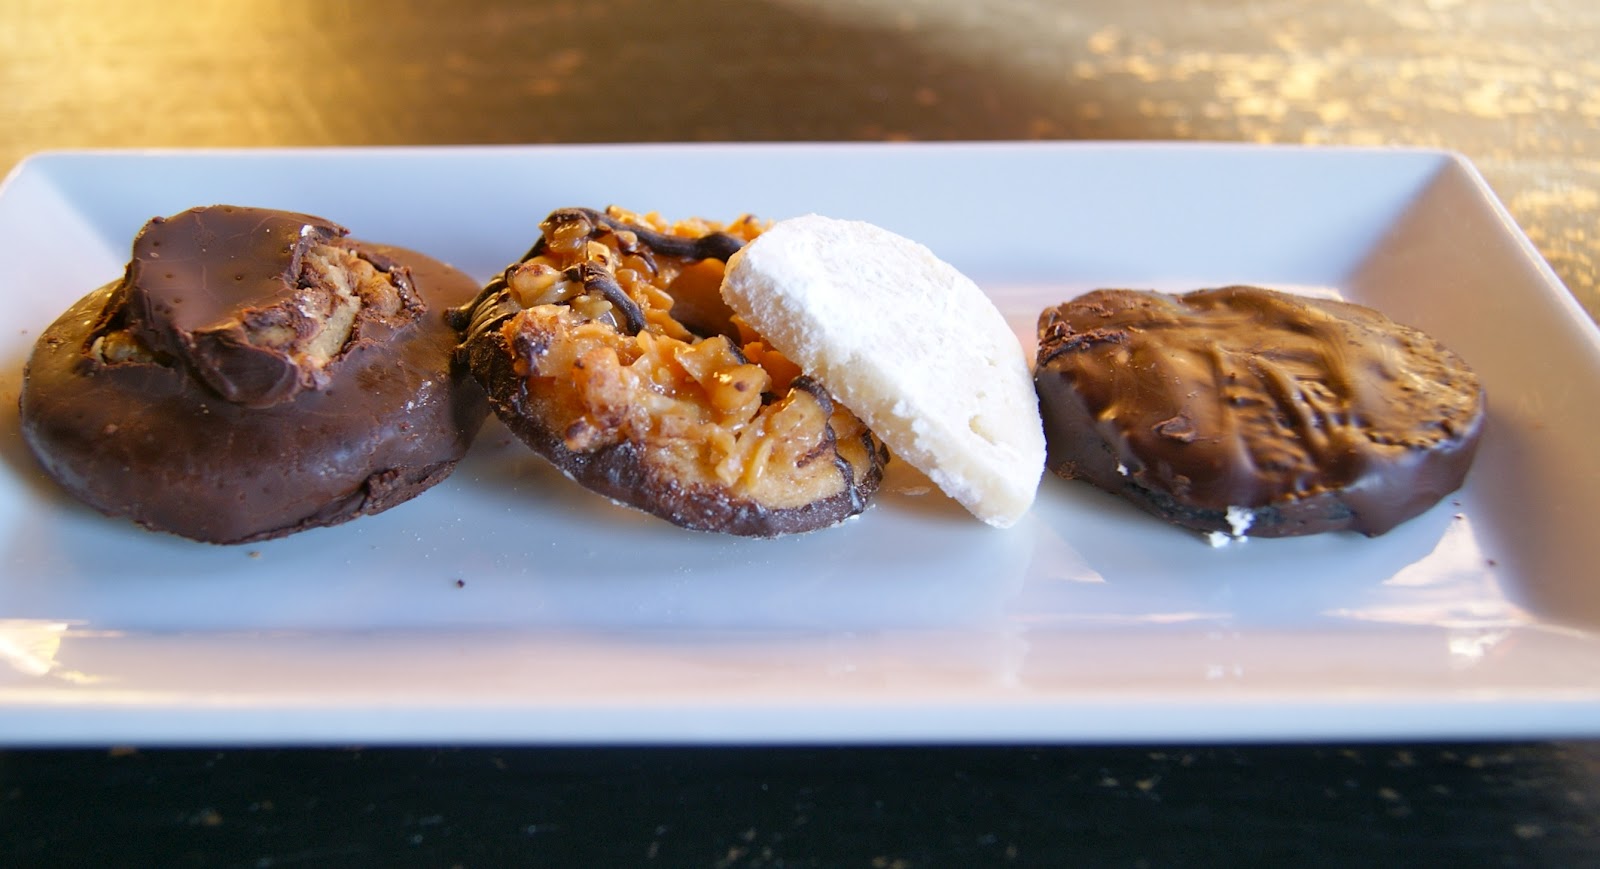
Lemon Coolers: a homemade, discontinued girlscout cookie


Several years ago, the Girl Scouts had a cookie called a Lemon Cooler. They were marketed as a low fat cookie from about 2000-2006 when they were discontinued/retired. Even though they were low fat, they were sweet and refreshing. It was a vanilla cookie with just a hint of tart. They were perfect when you didn't want chocolate, and you could eat 5 cookies for the caloric equivalent of 2 samoas. 


Those cookies seem to have come back for the 100th anniversary, now dubbed with the name "Savannah Smiles" (which means, of course, that there is a stripper somewhere with the unfortunate name of Thin Mint or Tagalong). But I will always call these delicious cookies lemon coolers. 


It might almost be girlscout cookie season, but in the off times when you long for those delicious cookies, you can always make this recipe or a recipe for homemade Samoas to hold you over from one year to the next. 


Lemon Coolers
Ingredients

  • ½ cup butter
  • ¾ cup powdered sugar
  • 2 tsp lemon extract or zest and juice from 1 lemon
  • 1 tsp vanilla
  • 1 cup - 1 Tbsp flour
  • 1 Tbsp corn starch
  • ¼ tsp baking powder
  • ¼ tsp salt
  • ¼ cup milk
  • additional confectioners sugar for rolling

Directions
  1. Cream together butter and sugar. Mix in vanilla, lemon and milk
  2. Add starch, flour, salt and baking powder and mix until combined
  3. Roll into a log and freeze at least one hour
  4. Slice into circles and then half moons if desired.
  5. Bake 12 minutes at 350 degrees.
  6. After cookies are cool, roll in powdered sugar

reade more... Résuméabuiyad