Pages

Sausage & Balsamic-Caramelized Onion Pizza - and a homemade whole wheat crust recipe


We love, love, love homemade pizza.  Not only can you make it healthier than what you buy at the pizza shops, you can put together some way crazy-delicious flavor combinations that you just can't buy.  Now, don't get me wrong - I love pizza from pizza shops ... swear I could eat it every day and never get tired of it.  Unfortunately, I don't think my pants would be very happy with me if I did that.  So I've played around at home and come up with several homemade pizzas we really enjoy, and with a whole wheat crust to boot.  Here's the first of our favorites - Sausage & Balsamic-Caramelized Onion Pizza.

Sometimes I make my own crust, but most of the time - I'll admit - I buy pre-made dough balls at the grocery store.  My favorites - 1.  Trader Joe's for $0.99 (can you believe that price??), and 2.  Harris Teeter for $1.99.  When I go to Trader Joe's, I bring a cooler and buy like 10 or 15 dough balls at a time.  Then I stick them in the freezer and pull them out as I need them.  Harris Teeter just started carrying the whole wheat dough balls (in their deli section), so that's a great option now, too.  Check your local grocery stores to see what's available.  If you'd like to make your own, I've included my recipe at the end of this post.

Pre-made Dough Balls
The beauty of the toppings for this pizza is you can prepare them in advance and just stick them in the frig until you're ready to assemble the pizza.  A lot of times, I get the toppings ready the day before.  First, fry up your sausage (I didn't take a picture of that), and then caramelize your onions.  To do that, slice them in rings and put them in a fry pan with a little butter (or olive oil):
Starting the onions
After they've softened a bit, add in the balsamic vinegar and continue to cook them until all the liquid has been absorbed.
With the Balsamic vinegar added
When you're ready to assemble, roll out your dough ...
Rollin' out the dough ...
... and put it on a pizza stone or baking sheet.  As you can see, I don't try to get real precise with the shape.
... you can be very rustic with the dough shape
Spread on your sauce.  I use just a very simple sauce of crushed tomatoes.  Straight out of the can ... yup, just a thin layer of canned crushed tomatoes.
Simple sauce - just crushed tomatoes!
Then add your toppings.  I like to sprinkle on just a tiny bit of cheese first, then the sausage, and then the onions.
Putting on the onions ... they taste better than they look
Then top with a good layer of cheese - however much you want.
Mmmmmmm - ready to bake
Bake it up and enjoy.  I think leftovers are just as yummy, if not even yummier, the next day!


I invite you to follow The Kitchen is My Playground with Pinterest, Facebook, Google Friend Connect, Linky Followers, bloglovin', or Feedburner. Buttons are in the right sidebar. I'd love to have you back soon!


Sausage & Balsamic-Caramelized Onion Pizza
Source:  Inspired by Williams-Sonoma
Ingredients
Store-bought pizza dough ball OR homemade pizza dough (see ingredients below)

For Homemade Whole Wheat Pizza Dough (enough for 2 pizza crusts):
1 envelope active dry yeast
1 c. warm water
4 c. whole wheat flour
1 tsp. sea salt
3 T. olive oil
3/4 c. + 1-2 T. additional warm water


Toppings:
1 lb. pork sausage
1 large yellow or Vidalia onion
3 T. balsamic vinegar
1 T. butter
1 (14 oz.) can crushed tomatoes
Shredded mozzarella


Directions
Prepare the Pizza Dough:
Combine yeast and 1 cup warm water to activate yeast - water should be just barely warm to the touch.  Add remaining ingredients and knead together, adding the 1-2 T. additional warm water in the amount needed to form a dough that holds together.  Let dough rise in a greased and covered bowl for about 45-60 minutes.  Divide dough into two halves and roll out for two pizza crusts.  After topping as desired, bake at 425 degrees for about 15-25 minutes.

Prepare the Pizza:
Slice onion in rings, saute in butter over medium-low heat until tender.  Add balsamic vinegar and continue cooking until liquid is gone, caramelizing the onions.  In a separate pan, brown sausage and drain.  Roll pizza dough out to desired size; place on preheated pizza stone or baking sheet.  Spread crushed tomatoes over crust for sauce (you may not use all of the can).  Top with sausage and onions, then sprinkle with cheese.  Bake at 425 degrees for about 15-25 minutes, or until cheese is bubbly and just beginning to brown.

Enjoy!


We love, love, love homemade pizza.  Not only can you make it healthier than what you buy at the pizza shops, you can put together some way crazy-delicious flavor combinations that you just can't buy.  Now, don't get me wrong - I love pizza from pizza shops ... swear I could eat it every day and never get tired of it.  Unfortunately, I don't think my pants would be very happy with me if I did that.  So I've played around at home and come up with several homemade pizzas we really enjoy, and with a whole wheat crust to boot.  Here's the first of our favorites - Sausage & Balsamic-Caramelized Onion Pizza.

Sometimes I make my own crust, but most of the time - I'll admit - I buy pre-made dough balls at the grocery store.  My favorites - 1.  Trader Joe's for $0.99 (can you believe that price??), and 2.  Harris Teeter for $1.99.  When I go to Trader Joe's, I bring a cooler and buy like 10 or 15 dough balls at a time.  Then I stick them in the freezer and pull them out as I need them.  Harris Teeter just started carrying the whole wheat dough balls (in their deli section), so that's a great option now, too.  Check your local grocery stores to see what's available.  If you'd like to make your own, I've included my recipe at the end of this post.

Pre-made Dough Balls
The beauty of the toppings for this pizza is you can prepare them in advance and just stick them in the frig until you're ready to assemble the pizza.  A lot of times, I get the toppings ready the day before.  First, fry up your sausage (I didn't take a picture of that), and then caramelize your onions.  To do that, slice them in rings and put them in a fry pan with a little butter (or olive oil):
Starting the onions
After they've softened a bit, add in the balsamic vinegar and continue to cook them until all the liquid has been absorbed.
With the Balsamic vinegar added
When you're ready to assemble, roll out your dough ...
Rollin' out the dough ...
... and put it on a pizza stone or baking sheet.  As you can see, I don't try to get real precise with the shape.
... you can be very rustic with the dough shape
Spread on your sauce.  I use just a very simple sauce of crushed tomatoes.  Straight out of the can ... yup, just a thin layer of canned crushed tomatoes.
Simple sauce - just crushed tomatoes!
Then add your toppings.  I like to sprinkle on just a tiny bit of cheese first, then the sausage, and then the onions.
Putting on the onions ... they taste better than they look
Then top with a good layer of cheese - however much you want.
Mmmmmmm - ready to bake
Bake it up and enjoy.  I think leftovers are just as yummy, if not even yummier, the next day!


I invite you to follow The Kitchen is My Playground with Pinterest, Facebook, Google Friend Connect, Linky Followers, bloglovin', or Feedburner. Buttons are in the right sidebar. I'd love to have you back soon!


Sausage & Balsamic-Caramelized Onion Pizza
Source:  Inspired by Williams-Sonoma
Ingredients
Store-bought pizza dough ball OR homemade pizza dough (see ingredients below)

For Homemade Whole Wheat Pizza Dough (enough for 2 pizza crusts):
1 envelope active dry yeast
1 c. warm water
4 c. whole wheat flour
1 tsp. sea salt
3 T. olive oil
3/4 c. + 1-2 T. additional warm water


Toppings:
1 lb. pork sausage
1 large yellow or Vidalia onion
3 T. balsamic vinegar
1 T. butter
1 (14 oz.) can crushed tomatoes
Shredded mozzarella


Directions
Prepare the Pizza Dough:
Combine yeast and 1 cup warm water to activate yeast - water should be just barely warm to the touch.  Add remaining ingredients and knead together, adding the 1-2 T. additional warm water in the amount needed to form a dough that holds together.  Let dough rise in a greased and covered bowl for about 45-60 minutes.  Divide dough into two halves and roll out for two pizza crusts.  After topping as desired, bake at 425 degrees for about 15-25 minutes.

Prepare the Pizza:
Slice onion in rings, saute in butter over medium-low heat until tender.  Add balsamic vinegar and continue cooking until liquid is gone, caramelizing the onions.  In a separate pan, brown sausage and drain.  Roll pizza dough out to desired size; place on preheated pizza stone or baking sheet.  Spread crushed tomatoes over crust for sauce (you may not use all of the can).  Top with sausage and onions, then sprinkle with cheese.  Bake at 425 degrees for about 15-25 minutes, or until cheese is bubbly and just beginning to brown.

Enjoy!

reade more... Résuméabuiyad

Blueberry Crisp ... dee-lish


I may have a new favorite fruit dessert!  I don't know why I didn't think of this before.  Apple crisp, all the time ... pear crisp, yes ... but never blueberry crisp?  Didn't think of that until now.  Now that I've tried it, I'm hooked.  I think I even like it better than blueberry pie, which is one of my all-time favorite desserts!  And another plus for this recipe - it's so quick and easy.

I tried two different versions of this crisp - one with red wine, and one without.  I was so sure the one with wine would be better, but this was one time that adding wine was not a plus.  In my side-by-side taste comparison, the without-wine version won hands-down.  Not even a contest.  I then had Mark do a blind testing ... same result - the "not wine" one won.  No question.  And I thought wine with the blueberries would be so good.  Perhaps a different kind of wine ... or perhaps red wine and blueberries in a different type of blueberry dessert.  I may have to keep tinkering.  Until I tinker my way to a new blueberry-wine creation, enjoy this non-wine blueberry crisp!

First mix up your blueberry filling:


Then toss together your topping and sprinkle it over the blueberry mixture:


Bake it all up:


And enjoy it with a dollop of whipped cream ...


Or not....


It's dee-lish both ways!


Blueberry Crisp
Source:  Tracey-Original
Ingredients
Blueberry Filling:
4 c. blueberries (fresh or frozen)
2 T. cornstarch
1/2 c. sugar
1/4 tsp. ground cinnamon
1/8 tsp. ground nutmeg
1/2 c. water
1 tsp. lemon juice

Topping:
1 c. whole wheat flour (or all-purpose flour)
1 c. old-fashioned oats
1 c. brown sugar
1/2 tsp. cinnamon
1/2 c. (1 stick) butter, melted


Directions
1.  Preheat oven to 350 degrees.

Prepare the Blueberry Filling:  
2.  Place the berries in a large bowl, set aside.  Whisk together the cornstarch, sugar, 1/4 tsp. cinnamon, and nutmeg. Sprinkle over the berries and toss together. Add the lemon juice and water; toss together.

3.  Place in a 9x13” baking dish that has been sprayed with cooking spray.

Prepare the Topping:  
4.  Combine the flour, oats, brown sugar, and 1/2 tsp. cinnamon in a bowl. Add the melted butter and toss until it is all well combined.  Sprinkle the topping evenly over the blueberries.

5.  Bake for 45 minutes or until the berries are bubbling vigorously along the edges and the topping is golden brown.

Enjoy!


I may have a new favorite fruit dessert!  I don't know why I didn't think of this before.  Apple crisp, all the time ... pear crisp, yes ... but never blueberry crisp?  Didn't think of that until now.  Now that I've tried it, I'm hooked.  I think I even like it better than blueberry pie, which is one of my all-time favorite desserts!  And another plus for this recipe - it's so quick and easy.

I tried two different versions of this crisp - one with red wine, and one without.  I was so sure the one with wine would be better, but this was one time that adding wine was not a plus.  In my side-by-side taste comparison, the without-wine version won hands-down.  Not even a contest.  I then had Mark do a blind testing ... same result - the "not wine" one won.  No question.  And I thought wine with the blueberries would be so good.  Perhaps a different kind of wine ... or perhaps red wine and blueberries in a different type of blueberry dessert.  I may have to keep tinkering.  Until I tinker my way to a new blueberry-wine creation, enjoy this non-wine blueberry crisp!

First mix up your blueberry filling:


Then toss together your topping and sprinkle it over the blueberry mixture:


Bake it all up:


And enjoy it with a dollop of whipped cream ...


Or not....


It's dee-lish both ways!


Blueberry Crisp
Source:  Tracey-Original
Ingredients
Blueberry Filling:
4 c. blueberries (fresh or frozen)
2 T. cornstarch
1/2 c. sugar
1/4 tsp. ground cinnamon
1/8 tsp. ground nutmeg
1/2 c. water
1 tsp. lemon juice

Topping:
1 c. whole wheat flour (or all-purpose flour)
1 c. old-fashioned oats
1 c. brown sugar
1/2 tsp. cinnamon
1/2 c. (1 stick) butter, melted


Directions
1.  Preheat oven to 350 degrees.

Prepare the Blueberry Filling:  
2.  Place the berries in a large bowl, set aside.  Whisk together the cornstarch, sugar, 1/4 tsp. cinnamon, and nutmeg. Sprinkle over the berries and toss together. Add the lemon juice and water; toss together.

3.  Place in a 9x13” baking dish that has been sprayed with cooking spray.

Prepare the Topping:  
4.  Combine the flour, oats, brown sugar, and 1/2 tsp. cinnamon in a bowl. Add the melted butter and toss until it is all well combined.  Sprinkle the topping evenly over the blueberries.

5.  Bake for 45 minutes or until the berries are bubbling vigorously along the edges and the topping is golden brown.

Enjoy!


reade more... Résuméabuiyad

How to Bake Classic Pound Cake - I did it!

I finally did it!  I baked my first pound cake!!  Can you believe I had never made a pound cake before this?  In my defense, pound cake is decidedly a southern thing.  Growing up in Vermont, we just didn't bake pound cakes.  The only pound cake I had been exposed to prior to moving south was the Sara Lee loaf kind you buy in the freezer section at the grocery store.  Now that I live in North Carolina, pound cake is everywhere, and in so many wonderful flavors. Oh, homemade is sooooo much better than that frozen stuff!

I'll admit I was very nervous, possibly even a little bit scared, to make my first pound cake.  As I said before, I have absolutely zero background in baking this kind of cake.  Add to that the fact that my mother-in-law is pretty much a pound cake baking goddess.  You can be almost guaranteed that when you walk into her house, there's a pound cake in the cake cupboard.  Yep, she makes it so much there's a cake cupboard where it's kept.  Now if that's not intimidating, I don't know what is.

And there you have it - fear.  Fear of the cake.  But I desperately wanted to overcome this fear.


So, after eight years of knowing my husband and eating his mother's wonderfully amazing pound cake, I decided to give her recipe a whirl myself.  Trying to recall all the tips and tricks she told me, I set out on my journey.  Doubts still ran through my head - What if I don't get the batter mixed just right?  What if it gets a streak in it? (I've learned that this is when it doesn't bake evenly, creating basically an unbaked "streak" through the cake.)  What if ... and apparently this is one of the worst and most frequent pound cake mishaps ... it won't come out of the pan?  What if it bakes up ugly??  But I pressed on ... 

After combining all my ingredients and beating them for the full 15 minutes called for in the recipe, I poured my beautiful pale yellow, smooth, creamy batter into my pan.  I'm a sucker for batter, so of course I tasted it at this point.  Already yummy!

Beautiful batter

But when my cake came out of the oven, one of my fears had come to be - the top of the cake baked up ugly, and one part of it was slumped down a little.  Fortunately, it settled down a tiny bit as it cooled - but it still certainly wasn't the prettiest cake around.  This made me very worried to cut into it.


Not-so-beautiful baked top
When it finally came time to cut, Mark and I did it together.  After all, he grew up with this cake and would for-sure know if it was up-to-snuff!  Because of the slumped side, he was positive there was going to be a streak in it.  When we cut, I was extremely glad to find no streak!


Now came the ultimate test ... the Mark taste-test.  I'm happy to report that my pound cake passed with flying colors, ugly top and all!  The Mark quote:  "I think you've done it."  That's very high praise from my particular husband.

As I do with most of my baked goods, I gave the majority of the cake away.  As I was packaging up my little cake care packages, I asked Mark if he wanted me to save him a few slices.  He said no - so I asked, "Are you sure?"  He said, "Yes, I'm sure."  I admit, I was surprised.  So, I decided to save just one slice for me to have the next day.  Here it is - all by itself on the cake plate:

One lonely little piece of pound cake

Here's what the cake plate looked like the next morning when I came down for breakfast:
Someone stole the pound cake!
Guess what Mark had for breakfast...

Compliments of my mother-in-law, here is the recipe for this classic pound cake.  Eat it plain, or with berries or whipped cream (or both!) on top.  Even if it bakes up ugly, it will still taste delicious.


Classic Vanilla Pound Cake
Source:  My Mother-in-Law
Ingredients
3 c. sugar
1/2 lb. (2 sticks) butter
2 T. Crisco shortening
6 eggs
1 tsp. vanilla
3 c. flour
1 tsp. baking powder
1 c. milk (my mother-in-law and I use 2% milk)

Directions
Cream the sugar, butter, and Crisco.  Add eggs and vanilla; beat with an electric mixer about 10-15 minutes.  Combine the flour and baking powder.  Add flour mixture and milk, alternately, to the creamed sugar and eggs mixture.  Pour batter into a tube pan that has been generously sprayed with cooking spray.  Bake at 325 degrees for 1 to 1 1/2 hours until a toothpick comes out clean.  Cool about a 1/2 an hour in the pan; remove cake from pan.

Enjoy!

I finally did it!  I baked my first pound cake!!  Can you believe I had never made a pound cake before this?  In my defense, pound cake is decidedly a southern thing.  Growing up in Vermont, we just didn't bake pound cakes.  The only pound cake I had been exposed to prior to moving south was the Sara Lee loaf kind you buy in the freezer section at the grocery store.  Now that I live in North Carolina, pound cake is everywhere, and in so many wonderful flavors. Oh, homemade is sooooo much better than that frozen stuff!

I'll admit I was very nervous, possibly even a little bit scared, to make my first pound cake.  As I said before, I have absolutely zero background in baking this kind of cake.  Add to that the fact that my mother-in-law is pretty much a pound cake baking goddess.  You can be almost guaranteed that when you walk into her house, there's a pound cake in the cake cupboard.  Yep, she makes it so much there's a cake cupboard where it's kept.  Now if that's not intimidating, I don't know what is.

And there you have it - fear.  Fear of the cake.  But I desperately wanted to overcome this fear.


So, after eight years of knowing my husband and eating his mother's wonderfully amazing pound cake, I decided to give her recipe a whirl myself.  Trying to recall all the tips and tricks she told me, I set out on my journey.  Doubts still ran through my head - What if I don't get the batter mixed just right?  What if it gets a streak in it? (I've learned that this is when it doesn't bake evenly, creating basically an unbaked "streak" through the cake.)  What if ... and apparently this is one of the worst and most frequent pound cake mishaps ... it won't come out of the pan?  What if it bakes up ugly??  But I pressed on ... 

After combining all my ingredients and beating them for the full 15 minutes called for in the recipe, I poured my beautiful pale yellow, smooth, creamy batter into my pan.  I'm a sucker for batter, so of course I tasted it at this point.  Already yummy!

Beautiful batter

But when my cake came out of the oven, one of my fears had come to be - the top of the cake baked up ugly, and one part of it was slumped down a little.  Fortunately, it settled down a tiny bit as it cooled - but it still certainly wasn't the prettiest cake around.  This made me very worried to cut into it.


Not-so-beautiful baked top
When it finally came time to cut, Mark and I did it together.  After all, he grew up with this cake and would for-sure know if it was up-to-snuff!  Because of the slumped side, he was positive there was going to be a streak in it.  When we cut, I was extremely glad to find no streak!


Now came the ultimate test ... the Mark taste-test.  I'm happy to report that my pound cake passed with flying colors, ugly top and all!  The Mark quote:  "I think you've done it."  That's very high praise from my particular husband.

As I do with most of my baked goods, I gave the majority of the cake away.  As I was packaging up my little cake care packages, I asked Mark if he wanted me to save him a few slices.  He said no - so I asked, "Are you sure?"  He said, "Yes, I'm sure."  I admit, I was surprised.  So, I decided to save just one slice for me to have the next day.  Here it is - all by itself on the cake plate:

One lonely little piece of pound cake

Here's what the cake plate looked like the next morning when I came down for breakfast:
Someone stole the pound cake!
Guess what Mark had for breakfast...

Compliments of my mother-in-law, here is the recipe for this classic pound cake.  Eat it plain, or with berries or whipped cream (or both!) on top.  Even if it bakes up ugly, it will still taste delicious.


Classic Vanilla Pound Cake
Source:  My Mother-in-Law
Ingredients
3 c. sugar
1/2 lb. (2 sticks) butter
2 T. Crisco shortening
6 eggs
1 tsp. vanilla
3 c. flour
1 tsp. baking powder
1 c. milk (my mother-in-law and I use 2% milk)

Directions
Cream the sugar, butter, and Crisco.  Add eggs and vanilla; beat with an electric mixer about 10-15 minutes.  Combine the flour and baking powder.  Add flour mixture and milk, alternately, to the creamed sugar and eggs mixture.  Pour batter into a tube pan that has been generously sprayed with cooking spray.  Bake at 325 degrees for 1 to 1 1/2 hours until a toothpick comes out clean.  Cool about a 1/2 an hour in the pan; remove cake from pan.

Enjoy!

reade more... Résuméabuiyad

My Favorite Children's Literature ... food-related, of course!

Now, why would I be writing a post about children's literature on a cooking blog?  Because I realized on my drive to school the other day (I'm a first grade teacher) that three of my favorite children's books have to do with food!  So as soon as I got to my classroom that morning, I grabbed these three favorite books off my bookshelf so I could take them home, snap some pictures of them, and share them with you.  If you have little ones in your life (or, if you're simply a lover of children's books), I highly recommend these stories.

First up is a very sweet little book brought to my attention by my friend Andrea (she has a blog, too - you can check it out by clicking here.  Or, click here to read a post she did about me - thanks, Andrea!). 


Cupcake ... How appropriate for me!!  See, I love to bake cupcakes, as you can read in Andrea's post.  They're fun.  And they make you feel less guilty about eating them than eating a big ol' slice of cake does ... even though, in reality, you probably end up eating more because you usually eat more than one.  Well, at least I end up eating more than one.

The plain vanilla cupcake in this story feels very, well, plain compared to her fancy brothers and sisters who have lots of decorations.  She feels even worse about her herself when she's left sitting all alone on the plate when all the others have been chosen already.  Poor plain vanilla!  I would choose you!  After trying to spruce herself up with lots of funny things, she ends up realizing she's special just the way she is.  Ahhhh, how sweet!

I read this story with my first grade class the week we were learning about compound words ... since cupcake is a compound word ... get it?  Cup + cake = cupcake!  Then we decorated cupcakes and ate them.  Plain vanilla cupcakes, of course.  Though my kids could choose chocolate OR vanilla frosting, or a little of each ... which they all thought was very cool.  First graders really are so easy to please.

Next up is one of my all-time favorite storybooks - Marsupial Sue Presents the Runaway Pancake by John Lithgow.  Yes, the John Lithgow - the absolutely hysterically funny and great actor.  The book itself read by anyone is funny enough.  But what makes it even funnier is that it comes with a CD of John Lithgow reading and singing the story - and he is hilarious!  I soooooo love this book.  It's just good ol' fun, and you can't help but laugh and sing along with John as the pancake desperately tries to get away without being eaten.


I play this book for my class probably about 3-4 times a year, they love it so much.

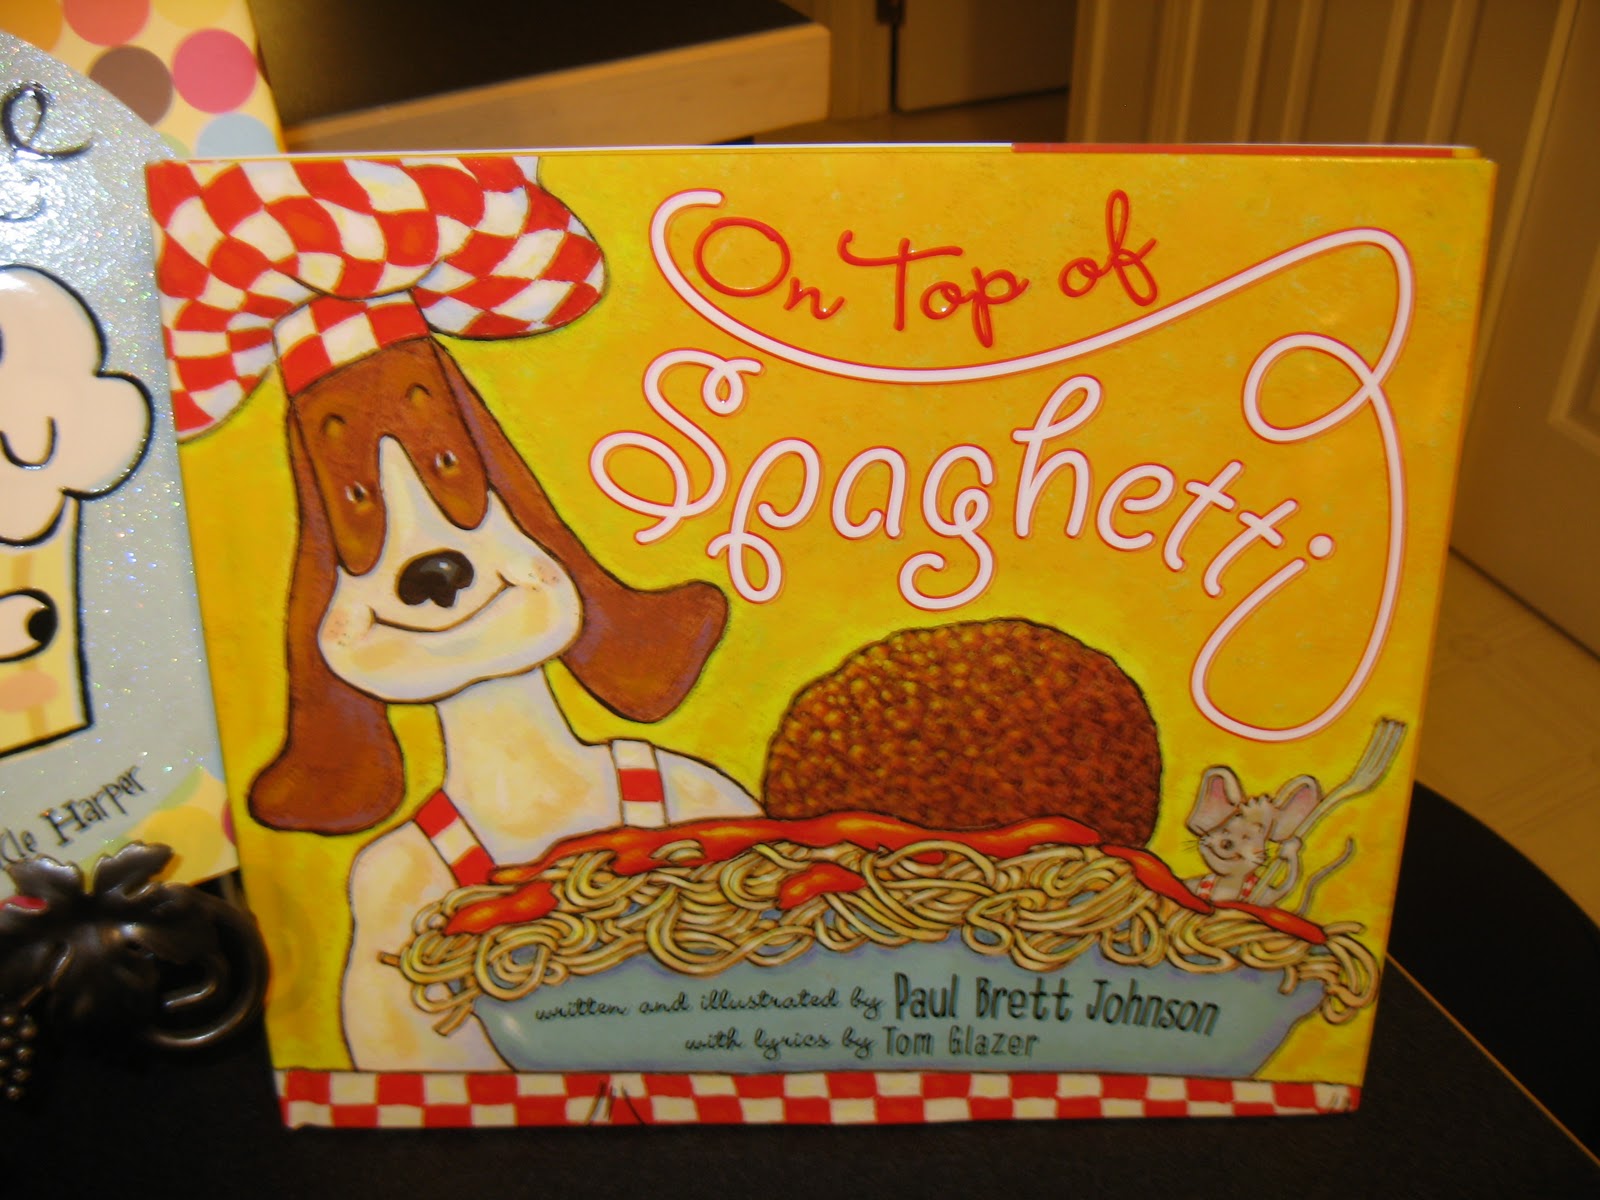
Finally, I have an old classic - On Top of Spaghetti.  It goes right along with that song we all know ... sing along, you know you want to! 

On top of spaaaaagheeeeettiii, all covered with cheese - I lost my poor meattttttball when somebody sneezed.  It rolled ooooofffff the table, and onto the floor.  And then my poor meatttttball rolled out of the door...

The week we learn the short o sound, I read this book and we learn the song.  The book quickly becomes one of the students' favorites during their independent reading time - so much so that my first copy is about falling apart after only three years in the classroom!  I asked for a second copy this past Christmas, and was very happy that Santa obliged.  Now I have an intact copy to read aloud.  But, knowing me, I'll probably put that one out in the classroom library, too, next year and both copies will end up "loved" (that sounds so much better than worn out!).  But, I guess it's a small price to pay to be able to witness the beautiful joy of little ones enjoying a book they love.
Now, why would I be writing a post about children's literature on a cooking blog?  Because I realized on my drive to school the other day (I'm a first grade teacher) that three of my favorite children's books have to do with food!  So as soon as I got to my classroom that morning, I grabbed these three favorite books off my bookshelf so I could take them home, snap some pictures of them, and share them with you.  If you have little ones in your life (or, if you're simply a lover of children's books), I highly recommend these stories.

First up is a very sweet little book brought to my attention by my friend Andrea (she has a blog, too - you can check it out by clicking here.  Or, click here to read a post she did about me - thanks, Andrea!). 


Cupcake ... How appropriate for me!!  See, I love to bake cupcakes, as you can read in Andrea's post.  They're fun.  And they make you feel less guilty about eating them than eating a big ol' slice of cake does ... even though, in reality, you probably end up eating more because you usually eat more than one.  Well, at least I end up eating more than one.

The plain vanilla cupcake in this story feels very, well, plain compared to her fancy brothers and sisters who have lots of decorations.  She feels even worse about her herself when she's left sitting all alone on the plate when all the others have been chosen already.  Poor plain vanilla!  I would choose you!  After trying to spruce herself up with lots of funny things, she ends up realizing she's special just the way she is.  Ahhhh, how sweet!

I read this story with my first grade class the week we were learning about compound words ... since cupcake is a compound word ... get it?  Cup + cake = cupcake!  Then we decorated cupcakes and ate them.  Plain vanilla cupcakes, of course.  Though my kids could choose chocolate OR vanilla frosting, or a little of each ... which they all thought was very cool.  First graders really are so easy to please.

Next up is one of my all-time favorite storybooks - Marsupial Sue Presents the Runaway Pancake by John Lithgow.  Yes, the John Lithgow - the absolutely hysterically funny and great actor.  The book itself read by anyone is funny enough.  But what makes it even funnier is that it comes with a CD of John Lithgow reading and singing the story - and he is hilarious!  I soooooo love this book.  It's just good ol' fun, and you can't help but laugh and sing along with John as the pancake desperately tries to get away without being eaten.


I play this book for my class probably about 3-4 times a year, they love it so much.

Finally, I have an old classic - On Top of Spaghetti.  It goes right along with that song we all know ... sing along, you know you want to! 

On top of spaaaaagheeeeettiii, all covered with cheese - I lost my poor meattttttball when somebody sneezed.  It rolled ooooofffff the table, and onto the floor.  And then my poor meatttttball rolled out of the door...

The week we learn the short o sound, I read this book and we learn the song.  The book quickly becomes one of the students' favorites during their independent reading time - so much so that my first copy is about falling apart after only three years in the classroom!  I asked for a second copy this past Christmas, and was very happy that Santa obliged.  Now I have an intact copy to read aloud.  But, knowing me, I'll probably put that one out in the classroom library, too, next year and both copies will end up "loved" (that sounds so much better than worn out!).  But, I guess it's a small price to pay to be able to witness the beautiful joy of little ones enjoying a book they love.
reade more... Résuméabuiyad

Update

Wow, so this is the longest I've gone without posting since.....well, since I was pregnant with Ellia two years ago.  

Here's what's been happening:
  • I have gotten significantly sicker than when I last reported, although I have managed to only vomit in the mornings when I first get up.  I do spend quite a bit of time in bed, particularly in the afternoon and evenings.  I know I'm dehydrated, because fluids of any sort make me so nauseous I tend to avoid them. But I'm getting by without IV fluids, so I'm hanging in there. 
  • My mom has been here for two weeks; just one week left. :(  She has carried so much for me, with grocery shopping, taking the girls to gymnastics, cleaning, cooking, changing diapers, dishes, all that stuff.  I am so spoiled!  Not quite sure what I'll do when she has to leave.....hopefully I'll be stronger then.
  • We had our first ultrasound last week - very exciting!  It never gets old, seeing the miracle of life.  I was 8 weeks-4 days along at the time.....the baby was about the size of a grape, with a rapidly beating heart and tiny arms and legs.  We could see the blood flowing in the umbilical cord.  So amazing.  
  • Grant was a bit disappointed that we're not having twins.  We had been talking about the possibility and what that would mean as far as vehicles (have to get a different one) and such....and while the thought was quite daunting, it was also exciting.  Me, well, I would have been thankful for twins, but I really wasn't disappointed at all.  
  • I can't wait to feel better and get back to cooking and baking.  I miss being in my kitchen. I miss enjoying my kitchen.  
  • I even miss exercising.  I'm feeling more flabby all the time.  Lying in bed all day will do that to a person.
  • We're still managing to keep up with schoolwork.  Grant has been teaching Corban his math early in the mornings before he goes to work and that helps me a lot.  Some days are better than others, but we're getting through it.  
  • Thanks to inspiration from Kimberly at Raising Olives, I embarked on a Read the Bible in 90 Days venture at the beginning of the year.  I have not succeeded in reading the Bible through in a year in I don't know how long, probably 15 years.  So I figured if I had a shorter time frame to work with, and more to read each day, I wouldn't be as likely to skip a day.  I was right.  I am still on schedule to finish the Bible at the end of March, currently reading in the minor prophets of the OT (Hosea, Joel, Amos). It does feel rushed at times, but I'm enjoying the new perspective I'm gaining from reading so much so fast.  And I've definitely established the habit of Bible reading now, which is huge for me.  
  • Early pregnancy is the only time of my life that I don't enjoy chocolate.  In fact, I'm generally not interested in sweets at all.  Pretty different from the normal me!  I am liking Tootsie Roll Pops and Now and Laters sometimes, though.        
  • Thanks for all of your prayers and support!  I look forward to a normal life again soon!
Wow, so this is the longest I've gone without posting since.....well, since I was pregnant with Ellia two years ago.  

Here's what's been happening:
  • I have gotten significantly sicker than when I last reported, although I have managed to only vomit in the mornings when I first get up.  I do spend quite a bit of time in bed, particularly in the afternoon and evenings.  I know I'm dehydrated, because fluids of any sort make me so nauseous I tend to avoid them. But I'm getting by without IV fluids, so I'm hanging in there. 
  • My mom has been here for two weeks; just one week left. :(  She has carried so much for me, with grocery shopping, taking the girls to gymnastics, cleaning, cooking, changing diapers, dishes, all that stuff.  I am so spoiled!  Not quite sure what I'll do when she has to leave.....hopefully I'll be stronger then.
  • We had our first ultrasound last week - very exciting!  It never gets old, seeing the miracle of life.  I was 8 weeks-4 days along at the time.....the baby was about the size of a grape, with a rapidly beating heart and tiny arms and legs.  We could see the blood flowing in the umbilical cord.  So amazing.  
  • Grant was a bit disappointed that we're not having twins.  We had been talking about the possibility and what that would mean as far as vehicles (have to get a different one) and such....and while the thought was quite daunting, it was also exciting.  Me, well, I would have been thankful for twins, but I really wasn't disappointed at all.  
  • I can't wait to feel better and get back to cooking and baking.  I miss being in my kitchen. I miss enjoying my kitchen.  
  • I even miss exercising.  I'm feeling more flabby all the time.  Lying in bed all day will do that to a person.
  • We're still managing to keep up with schoolwork.  Grant has been teaching Corban his math early in the mornings before he goes to work and that helps me a lot.  Some days are better than others, but we're getting through it.  
  • Thanks to inspiration from Kimberly at Raising Olives, I embarked on a Read the Bible in 90 Days venture at the beginning of the year.  I have not succeeded in reading the Bible through in a year in I don't know how long, probably 15 years.  So I figured if I had a shorter time frame to work with, and more to read each day, I wouldn't be as likely to skip a day.  I was right.  I am still on schedule to finish the Bible at the end of March, currently reading in the minor prophets of the OT (Hosea, Joel, Amos). It does feel rushed at times, but I'm enjoying the new perspective I'm gaining from reading so much so fast.  And I've definitely established the habit of Bible reading now, which is huge for me.  
  • Early pregnancy is the only time of my life that I don't enjoy chocolate.  In fact, I'm generally not interested in sweets at all.  Pretty different from the normal me!  I am liking Tootsie Roll Pops and Now and Laters sometimes, though.        
  • Thanks for all of your prayers and support!  I look forward to a normal life again soon!
reade more... Résuméabuiyad

Tapenade - and my winner of an olive oil tasting


If you love olives, then you'll love this tapenade.  When you make your own at home, it tastes soooo much better than those you buy in a jar at the grocery store.  And I never knew it was so super easy to make your own ... until a friend of mine and I took a one-day demonstration cooking class featuring olive oil.

I absolutely loved the class!!  The instructor made several different dishes using olive oil, and we got to sample each one - each paired with a different wine.  What's even better is we got to do an olive oil tasting!  Did you know that olive oils from different countries and regions taste distinctly different?  I sure didn't.  But, boy, do they ever.  It was really neat to get to taste the subtle, and sometimes not-so-subtle, differences in the oils.  So ... we got a cooking demonstration, meal, olive oil tasting, and wine tasting all rolled into one.  Sweet!  For a wine lover and olive lover like me, it was an absolutely wonderful day spent with an absolutely fabulous friend.

For each dish the instructor prepared, she'd begin by having us taste several olive oils from the region whose oil she was going to use in the dish.  We'd dip small pieces of bread in each of the oils and taste to our heart's content.  My favorites ended up being from Italy.  The Italian oils were very mild and smooth tasting, with a little bit of fruitiness to them.  My absolute favorite was Colavita Extra Virgin olive oil - yuuummmmmy!  Though I must say - I really didn't like the oils from Spain at all.  The Spanish ones had a bit of a bitter taste (sorry, Spain!). 


My absolute favorite - Colavita Extra Virgin from Italy.
We were treated to a salad with olive oil vinaigrette, tapenade and tapenade bruschetta, fish poached in olive oil, and ... for dessert ... olive oil gellato.  What???  Yes, olive oil gellato.  I was very skeptical of the gellato.  I mean, ice cream whose main ingredient and flavor is olive oil?  I was thinking this will not be good at all.  To my surprise, it was actually quite tasty.  Maybe because it was made with the Colavita oil I love so much!  It's not something I'll ever make at home, or would just jump for joy to see on a restaurant menu, but it was an experience I'm glad I had - mainly because it was a combination you don't expect to see.  I like to try combinations you don't expect to see.

My favorite dish of the day was the tapenade.  Naturally, then, I started making it myself at home.  The beauty of this recipe is you can adapt it to suit your tastes.  I start with a mix of several varieties of olives - a country mix that includes kalamata and Queen, regular ol' manzanilla stuffed with pimentos, and black.  Throw them all in your food processor, like this:


Lovely olive mix.

Don't like pimento-stuffed? - use something else.  Can't stand black?  Leave them out.  It's all up to you!  Next, toss in some capers.  The capers control the saltiness of the tapenade so, again, adjust to your taste.


Capers - ready to go.
 Grate in the zest of one lemon.  The original recipe called for the zest of two lemons, but I thought that was too much.  I like a little lemon zing with my olives, not a little olives with my lemon.


Lemon zestiness.

Add some parsley and give it all a good whirl in the food processor to chop and combine it, like this:


It tastes way better than it looks!
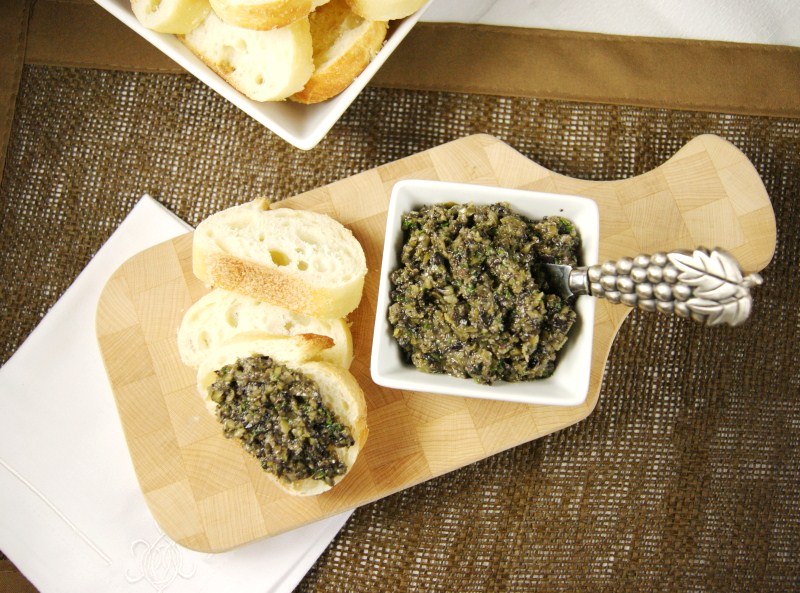
 Drizzle in olive oil, pulsing the food processor a couple of times, until the tapenade is moist.  There you have it - wonderful homemade tapenade in about 5 minutes flat.  Serve it up with some nice bread and enjoy! 

The finished product.
I invite you to follow The Kitchen is My Playground with Pinterest, Facebook, Google Friend Connect, Linky Followers, bloglovin', or Feedburner. Buttons are in the right sidebar. I'd love to have you back soon!


Mixed Olive Tapenade
Adapted from Heidi Billotto

Ingredients
1 (6.25 oz) jar pitted country mix olives
1 (6 oz) can pitted black olives
A couple spoonfuls of pimento-stuffed manzanilla olives
1/2 of a 4 oz jar capers
Zest of 1 lemon
3 T. fresh or dried parsley
Olive oil


Directions
1.  Drain olives and capers; place in the bowl of a food processor.  Add lemon zest and parsley; process a few seconds to chop and blend ingredients together.

2.  Drizzle in olive oil, pulsing occasionally, until tapenade reaches your desired consistency.  It should be moist, but not runny.  Serve with bread or crackers.

NOTES:
- You can use any combination of olives you like ... all green, all black, 1/2 & 1/2, the mix I use - whatever you like!
- Capers control the saltiness, so adjust to taste.
- To make a tapenade bruschetta, spread tapenade on baguette slices, sprinkle on some mozzarella or goat cheese, and top with a piece of sundried tomato and chopped fresh basil; broil until the cheese is melty.

This post is linked with Sharing Sundays hosted by Everyday Sisters and Flash Back Friday hosted by Cookin' for My Captain, Ladies Night.


If you love olives, then you'll love this tapenade.  When you make your own at home, it tastes soooo much better than those you buy in a jar at the grocery store.  And I never knew it was so super easy to make your own ... until a friend of mine and I took a one-day demonstration cooking class featuring olive oil.

I absolutely loved the class!!  The instructor made several different dishes using olive oil, and we got to sample each one - each paired with a different wine.  What's even better is we got to do an olive oil tasting!  Did you know that olive oils from different countries and regions taste distinctly different?  I sure didn't.  But, boy, do they ever.  It was really neat to get to taste the subtle, and sometimes not-so-subtle, differences in the oils.  So ... we got a cooking demonstration, meal, olive oil tasting, and wine tasting all rolled into one.  Sweet!  For a wine lover and olive lover like me, it was an absolutely wonderful day spent with an absolutely fabulous friend.

For each dish the instructor prepared, she'd begin by having us taste several olive oils from the region whose oil she was going to use in the dish.  We'd dip small pieces of bread in each of the oils and taste to our heart's content.  My favorites ended up being from Italy.  The Italian oils were very mild and smooth tasting, with a little bit of fruitiness to them.  My absolute favorite was Colavita Extra Virgin olive oil - yuuummmmmy!  Though I must say - I really didn't like the oils from Spain at all.  The Spanish ones had a bit of a bitter taste (sorry, Spain!). 


My absolute favorite - Colavita Extra Virgin from Italy.
We were treated to a salad with olive oil vinaigrette, tapenade and tapenade bruschetta, fish poached in olive oil, and ... for dessert ... olive oil gellato.  What???  Yes, olive oil gellato.  I was very skeptical of the gellato.  I mean, ice cream whose main ingredient and flavor is olive oil?  I was thinking this will not be good at all.  To my surprise, it was actually quite tasty.  Maybe because it was made with the Colavita oil I love so much!  It's not something I'll ever make at home, or would just jump for joy to see on a restaurant menu, but it was an experience I'm glad I had - mainly because it was a combination you don't expect to see.  I like to try combinations you don't expect to see.

My favorite dish of the day was the tapenade.  Naturally, then, I started making it myself at home.  The beauty of this recipe is you can adapt it to suit your tastes.  I start with a mix of several varieties of olives - a country mix that includes kalamata and Queen, regular ol' manzanilla stuffed with pimentos, and black.  Throw them all in your food processor, like this:


Lovely olive mix.

Don't like pimento-stuffed? - use something else.  Can't stand black?  Leave them out.  It's all up to you!  Next, toss in some capers.  The capers control the saltiness of the tapenade so, again, adjust to your taste.


Capers - ready to go.
 Grate in the zest of one lemon.  The original recipe called for the zest of two lemons, but I thought that was too much.  I like a little lemon zing with my olives, not a little olives with my lemon.


Lemon zestiness.

Add some parsley and give it all a good whirl in the food processor to chop and combine it, like this:


It tastes way better than it looks!
 Drizzle in olive oil, pulsing the food processor a couple of times, until the tapenade is moist.  There you have it - wonderful homemade tapenade in about 5 minutes flat.  Serve it up with some nice bread and enjoy! 

The finished product.
I invite you to follow The Kitchen is My Playground with Pinterest, Facebook, Google Friend Connect, Linky Followers, bloglovin', or Feedburner. Buttons are in the right sidebar. I'd love to have you back soon!


Mixed Olive Tapenade
Adapted from Heidi Billotto

Ingredients
1 (6.25 oz) jar pitted country mix olives
1 (6 oz) can pitted black olives
A couple spoonfuls of pimento-stuffed manzanilla olives
1/2 of a 4 oz jar capers
Zest of 1 lemon
3 T. fresh or dried parsley
Olive oil


Directions
1.  Drain olives and capers; place in the bowl of a food processor.  Add lemon zest and parsley; process a few seconds to chop and blend ingredients together.

2.  Drizzle in olive oil, pulsing occasionally, until tapenade reaches your desired consistency.  It should be moist, but not runny.  Serve with bread or crackers.

NOTES:
- You can use any combination of olives you like ... all green, all black, 1/2 & 1/2, the mix I use - whatever you like!
- Capers control the saltiness, so adjust to taste.
- To make a tapenade bruschetta, spread tapenade on baguette slices, sprinkle on some mozzarella or goat cheese, and top with a piece of sundried tomato and chopped fresh basil; broil until the cheese is melty.

This post is linked with Sharing Sundays hosted by Everyday Sisters and Flash Back Friday hosted by Cookin' for My Captain, Ladies Night.
reade more... Résuméabuiyad

Royal Chai Shortbread Cookies

Here's the 2nd installment from my cardamom-palooza adventure this past weekend - Chai Shortbread.  This one is pretty close to a Tracey-original recipe.  See, I had made Chai Shortbread a long time ago, following a recipe from Cooking Light magazine.  This weekend when I decided to have my cardamom-palooza cooking fest, do you think I could find that recipe anywhere?  No, of course not.  I must have actually put it where it's supposed to be - can never find anything when I do that.  I even resorted to searching the Cooking Light website, but no luck. 

So, I was left to my own devises to craft some sort of Chai Shortbread recipe if I was to press on with my adventure.  And I was determined to press on with my adventure.  I started with a basic shortbread recipe from The Joy of Cooking.  To that, I added the Chai spice line-up ... cinnamon, cardamom, cloves, and black pepper, guessing at the amounts ... and I think I did pretty good, if I do say so myself!

After you mix everthing up and chill down your dough, you're supposed to roll the dough out thin and cut it into cookies with cookie cutters.  I can't be bothered with that.  Sure, cut shapes are pretty and all ... but unless it's for a special occasion where the shape adds some value, I'm okay with a more rustic cookie.  Hey, it still tastes the same!  So here's my method - roll the dough into a log and slice it into 1/4" thick pieces with a serrated knife, like this:
Shortbread cut the easy-sneezy way.
 Place the pieces on a cookie sheet and give them a short bake.  They come out looking almost exactly as they did when they went in, so if you have any that look too rustic - fix them before they bake.  There's no changing them after-the-fact!


Chai shortbread - naked version.

I decided to dip some of the cookies in cardamom-spiked chocolate.  If one has cookies that have some flaws, chocolate covers a multitude of sins!  And it sure tastes great too.  I also learned in doing a little bit of reading about shortbread, that when one end of  baked shortbread is dipped into melted chocolate, it's given the name Royal shortbread.  How fancy sounding!
ROYAL Chai shortbread ... yummm.
Both versions were tasty.  But when put to the test, the chocolate-dipped shortbreads were my favorite, and the favorite of the majority of my tasting panel (aka - friends on whom I unload the bulk of my baked goods!).


Royal Chai Shortbread Cookies
Adapted from:  Joy of Baking
Ingredients
Shortbread:
1 c. (2 sticks) unsalted butter, softened
1/2 c. confectioners sugar
1 tsp. vanilla extract
2 c. all-purpose flour
1/4 tsp. salt
1/2 tsp. ground cardamom
1/2 tsp. ground cinnamon
1/4 tsp. ground cloves
10 cranks of freshly ground pepper from a pepper mill

Chocolate for dipping:
About 1 c. chopped semi-sweet chocolate or semi-sweet chocolate chips
About 2 tsp. shortening
Pinch of ground cardamom


Directions
1.  Preheat oven to 350 degrees.  Combine flour, salt, and spices in a bowl.

2.  In the bowl of an electric mixer, beat the butter until smooth and creamy (about 1 minute).  Add the sugar and beat, about 2 minutes, until smooth.  Beat in the vanilla extract.  Gently stir in the flour mixture just until incorporated.  Flatten the dough into a disk (or roll it into a log), wrap in plastic wrap, and chill dough for at least an hour or until firm.

3.  Roll dough into a 1/4" thick circle; cut into rounds or other shapes using a lightly floured cookie cutter.  Or, use a serrated knife to slice the dough log into 1/4" thick slices (use a sawing motion, rather than just pushing down on the dough).  Place cut cookies on a baking sheet.  Bake for 8-10 minutes, or until very lightly browned.  Cool.

4.  Combine chocolate and shortening in a small bowl.  Microwave in 30-second intervals until melted, stirring together the melted chocolate and shortening.  Stir in the pinch of ground cardamom.  Dip one end of each shortbread cookie into the chocolate mixture; place on a piece of waxed paper to set.  Dipped cookies may be placed in the refrigerator for a few minutes to help set the chocolate.

Enjoy!
Here's the 2nd installment from my cardamom-palooza adventure this past weekend - Chai Shortbread.  This one is pretty close to a Tracey-original recipe.  See, I had made Chai Shortbread a long time ago, following a recipe from Cooking Light magazine.  This weekend when I decided to have my cardamom-palooza cooking fest, do you think I could find that recipe anywhere?  No, of course not.  I must have actually put it where it's supposed to be - can never find anything when I do that.  I even resorted to searching the Cooking Light website, but no luck. 

So, I was left to my own devises to craft some sort of Chai Shortbread recipe if I was to press on with my adventure.  And I was determined to press on with my adventure.  I started with a basic shortbread recipe from The Joy of Cooking.  To that, I added the Chai spice line-up ... cinnamon, cardamom, cloves, and black pepper, guessing at the amounts ... and I think I did pretty good, if I do say so myself!

After you mix everthing up and chill down your dough, you're supposed to roll the dough out thin and cut it into cookies with cookie cutters.  I can't be bothered with that.  Sure, cut shapes are pretty and all ... but unless it's for a special occasion where the shape adds some value, I'm okay with a more rustic cookie.  Hey, it still tastes the same!  So here's my method - roll the dough into a log and slice it into 1/4" thick pieces with a serrated knife, like this:
Shortbread cut the easy-sneezy way.
 Place the pieces on a cookie sheet and give them a short bake.  They come out looking almost exactly as they did when they went in, so if you have any that look too rustic - fix them before they bake.  There's no changing them after-the-fact!


Chai shortbread - naked version.

I decided to dip some of the cookies in cardamom-spiked chocolate.  If one has cookies that have some flaws, chocolate covers a multitude of sins!  And it sure tastes great too.  I also learned in doing a little bit of reading about shortbread, that when one end of  baked shortbread is dipped into melted chocolate, it's given the name Royal shortbread.  How fancy sounding!
ROYAL Chai shortbread ... yummm.
Both versions were tasty.  But when put to the test, the chocolate-dipped shortbreads were my favorite, and the favorite of the majority of my tasting panel (aka - friends on whom I unload the bulk of my baked goods!).


Royal Chai Shortbread Cookies
Adapted from:  Joy of Baking
Ingredients
Shortbread:
1 c. (2 sticks) unsalted butter, softened
1/2 c. confectioners sugar
1 tsp. vanilla extract
2 c. all-purpose flour
1/4 tsp. salt
1/2 tsp. ground cardamom
1/2 tsp. ground cinnamon
1/4 tsp. ground cloves
10 cranks of freshly ground pepper from a pepper mill

Chocolate for dipping:
About 1 c. chopped semi-sweet chocolate or semi-sweet chocolate chips
About 2 tsp. shortening
Pinch of ground cardamom


Directions
1.  Preheat oven to 350 degrees.  Combine flour, salt, and spices in a bowl.

2.  In the bowl of an electric mixer, beat the butter until smooth and creamy (about 1 minute).  Add the sugar and beat, about 2 minutes, until smooth.  Beat in the vanilla extract.  Gently stir in the flour mixture just until incorporated.  Flatten the dough into a disk (or roll it into a log), wrap in plastic wrap, and chill dough for at least an hour or until firm.

3.  Roll dough into a 1/4" thick circle; cut into rounds or other shapes using a lightly floured cookie cutter.  Or, use a serrated knife to slice the dough log into 1/4" thick slices (use a sawing motion, rather than just pushing down on the dough).  Place cut cookies on a baking sheet.  Bake for 8-10 minutes, or until very lightly browned.  Cool.

4.  Combine chocolate and shortening in a small bowl.  Microwave in 30-second intervals until melted, stirring together the melted chocolate and shortening.  Stir in the pinch of ground cardamom.  Dip one end of each shortbread cookie into the chocolate mixture; place on a piece of waxed paper to set.  Dipped cookies may be placed in the refrigerator for a few minutes to help set the chocolate.

Enjoy!
reade more... Résuméabuiyad