Pages

Must be Slacking.....


My three dancing Princesses.  Marissa (5) dressed them all up and they were thoroughly enjoying dancing together.  Melted my heart in a really big way.  

See that one in the middle?
That's Annika.  She's turning 4 in a month.
We started up our home school this week and she is doing work from the Abeka K-4 program.  
She loves doing workbooks and feeling big like her siblings.  
She loves to color (and does it remarkably well for her age) and is currently practicing sounds of letters, especially short vowel sounds.  
After our first day of school was complete, she came to me with a look of total dismay.

"Mom!"  she exclaimed loudly.  "You forgot to teach me how to read!!" 

I giggled and tried to explain that learning how to read is a process, you don't learn in just a day, that practicing the sounds of the letters is the beginning stages of reading, etc etc.....but she was not satisfied.  
Every day since, she's insistent on getting her "reading" time and is still expectant that she'll be reading books independently immediately.  

Oh, how fast they grow up.  

My three dancing Princesses.  Marissa (5) dressed them all up and they were thoroughly enjoying dancing together.  Melted my heart in a really big way.  

See that one in the middle?
That's Annika.  She's turning 4 in a month.
We started up our home school this week and she is doing work from the Abeka K-4 program.  
She loves doing workbooks and feeling big like her siblings.  
She loves to color (and does it remarkably well for her age) and is currently practicing sounds of letters, especially short vowel sounds.  
After our first day of school was complete, she came to me with a look of total dismay.

"Mom!"  she exclaimed loudly.  "You forgot to teach me how to read!!" 

I giggled and tried to explain that learning how to read is a process, you don't learn in just a day, that practicing the sounds of the letters is the beginning stages of reading, etc etc.....but she was not satisfied.  
Every day since, she's insistent on getting her "reading" time and is still expectant that she'll be reading books independently immediately.  

Oh, how fast they grow up.  
reade more... Résuméabuiyad

Simple Roast Chicken


This is the easiest roast chicken recipe I've ever found, and it comes from Thomas Keller of the French Laundry. Even the most prestigious chefs love simple food the best. No matter how great fancy food prepared in inventive ways might be, it rarely beats a well done classic.

This chicken is definitely a "set it and forget it" kind of recipe. Remove bird from refrigerator. Let sit 3 hours or so to come up to room temperature. Season, truss, roast, rest, carve. That's it. The time required gives you ample time to prepare the rest of the meal, and everyone loves this extremely moist, flavorful chicken. The potatoes are optional, but they do prevent the chicken from smoking as much and they are essentially potatoes roasted in chicken fat. they're heavenly.

Simple Roast Chicken

Ingredients
  • 1 3-4 pound chicken
  • 1 Tbsp salt
  • Black pepper
  • Fresh thyme
  • 2 lb red potatoes (optional)

Directions
  1. Let chicken come up to room temperature and pat dry inside and out with paper towels
  2. Preheat oven to 450 degrees.
  3. Line a roasting pan or cast iron skillet with sliced potatoes. Season lightly with pepper. This will prevent the oven from smoking so much, but also make some great potatoes soaked in the chicken drippings/fat
  4. Season inside of the chicken with a generous amount of salt, pepper and fresh thyme.
  5. Truss chicken, folding the wing tips under the body and tying the legs close to compact the weight of the bird
  6. Generously season the outside of the bird, raining down salt to create a slightly crust on the outside. Season with pepper and thyme
  7. Place bird over pan of potatoes. Roast in preheated oven for 1 hour or until meat thermometer registers 180
  8. Let rest 10 minutes before carving.

This is the easiest roast chicken recipe I've ever found, and it comes from Thomas Keller of the French Laundry. Even the most prestigious chefs love simple food the best. No matter how great fancy food prepared in inventive ways might be, it rarely beats a well done classic.

This chicken is definitely a "set it and forget it" kind of recipe. Remove bird from refrigerator. Let sit 3 hours or so to come up to room temperature. Season, truss, roast, rest, carve. That's it. The time required gives you ample time to prepare the rest of the meal, and everyone loves this extremely moist, flavorful chicken. The potatoes are optional, but they do prevent the chicken from smoking as much and they are essentially potatoes roasted in chicken fat. they're heavenly.

Simple Roast Chicken

Ingredients
  • 1 3-4 pound chicken
  • 1 Tbsp salt
  • Black pepper
  • Fresh thyme
  • 2 lb red potatoes (optional)

Directions
  1. Let chicken come up to room temperature and pat dry inside and out with paper towels
  2. Preheat oven to 450 degrees.
  3. Line a roasting pan or cast iron skillet with sliced potatoes. Season lightly with pepper. This will prevent the oven from smoking so much, but also make some great potatoes soaked in the chicken drippings/fat
  4. Season inside of the chicken with a generous amount of salt, pepper and fresh thyme.
  5. Truss chicken, folding the wing tips under the body and tying the legs close to compact the weight of the bird
  6. Generously season the outside of the bird, raining down salt to create a slightly crust on the outside. Season with pepper and thyme
  7. Place bird over pan of potatoes. Roast in preheated oven for 1 hour or until meat thermometer registers 180
  8. Let rest 10 minutes before carving.
reade more... Résuméabuiyad

Brandied Peach Cobbler


It's that time of year in the South ... peach season!  Believe it or not, I'm really not that big a peach fan.  But when I get them fresh from the tree, that seems to change.  Juicy, ripe, straight-from-the-tree peaches are wonderful little fruit jewels.  And I'm fortunate enough to live where I can drive right up to a peach farmer's roadside stand and grab a basket ...

Peaches at the farm stand

... or, pick my own.  Mark and I tend to go pick our own.  We have four local peach orchards within a 15 minute drive of our house, and you can drive your car right into the orchard!  How easy is that?  I kid you not, from leaving our door to coming back home through it, it takes us all of about 45 minutes to an hour to pick our fill of fresh peaches.  I'm spoiled.  Definitely spoiled.

We pick our own!

My favorite way to enjoy fresh peaches is in this Brandied Peach Cobbler.  (Well, after learning about chocolate vincotto, cobbler may be my second favorite way to enjoy fresh peaches ... but we won't quibble.)  The peaches in this cobbler are spiced up with just a touch of brandy and ground cloves, lending a totally amazing flavor to the peaches.  The topping is a bit different than your typical cobbler, too - it's like a sugar cookie dough that you drop on in spoonfuls.  Absolutely delicious.

Slice up some peeled fresh peaches and toss them with a little sugar, cornstarch, brandy, and ground cloves.  Bake them until they start to release juice ...

All sliced up

... and then drop on really yummy sugar cookie-like dough.

Drop, drop, drop ...

Bake that until it's golden brown.  Then dish out a big ol' bowl and dig in!  You can top it with vanilla ice cream or whipped cream, but I'll be honest - I like mine best just plain.  I have one little dab of this pan left, and I'm going to go finish it up right now!  Yum.

Dish it up!

We invite you to follow The Kitchen is My Playground with Google+, PinterestFacebookTwitterGoogle Friend Connectbloglovin', or Feedburner.  We'd love to have you back soon!  Want to promote your website, business, or Etsy shop with us?  Visit our advertise page for details.


Brandied Peach Cobbler
Source:  Adapted from The Best Recipe cookbook, by the Editors of Cook's Illustrated magazine

Ingredients
Peach filling:
2 lbs. fresh peaches
1/3 c. sugar
1 tsp. vanilla
2 tsp. cornstarch
1 1/2 T. brandy
Pinch of ground cloves

Topping:
1/2 c. all-purpose flour
1/4 tsp. baking powder
Pinch of salt
1/2 c. sugar
8 T. unsalted butter, softened
1/4 tsp. vanilla
1 large egg yolk


Directions
Prepare the Filling:  
1.  Peel and pit peaches; cut into thick slices.  Combine with sugar, cornstarch, vanilla, ground cloves, and brandy.  

2.  Please in a greased baking dish; cover with foil and bake at 400 degrees until peaches begin to release liquid - about 15 minutes.  (Note:  Let the peaches go the full 15 minutes.  I tried to rush this one time, and my topping didn't cook correctly.  I think the peaches need to be fully heated through when you put the topping on.)

Prepare the Topping:  
3.  While the peaches bake, mix flour, baking powder, and salt together; set aside.  

4.  Beat softened butter and sugar until light and fluffy, about 1 minute.  Beat in egg yolk and vanilla.  Stir in dry ingredients just until combined.

5.  After the peaches have cooked for about 15 minutes, remove them from the oven and stir them.  

6.  Drop topping dough by tablespoons evenly over the fruit (it won't cover every spot completely!).  Return baking dish to the oven, uncovered, and bake until the topping is nicely browned and peaches are bubbly, about 40 minutes more.

Enjoy!

This post is linked with Recipe Sharing Monday hosted by Jam Hands, It's a Keeper Thursday hosted by It's a Keeper, Foodie Friday hosted by Designs by Gollum, Friday Favorites hosted by Simply Sweet Home, Friday Potluck hosted by EKat's Kitchen, Sweet Tooth Friday hosted by Alli-n-son, Sweets for a Saturday hosted by Sweet as Sugar Cookies, Sweet Indulgences Sunday hosted by A Well-Seasoned Life, and This Week's Cravings hosted by Mom's Crazy Cooking.

It's that time of year in the South ... peach season!  Believe it or not, I'm really not that big a peach fan.  But when I get them fresh from the tree, that seems to change.  Juicy, ripe, straight-from-the-tree peaches are wonderful little fruit jewels.  And I'm fortunate enough to live where I can drive right up to a peach farmer's roadside stand and grab a basket ...

Peaches at the farm stand

... or, pick my own.  Mark and I tend to go pick our own.  We have four local peach orchards within a 15 minute drive of our house, and you can drive your car right into the orchard!  How easy is that?  I kid you not, from leaving our door to coming back home through it, it takes us all of about 45 minutes to an hour to pick our fill of fresh peaches.  I'm spoiled.  Definitely spoiled.

We pick our own!

My favorite way to enjoy fresh peaches is in this Brandied Peach Cobbler.  (Well, after learning about chocolate vincotto, cobbler may be my second favorite way to enjoy fresh peaches ... but we won't quibble.)  The peaches in this cobbler are spiced up with just a touch of brandy and ground cloves, lending a totally amazing flavor to the peaches.  The topping is a bit different than your typical cobbler, too - it's like a sugar cookie dough that you drop on in spoonfuls.  Absolutely delicious.

Slice up some peeled fresh peaches and toss them with a little sugar, cornstarch, brandy, and ground cloves.  Bake them until they start to release juice ...

All sliced up

... and then drop on really yummy sugar cookie-like dough.

Drop, drop, drop ...

Bake that until it's golden brown.  Then dish out a big ol' bowl and dig in!  You can top it with vanilla ice cream or whipped cream, but I'll be honest - I like mine best just plain.  I have one little dab of this pan left, and I'm going to go finish it up right now!  Yum.

Dish it up!

We invite you to follow The Kitchen is My Playground with Google+, PinterestFacebookTwitterGoogle Friend Connectbloglovin', or Feedburner.  We'd love to have you back soon!  Want to promote your website, business, or Etsy shop with us?  Visit our advertise page for details.


Brandied Peach Cobbler
Source:  Adapted from The Best Recipe cookbook, by the Editors of Cook's Illustrated magazine

Ingredients
Peach filling:
2 lbs. fresh peaches
1/3 c. sugar
1 tsp. vanilla
2 tsp. cornstarch
1 1/2 T. brandy
Pinch of ground cloves

Topping:
1/2 c. all-purpose flour
1/4 tsp. baking powder
Pinch of salt
1/2 c. sugar
8 T. unsalted butter, softened
1/4 tsp. vanilla
1 large egg yolk


Directions
Prepare the Filling:  
1.  Peel and pit peaches; cut into thick slices.  Combine with sugar, cornstarch, vanilla, ground cloves, and brandy.  

2.  Please in a greased baking dish; cover with foil and bake at 400 degrees until peaches begin to release liquid - about 15 minutes.  (Note:  Let the peaches go the full 15 minutes.  I tried to rush this one time, and my topping didn't cook correctly.  I think the peaches need to be fully heated through when you put the topping on.)

Prepare the Topping:  
3.  While the peaches bake, mix flour, baking powder, and salt together; set aside.  

4.  Beat softened butter and sugar until light and fluffy, about 1 minute.  Beat in egg yolk and vanilla.  Stir in dry ingredients just until combined.

5.  After the peaches have cooked for about 15 minutes, remove them from the oven and stir them.  

6.  Drop topping dough by tablespoons evenly over the fruit (it won't cover every spot completely!).  Return baking dish to the oven, uncovered, and bake until the topping is nicely browned and peaches are bubbly, about 40 minutes more.

Enjoy!

This post is linked with Recipe Sharing Monday hosted by Jam Hands, It's a Keeper Thursday hosted by It's a Keeper, Foodie Friday hosted by Designs by Gollum, Friday Favorites hosted by Simply Sweet Home, Friday Potluck hosted by EKat's Kitchen, Sweet Tooth Friday hosted by Alli-n-son, Sweets for a Saturday hosted by Sweet as Sugar Cookies, Sweet Indulgences Sunday hosted by A Well-Seasoned Life, and This Week's Cravings hosted by Mom's Crazy Cooking.
reade more... Résuméabuiyad

Soft Garlic Knots


I've made this recipe take from Zoom Yummy twice in the past two weeks. It had been on my to-do list for ages, but I only got around to making it for a dinner party last week. They were such a big hit at the party that I decided to make it again for dinner tonight while cooking for my parents. They too loved these soft garlic knots

This was one of the easiest breads I've made. Not too many ingredients and no careful shaping or slashing. That is easily the area at which I am the weakest: shaping my loaves. The first time I made these loaves, I made them in a house without bread flour. I used all purpose and they took on an almost crisp yet fluffy dinner roll quality. Tonight I made them with bread flour and there was a noticeable difference. The interior was soft yet toothsome. They're not necessarily better or worse, just different. Perhaps next time I'll do a 50/50 ratio to see what happens.
The only hard part about these rolls is making enough. Not only will people wants seconds with dinner, but it will be a struggle not to pull one off the tray and dig in as soon as they come out of the oven. They just smell too good when cooking.


Soft Garlic Knots

Ingredients
  • 3 cups (480 grams) bread flour
  • 1 pack active yeast (2 ¼ tsp)
  • 1 Tbsp granulated sugar
  • 1 ¼ tsp salt
  • 2 Tbsp olive oil
  • ¼ cup milk
  • 1 cup + 2 Tbsp lukewarm water
  • 4 cloves garlic, minced
  • 4 Tbsp melted salted butter
  • 1 tsp dried oregano
  • 1 tsp dried parsley or 1 Tbsp fresh chopped italian parsley
DirectionsMix sugar, yeast and ¼ cup warm water to let yeast proof for 10 minutes
  1. Combined flour, yeast mixture, salt, olive oil, milk and remaining water in a large bowl, stirring until it comes together.
  2. Knead for 8 minutes on floured work surface until dough passes the window pane test.
  3. Form dough into a lose round and let proof in a greased, covered bowl for 1 hour until doubled in size.
  4. Divide dough into 8 pieces and shape into knots. Roll dough into a long rope like you would a pretzel. Tie a knot in the center.
  5. Fold the rope underlying the knot over the top, and fold the rope overlying underneath, securing in the center.
  6. Let rise another 45 minutes. Preheat oven to 350 degrees
  7. While dough is rising, melt butter and combine it with garlic, oregano and parsley
  8. Brush butter over knots just before baking. Bake around 15-20 minutes until golden
This post has been submitted to Yeastspotting


I've made this recipe take from Zoom Yummy twice in the past two weeks. It had been on my to-do list for ages, but I only got around to making it for a dinner party last week. They were such a big hit at the party that I decided to make it again for dinner tonight while cooking for my parents. They too loved these soft garlic knots

This was one of the easiest breads I've made. Not too many ingredients and no careful shaping or slashing. That is easily the area at which I am the weakest: shaping my loaves. The first time I made these loaves, I made them in a house without bread flour. I used all purpose and they took on an almost crisp yet fluffy dinner roll quality. Tonight I made them with bread flour and there was a noticeable difference. The interior was soft yet toothsome. They're not necessarily better or worse, just different. Perhaps next time I'll do a 50/50 ratio to see what happens.
The only hard part about these rolls is making enough. Not only will people wants seconds with dinner, but it will be a struggle not to pull one off the tray and dig in as soon as they come out of the oven. They just smell too good when cooking.


Soft Garlic Knots

Ingredients
  • 3 cups (480 grams) bread flour
  • 1 pack active yeast (2 ¼ tsp)
  • 1 Tbsp granulated sugar
  • 1 ¼ tsp salt
  • 2 Tbsp olive oil
  • ¼ cup milk
  • 1 cup + 2 Tbsp lukewarm water
  • 4 cloves garlic, minced
  • 4 Tbsp melted salted butter
  • 1 tsp dried oregano
  • 1 tsp dried parsley or 1 Tbsp fresh chopped italian parsley
DirectionsMix sugar, yeast and ¼ cup warm water to let yeast proof for 10 minutes
  1. Combined flour, yeast mixture, salt, olive oil, milk and remaining water in a large bowl, stirring until it comes together.
  2. Knead for 8 minutes on floured work surface until dough passes the window pane test.
  3. Form dough into a lose round and let proof in a greased, covered bowl for 1 hour until doubled in size.
  4. Divide dough into 8 pieces and shape into knots. Roll dough into a long rope like you would a pretzel. Tie a knot in the center.
  5. Fold the rope underlying the knot over the top, and fold the rope overlying underneath, securing in the center.
  6. Let rise another 45 minutes. Preheat oven to 350 degrees
  7. While dough is rising, melt butter and combine it with garlic, oregano and parsley
  8. Brush butter over knots just before baking. Bake around 15-20 minutes until golden
This post has been submitted to Yeastspotting

reade more... Résuméabuiyad

Quick and Easy Banana Cake


I generally stay away from packaged mixes, but there are certain times that it just makes life so much easier.  This is a nice recipe to have on hand for those times.  
This banana cake is so moist, full of banana flavor, and lightly spiced that it tastes great without a frosting.
I've made it before in muffin tins and served them for a brunch, where they were very well received.
However, if you want to jazz it up a little, you can't go wrong with a basic cream cheese frosting.  
That makes just about any cake better!  

Recipe: (adapted from Allrecipes)

1 white or yellow cake mix
Oil, eggs and water called for on box
2-3 very ripe bananas, mashed
1 t. baking soda
1 t. cinnamon
1/2 t. nutmeg

Preheat oven to 350°.
Prepare cake mix according to package directions with oil, eggs, and water.  Mix mashed bananas and baking soda together, then add to cake mix.  Stir in cinnamon and nutmeg.
Pour into a greased and floured 13x9" cake pan or muffin tins lined with paper liners or greased.  
Bake cake for 30-35 minutes, or until a toothpick comes out clean.  Bake cupcakes as directed on box.  
Cool completely and frost if desired. 

Frosting (optional)
1 (8 oz) package cream cheese, softened
1/4 cup butter, softened
2 cups powdered sugar
1 t. vanilla
cinnamon
(optional)
chopped nuts (optional)

With an electric mixer, beat together cream cheese and butter until light and fluffy.  Slowly add powdered sugar and continue to whip together.  Add vanilla and stir well.  Spread on top of cake or cupcakes and sprinkle with cinnamon and nuts if desired.  


I generally stay away from packaged mixes, but there are certain times that it just makes life so much easier.  This is a nice recipe to have on hand for those times.  
This banana cake is so moist, full of banana flavor, and lightly spiced that it tastes great without a frosting.
I've made it before in muffin tins and served them for a brunch, where they were very well received.
However, if you want to jazz it up a little, you can't go wrong with a basic cream cheese frosting.  
That makes just about any cake better!  

Recipe: (adapted from Allrecipes)

1 white or yellow cake mix
Oil, eggs and water called for on box
2-3 very ripe bananas, mashed
1 t. baking soda
1 t. cinnamon
1/2 t. nutmeg

Preheat oven to 350°.
Prepare cake mix according to package directions with oil, eggs, and water.  Mix mashed bananas and baking soda together, then add to cake mix.  Stir in cinnamon and nutmeg.
Pour into a greased and floured 13x9" cake pan or muffin tins lined with paper liners or greased.  
Bake cake for 30-35 minutes, or until a toothpick comes out clean.  Bake cupcakes as directed on box.  
Cool completely and frost if desired. 

Frosting (optional)
1 (8 oz) package cream cheese, softened
1/4 cup butter, softened
2 cups powdered sugar
1 t. vanilla
cinnamon
(optional)
chopped nuts (optional)

With an electric mixer, beat together cream cheese and butter until light and fluffy.  Slowly add powdered sugar and continue to whip together.  Add vanilla and stir well.  Spread on top of cake or cupcakes and sprinkle with cinnamon and nuts if desired.  


reade more... Résuméabuiyad

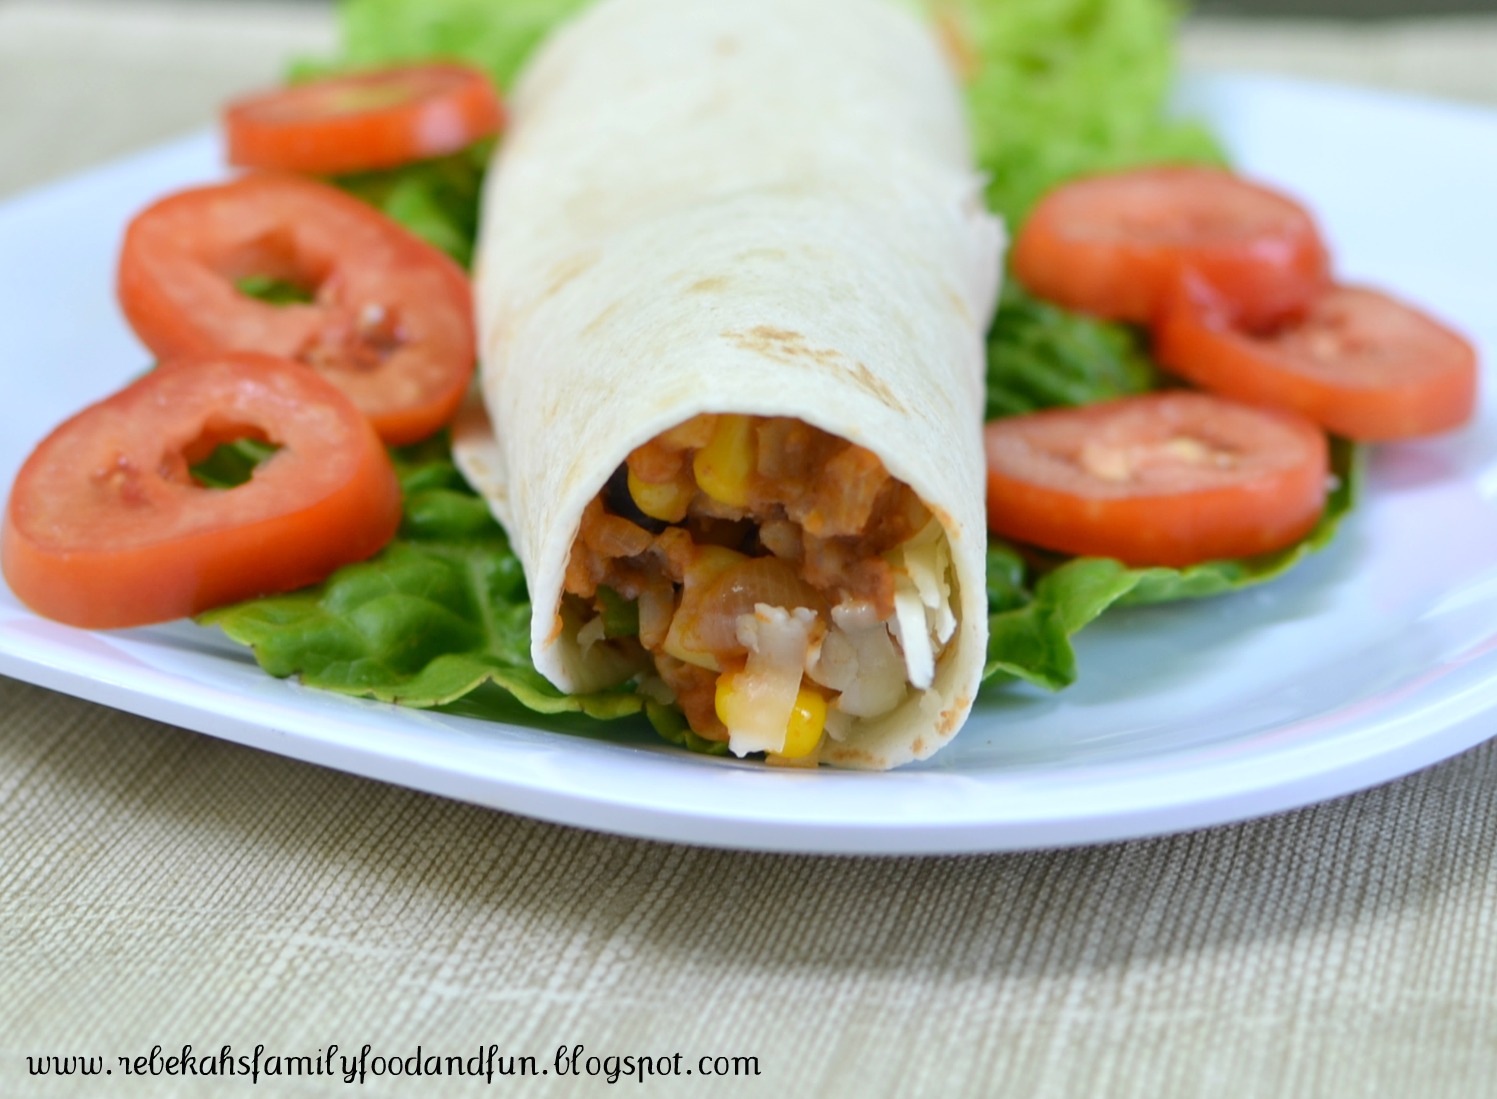
Super Bean Burritos


Another attempt at a vegetarian meal, this one was a huge hit with the entire family.  The filling is so tasty and satisfying, you don't miss having meat at all.  Although they can reportedly be frozen and reheated with great success, I didn't get the chance to try that because we gobbled up the leftovers for lunches the next couple of days.  I might prefer them with a little less corn personally, but they were great as is.  

Recipe: (from Mel's Kitchen Cafe)

1 cup brown or white rice (or 2 cups already cooked rice)
2 T. olive oil
1 medium onion, diced
3 cloves garlic, finely minced
1 jalapeno, seeds and membrane removed, finely diced (can substitute 1 (4 0z) can green chiles)
1 t. cumin
salt and pepper to taste
3 T. tomato paste
2 cans beans (pinto or black), drained and rinsed
1-1/2 c. water
1 (10 oz) package frozen corn or 1 can whole kernel corn, drained
6 green onions, white and green parts finely chopped
1/2 t. garlic powder
1/2 t. onion powder

14-16 soft-taco sized flour tortillas
2-3 cups shredded cheese (Monterey Jack or cheddar)
Cook rice; set aside. Meanwhile, heat oil in large saucepan over medium heat. Add onion, garlic, jalapeno and cumin; season with salt and pepper. Cook, stirring occasionally, until onions are softened and golden, being careful not to let the garlic burn. Add tomato paste and cook, stirring for 1 minute.
Add one can of beans and mash gently in the pan (a potato masher or fork works great here). Add the second can of beans and the water and stir to combine. Bring to a boil, reduce heat to medium and simmer, stirring occasionally, until thickened, 10-12 minutes, being careful not to let the mixture stick to the bottom of the pot. Add corn; cook to heat through, 2-3 minutes. Stir in onion and garlic powders. Remove from heat; stir in green onions and cooked rice.
Heat tortillas in microwave for about 30-45 seconds or until all are warmed through.
Fill each tortilla with about 2/3 cup bean and rice mixture and  a good sprinkling cheese on one side of tortilla. Fold, and hold in sides. Starting from filled end, holding sides in as you work, tightly roll into a bundle. Place on a baking sheet, seam side down, and prepare remaining burritos.
Serve warm immediately, with salsa and sour cream if desired — or, to freeze for later consumption, put the baking sheet of burritos into the freezer for at least 30 minutes, or until very cold so that they don’t come apart in the wrapping process. Remove them from the freezer and wrap each burrito individually in plastic wrap and place all the wrapped burritos in a freezer-safe resealable bag and freeze up to three months.
To reheat from frozen:
Remove plastic wrap from the burrito. Poke holes in the top several times with a fork. Microwave on high for two minutes. Gently poke a few more holes in the burrito and microwave for another minute. Be careful as the burrito will be piping hot!


Another attempt at a vegetarian meal, this one was a huge hit with the entire family.  The filling is so tasty and satisfying, you don't miss having meat at all.  Although they can reportedly be frozen and reheated with great success, I didn't get the chance to try that because we gobbled up the leftovers for lunches the next couple of days.  I might prefer them with a little less corn personally, but they were great as is.  

Recipe: (from Mel's Kitchen Cafe)

1 cup brown or white rice (or 2 cups already cooked rice)
2 T. olive oil
1 medium onion, diced
3 cloves garlic, finely minced
1 jalapeno, seeds and membrane removed, finely diced (can substitute 1 (4 0z) can green chiles)
1 t. cumin
salt and pepper to taste
3 T. tomato paste
2 cans beans (pinto or black), drained and rinsed
1-1/2 c. water
1 (10 oz) package frozen corn or 1 can whole kernel corn, drained
6 green onions, white and green parts finely chopped
1/2 t. garlic powder
1/2 t. onion powder

14-16 soft-taco sized flour tortillas
2-3 cups shredded cheese (Monterey Jack or cheddar)
Cook rice; set aside. Meanwhile, heat oil in large saucepan over medium heat. Add onion, garlic, jalapeno and cumin; season with salt and pepper. Cook, stirring occasionally, until onions are softened and golden, being careful not to let the garlic burn. Add tomato paste and cook, stirring for 1 minute.
Add one can of beans and mash gently in the pan (a potato masher or fork works great here). Add the second can of beans and the water and stir to combine. Bring to a boil, reduce heat to medium and simmer, stirring occasionally, until thickened, 10-12 minutes, being careful not to let the mixture stick to the bottom of the pot. Add corn; cook to heat through, 2-3 minutes. Stir in onion and garlic powders. Remove from heat; stir in green onions and cooked rice.
Heat tortillas in microwave for about 30-45 seconds or until all are warmed through.
Fill each tortilla with about 2/3 cup bean and rice mixture and  a good sprinkling cheese on one side of tortilla. Fold, and hold in sides. Starting from filled end, holding sides in as you work, tightly roll into a bundle. Place on a baking sheet, seam side down, and prepare remaining burritos.
Serve warm immediately, with salsa and sour cream if desired — or, to freeze for later consumption, put the baking sheet of burritos into the freezer for at least 30 minutes, or until very cold so that they don’t come apart in the wrapping process. Remove them from the freezer and wrap each burrito individually in plastic wrap and place all the wrapped burritos in a freezer-safe resealable bag and freeze up to three months.
To reheat from frozen:
Remove plastic wrap from the burrito. Poke holes in the top several times with a fork. Microwave on high for two minutes. Gently poke a few more holes in the burrito and microwave for another minute. Be careful as the burrito will be piping hot!


reade more... Résuméabuiyad

Fritter-Fried Okra - my absolute favorite okra!


Nothing says summer southern cooking like okra!  Well ... maybe fresh peaches ... or sweet tea ... or tomato pie - but let's stick with okra for right now.  And this fritter-fried okra is my absolute favorite way to enjoy fresh okra.

I learned this method from my mother-in-law.  After eight years of requesting fritter-fried okra every time Mark and I go to visit her, I've finally started making my own.  Though I still request it at her house, too, of course!!

To make this, start by slicing up fresh okra - into about 1/4" to 1/2" thick pieces.
Fresh okra
Then mix up what is pretty much a pancake batter.  Toss the okra slices in the batter ... the batter won't completely cover all the slices, but that's okay.  It'll look about like this:

Batter'ed up!
Drop it into a frying pan, very much like you would pancakes.  Let it get golden brown on the first side and then ...

Is it hot in here, or it just me?
... flip it over!  Let the second side get golden brown, and then start breaking the okra up and stirring it around to make sure all the batter gets cooked.
Golden brown & ready to flip
Now, here's a beautiful thing about this preparation - you can eat it immediately, or put it up in the freezer to have all winter long!  When I'm going to put it up in the freezer, I spread it out on baking sheets to cool.  Then, I pack it in freezer bags and chill it completely in the refrigerator before popping it in the freezer.

Just chillin'

When you take it out of the freezer, ya know, during the middle of January when you're longing for beautiful weather and a taste of summer produce, thaw it and heat it up in a skillet.  Then enjoy your from-the-summer treat! 


Fritter-Fried Okra
Source:  My mother-in-law
Ingredients
1 c. all-purpose flour
1/2 tsp. salt
1 T. baking powder
1/3 c. milk
2 eggs, well-beaten
5 c. sliced okra, about 1/4" to 1/2" thick
Canola oil to coat pan


Directions
1.  Combine flour, baking powder, and salt in a mixing bowl.  Add beaten eggs and milk, beating until smooth.  Add okra, stirring until coated. 

2.  Spoon okra into hot oil in a large skillet; cook, stirring occasionally, until golden brown.  Depending on the size of your pan, you may need to do multiple batches.  You don't want to crowd the pan.

3.  If freezing, cool in a single layer on baking sheets.  Package in freezer bags or sealable plastic containers; freeze.  When ready to serve, thaw and reheat in a little hot oil in a skillet on the stove.

Enjoy!


This post is linked with Tasty Tuesday hosted by For the Love of Blogs, Cast Party Wednesday hosted by Lady Behind the Curtain, It's a Keeper Thursday hosted by It's a Keeper, These Chicks Cooked hosted by This Chick Cooks, Savory Sunday hosted by The Sweet Details, and This Week's Cravings hosted by Mom's Crazy Cooking.

Nothing says summer southern cooking like okra!  Well ... maybe fresh peaches ... or sweet tea ... or tomato pie - but let's stick with okra for right now.  And this fritter-fried okra is my absolute favorite way to enjoy fresh okra.

I learned this method from my mother-in-law.  After eight years of requesting fritter-fried okra every time Mark and I go to visit her, I've finally started making my own.  Though I still request it at her house, too, of course!!

To make this, start by slicing up fresh okra - into about 1/4" to 1/2" thick pieces.
Fresh okra
Then mix up what is pretty much a pancake batter.  Toss the okra slices in the batter ... the batter won't completely cover all the slices, but that's okay.  It'll look about like this:

Batter'ed up!
Drop it into a frying pan, very much like you would pancakes.  Let it get golden brown on the first side and then ...

Is it hot in here, or it just me?
... flip it over!  Let the second side get golden brown, and then start breaking the okra up and stirring it around to make sure all the batter gets cooked.
Golden brown & ready to flip
Now, here's a beautiful thing about this preparation - you can eat it immediately, or put it up in the freezer to have all winter long!  When I'm going to put it up in the freezer, I spread it out on baking sheets to cool.  Then, I pack it in freezer bags and chill it completely in the refrigerator before popping it in the freezer.

Just chillin'

When you take it out of the freezer, ya know, during the middle of January when you're longing for beautiful weather and a taste of summer produce, thaw it and heat it up in a skillet.  Then enjoy your from-the-summer treat! 


Fritter-Fried Okra
Source:  My mother-in-law
Ingredients
1 c. all-purpose flour
1/2 tsp. salt
1 T. baking powder
1/3 c. milk
2 eggs, well-beaten
5 c. sliced okra, about 1/4" to 1/2" thick
Canola oil to coat pan


Directions
1.  Combine flour, baking powder, and salt in a mixing bowl.  Add beaten eggs and milk, beating until smooth.  Add okra, stirring until coated. 

2.  Spoon okra into hot oil in a large skillet; cook, stirring occasionally, until golden brown.  Depending on the size of your pan, you may need to do multiple batches.  You don't want to crowd the pan.

3.  If freezing, cool in a single layer on baking sheets.  Package in freezer bags or sealable plastic containers; freeze.  When ready to serve, thaw and reheat in a little hot oil in a skillet on the stove.

Enjoy!


This post is linked with Tasty Tuesday hosted by For the Love of Blogs, Cast Party Wednesday hosted by Lady Behind the Curtain, It's a Keeper Thursday hosted by It's a Keeper, These Chicks Cooked hosted by This Chick Cooks, Savory Sunday hosted by The Sweet Details, and This Week's Cravings hosted by Mom's Crazy Cooking.
reade more... Résuméabuiyad