Pages

Red Velvet Cake Truffles


Here is another fun holiday, red velvety treat!  Bring these to your next Christmas party or hand them out for neighbor gifts.  They look extra fancy & are super easy to prepare!  This is basically the same recipe as the cupcakes cut down to make about 30 cake truffles.  Have fun with them!  You can even try using semi-sweet chocolate to dip them in as well.
Pin It

  
  • Red Velvet Cake
  • Recipe adapted from allrecipes by: Amber (Dessert Now, Dinner Later!) 
  •  
  • 1/4 cup and 2 tsp butter
  • 3/4 cup and 2 Tbsp white sugar
  • 1 large egg
  • 1/2 cup and 2 Tbsp milk
  • 1 3/4 tsp lemon juice
  • 1 3/4 tsp red food coloring
  • 1/2 tsp vanilla extract
  • 1 tsp baking soda
  • 1 3/4 tsp distilled white vinegar
  • 1 cup and 3 Tbsp all-purpose flour
  • 3 Tbsp unsweetened cocoa powder
  • 1/2 teaspoon salt
  1. Add lemon juice to milk.  Set aside & let stand for 10 min.
  2. Beat butter & sugar until fluffy.
  3. Add eggs, milk mixture, red food coloring, & vanilla.  Combine.
  4. Add soda & vinegar stir lightly.
  5. Sift flour, cocoa, & salt together in a separate bowl.
  6. Add dry ingredients to wet ingredients in mixer.  Mix until just blended.  DO NOT OVERMIX!
  7. Spray or line cupcake pan & fill 1/2-3/4 full with cake batter.  Will make 10 cupcakes.  
  8. Bake at 350*F for 20-25 min or until cake springs back when touched.

Cream Cheese Frosting
Recipe by: Amber (Dessert Now, Dinner Later!)

4oz cream cheese
2 Tbsp butter
6 Tbsp sugar
1/4 tsp vanilla
  1. Cream butter with cream cheese until light & whipped (no lumps).  
  2. Add sugar & vanilla until incorporated.  Let sit in fridge 10 minutes so sugars can dissolve. 


Making the Truffles:


  1. Take cupcakes out of their wrappers & put in a stand mixer.  Start the mixer & wait until all the cake has been crumbled.  
  2. Add frosting to cake mixture.  Should come together & look wet.  Make 1-inch balls & place on a wax paper on a baking tray.  Cover with plastic wrap & freeze 2 hours.  

Dipping the Truffles:

  1. Melt 1 bag Guittard white chocolate chips using a double boiler.  Make sure water does not touch the bottom of the top (melting) bowl & only melt over low heat; white chocolate burns easily.  
  2. Using a fondue fork or bbq scewer, dip frozen cake truffles into melted chocolate chips.  Roll around till covered all around & shake off any excess chocolate.  
  3. Place on wax paper & immediately sprinkle with red/green sugar crystals.
  4. Continue with all the cake truffles.  Let sit until chocolate hardens.  Keep refrigerated.
Makes approximately 30 cake truffles


Here is another fun holiday, red velvety treat!  Bring these to your next Christmas party or hand them out for neighbor gifts.  They look extra fancy & are super easy to prepare!  This is basically the same recipe as the cupcakes cut down to make about 30 cake truffles.  Have fun with them!  You can even try using semi-sweet chocolate to dip them in as well.
Pin It

  
  • Red Velvet Cake
  • Recipe adapted from allrecipes by: Amber (Dessert Now, Dinner Later!) 
  •  
  • 1/4 cup and 2 tsp butter
  • 3/4 cup and 2 Tbsp white sugar
  • 1 large egg
  • 1/2 cup and 2 Tbsp milk
  • 1 3/4 tsp lemon juice
  • 1 3/4 tsp red food coloring
  • 1/2 tsp vanilla extract
  • 1 tsp baking soda
  • 1 3/4 tsp distilled white vinegar
  • 1 cup and 3 Tbsp all-purpose flour
  • 3 Tbsp unsweetened cocoa powder
  • 1/2 teaspoon salt
  1. Add lemon juice to milk.  Set aside & let stand for 10 min.
  2. Beat butter & sugar until fluffy.
  3. Add eggs, milk mixture, red food coloring, & vanilla.  Combine.
  4. Add soda & vinegar stir lightly.
  5. Sift flour, cocoa, & salt together in a separate bowl.
  6. Add dry ingredients to wet ingredients in mixer.  Mix until just blended.  DO NOT OVERMIX!
  7. Spray or line cupcake pan & fill 1/2-3/4 full with cake batter.  Will make 10 cupcakes.  
  8. Bake at 350*F for 20-25 min or until cake springs back when touched.

Cream Cheese Frosting
Recipe by: Amber (Dessert Now, Dinner Later!)

4oz cream cheese
2 Tbsp butter
6 Tbsp sugar
1/4 tsp vanilla
  1. Cream butter with cream cheese until light & whipped (no lumps).  
  2. Add sugar & vanilla until incorporated.  Let sit in fridge 10 minutes so sugars can dissolve. 


Making the Truffles:


  1. Take cupcakes out of their wrappers & put in a stand mixer.  Start the mixer & wait until all the cake has been crumbled.  
  2. Add frosting to cake mixture.  Should come together & look wet.  Make 1-inch balls & place on a wax paper on a baking tray.  Cover with plastic wrap & freeze 2 hours.  

Dipping the Truffles:

  1. Melt 1 bag Guittard white chocolate chips using a double boiler.  Make sure water does not touch the bottom of the top (melting) bowl & only melt over low heat; white chocolate burns easily.  
  2. Using a fondue fork or bbq scewer, dip frozen cake truffles into melted chocolate chips.  Roll around till covered all around & shake off any excess chocolate.  
  3. Place on wax paper & immediately sprinkle with red/green sugar crystals.
  4. Continue with all the cake truffles.  Let sit until chocolate hardens.  Keep refrigerated.
Makes approximately 30 cake truffles


reade more... Résuméabuiyad

Red Velvet Cupcakes


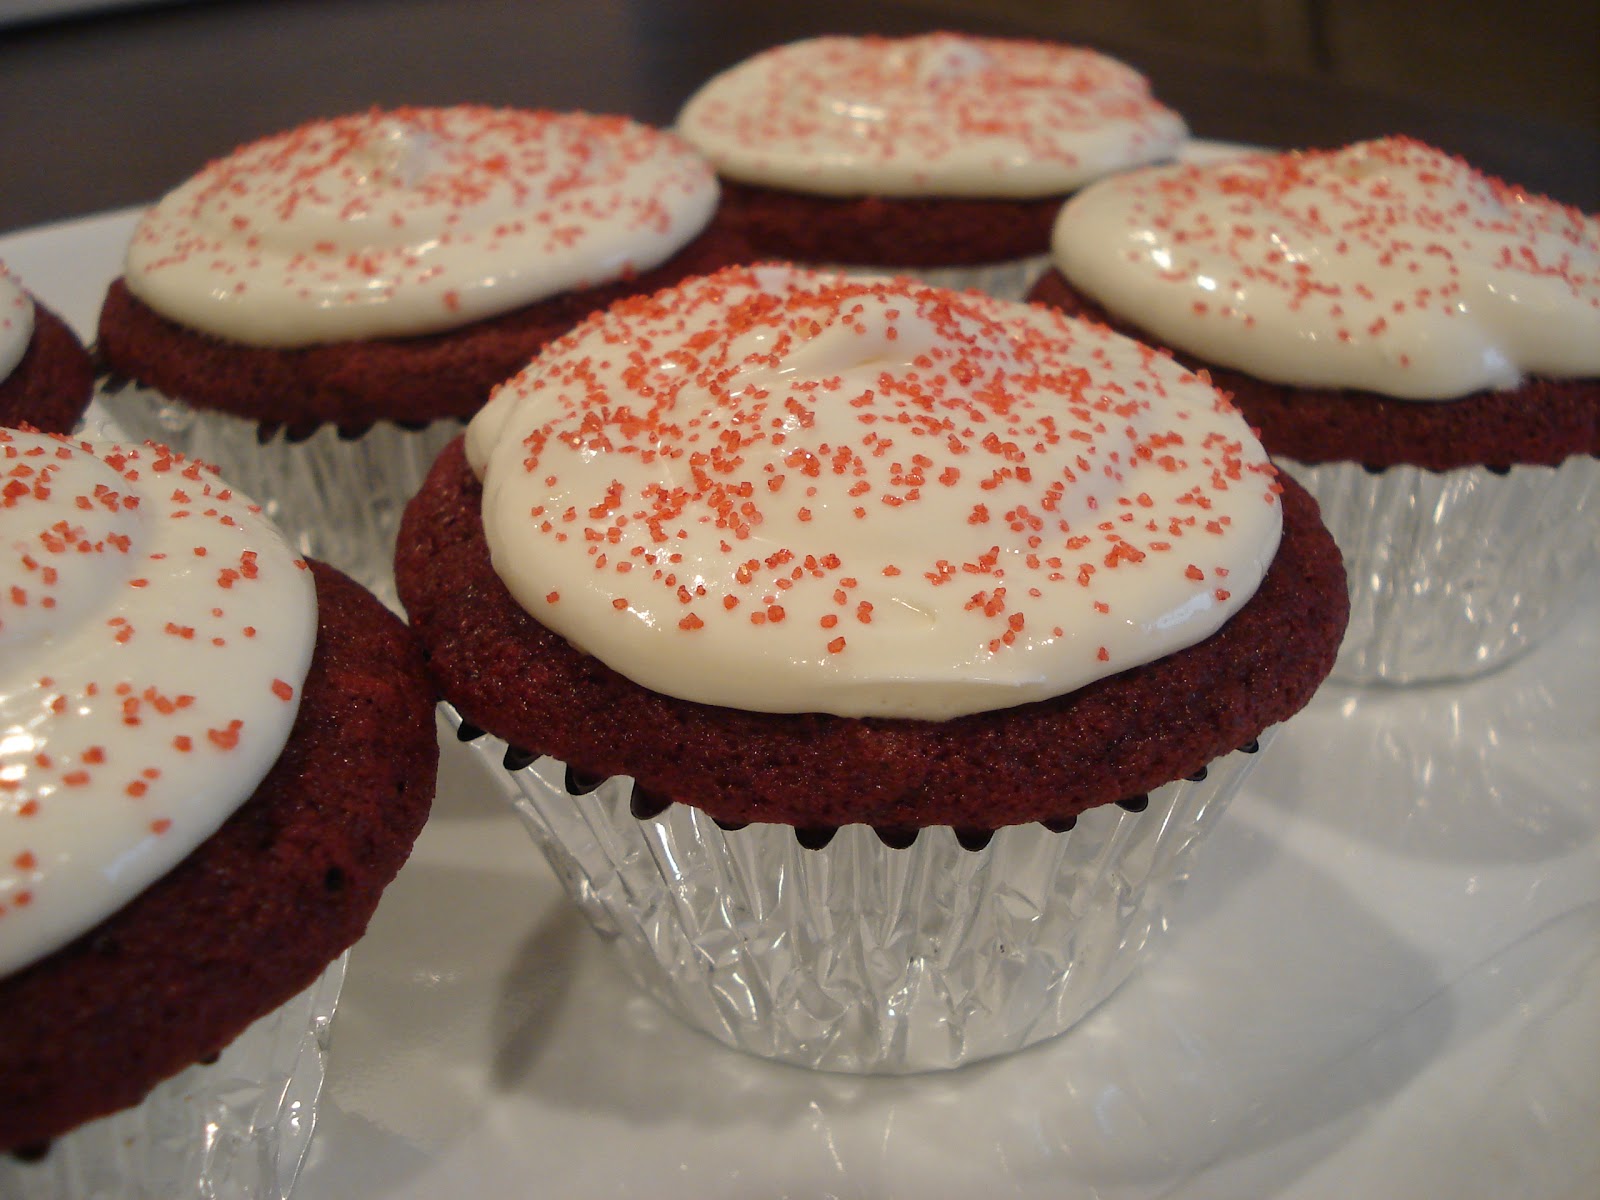
I have been looking around for some fun recipes to try for Christmas time & I LOVE red velvet things.  Since the colors resemble Christmas, I have played with a couple red velvet recipes.  Here is a basic red velvet cupcake recipe.  It is nice & moist & makes exactly 20 cupcakes like it said.  I didn't have buttermilk, so I made my own (milk+lemon juice).  


Also a fun tidbit of information: the vinegar & cocoa have a chemical reaction when they mix together which gives a red hue to this cake, but to get it the gorgeous bright red you want it, you still need to add red food coloring.  So that chemical reaction is why it is called red velvet; you really need the cocoa in it for it to be a red velvet cake & not just a white cake colored red.  Some people don't understand red velvet cake has a hint of chocolate in it.  Anyway, happy baking!
Pin It


Red Velvet Cupcakes   
Recipe adapted from allrecipes by: Amber (Dessert Now, Dinner Later!)

1/2 cup butter
1 1/2 cups sugar
2 eggs
1 cup milk
1 Tbsp lemon juice
1 tbsp red food coloring
1 tsp vanilla
1 1/2 tsp baking soda
1 Tbsp white distilled vinegar
2 cups all purpose flour
1/3 cup cocoa powder
1 tsp salt
  1. Add lemon juice to milk.  Set aside & let stand for 10 min.
  2. Beat butter & sugar until fluffy.
  3. Add eggs, milk mixture, red food coloring, & vanilla.  Combine.
  4. Add soda & vinegar stir lightly.
  5. Sift flour, cocoa, & salt together in a separate bowl.
  6. Add dry ingredients to wet ingredients in mixer.  Mix until just blended.  DO NOT OVERMIX!
  7. Spray or line cupcake pan & fill 1/2-3/4 full with cake batter.  Will make 20 cupcakes.  
  8. Bake at 350*F for 20-25 min or until cake springs back when touched.


Cream Cheese Icing
Recipe by: Amber (Dessert Now, Dinner Later!)

8oz Neufchatel Cream Cheese
4 Tbsp unsalted butter
3/4 cup sugar
1/2 tsp vanilla
1/2 8-oz tub light cool whip
  1. Cream butter with cream cheese until light & whipped (no lumps).  
  2. Add sugar & vanilla until incorporated.  
  3. Add cool whip & blend just until mixed.  Should be stiff enough to leave ripples in the icing from the beaters, but if you do it too long it might get soft & soupy; you want a light whipped icing.
  4. Frost cupcakes & sprinkle with red sugar crystals if desired.  
Leave these out for Santa to munch on this year! 


I have been looking around for some fun recipes to try for Christmas time & I LOVE red velvet things.  Since the colors resemble Christmas, I have played with a couple red velvet recipes.  Here is a basic red velvet cupcake recipe.  It is nice & moist & makes exactly 20 cupcakes like it said.  I didn't have buttermilk, so I made my own (milk+lemon juice).  


Also a fun tidbit of information: the vinegar & cocoa have a chemical reaction when they mix together which gives a red hue to this cake, but to get it the gorgeous bright red you want it, you still need to add red food coloring.  So that chemical reaction is why it is called red velvet; you really need the cocoa in it for it to be a red velvet cake & not just a white cake colored red.  Some people don't understand red velvet cake has a hint of chocolate in it.  Anyway, happy baking!
Pin It


Red Velvet Cupcakes   
Recipe adapted from allrecipes by: Amber (Dessert Now, Dinner Later!)

1/2 cup butter
1 1/2 cups sugar
2 eggs
1 cup milk
1 Tbsp lemon juice
1 tbsp red food coloring
1 tsp vanilla
1 1/2 tsp baking soda
1 Tbsp white distilled vinegar
2 cups all purpose flour
1/3 cup cocoa powder
1 tsp salt
  1. Add lemon juice to milk.  Set aside & let stand for 10 min.
  2. Beat butter & sugar until fluffy.
  3. Add eggs, milk mixture, red food coloring, & vanilla.  Combine.
  4. Add soda & vinegar stir lightly.
  5. Sift flour, cocoa, & salt together in a separate bowl.
  6. Add dry ingredients to wet ingredients in mixer.  Mix until just blended.  DO NOT OVERMIX!
  7. Spray or line cupcake pan & fill 1/2-3/4 full with cake batter.  Will make 20 cupcakes.  
  8. Bake at 350*F for 20-25 min or until cake springs back when touched.


Cream Cheese Icing
Recipe by: Amber (Dessert Now, Dinner Later!)

8oz Neufchatel Cream Cheese
4 Tbsp unsalted butter
3/4 cup sugar
1/2 tsp vanilla
1/2 8-oz tub light cool whip
  1. Cream butter with cream cheese until light & whipped (no lumps).  
  2. Add sugar & vanilla until incorporated.  
  3. Add cool whip & blend just until mixed.  Should be stiff enough to leave ripples in the icing from the beaters, but if you do it too long it might get soft & soupy; you want a light whipped icing.
  4. Frost cupcakes & sprinkle with red sugar crystals if desired.  
Leave these out for Santa to munch on this year! 

reade more... Résuméabuiyad

Dark Chocolate Pretzel Fudge {Crazy Cooking Challenge}


Well, hello there, Crazy Cooking Challenge time!  The challenge presented for December by our hostess, Tina of Mom's Crazy Cooking, was  FUDGE!  Gloriously decadent and totally indulgent fudge.

I'm new to making fudge ... I made my first fudge just last month, when I put two family recipes to a head-to-head taste and texture challenge.  (My mother-in-law's recipe beat my sister-in-law's!)  I always thought fudge was difficult to make, but ya know, it's not.  It's really pretty simple.

So, with just one batch of fudge under my belt, I set out to find a fudge flavor to play with for the Crazy Cooking Challenge.  I came across many interesting and intriguing flavors ... like eggnog, mocha, and cappuccino ... but being a choc-a-holic, I went with a good ol' chocolate variation ~ Dark Chocolate Pretzel Fudge, adapted from Beantown Baker's Oreo Pretzel Fudge.  When I saw the combination of fudge and pretzels, I just couldn't resist!  I left off Beantown Baker's Oreo cookies 'n cream layer, and went with just straight chocolate and pretzels.  Oh my.

This fudge is incredibly intense and rich, so just a little dab will do ya.  But my oh my, it's a choc-a-holic's dream.

To make it, start by preparing an 8"x8" pan with an aluminum foil or parchment paper sling.  This will make it easy to lift the finished fudge from the pan for cutting, and will make clean-up of your pan a breeze.

Melt some dark chocolate and combine it with sweetened condensed milk.  I used Baker's semi-sweet chocolate squares.


Then stir in about a cup of crushed pretzels.


Pour half of this mixture into your prepared pan and top it with a layer of whole pretzels.


Pour the remainder of the fudge mixture on top and smooth it out.


Now, Beantown Baker suggested sprinkling the top with sea salt.  And I agree.  I wish I had taken her advice and done that.  And next time I make this fudge, I will give it a little sprinkling.  While you indeed do get the beautiful chocolate-and-salt flavor from the dark chocolate and pretzels, I think another little kick of salt on the top would be totally fabulous.

Cool the completed fudge and cut it into small squares.  Pop it in your mouth and enjoy the salty goodness!


Dark Chocolate Pretzel Fudge
Source:  Adapted from The Beantown Baker
Ingredients
1 (8 oz.) package semi-sweet chocolate squares (I used Baker's brand)
1 (14 oz.) can sweetened condensed milk
1 c. crushed pretzel pieces (approximately 25 small twist pretzels)
Additional whole small twist pretzels (approximately 20 additional pretzels)
Fleur de sel or sea salt (optional)


Directions
1.  Line an 8"x8" pan with an aluminum foil or parchment paper sling.

2.  Melt the chocolate and condensed milk together in a small saucepan over low heat.  Remove from heat and stir in pretzel pieces. 

3.  Spread 1/2 of the chocolate mixture in the prepared pan; top with a layer of whole pretzels.  Pour remaining chocolate mixture on top and spread it evenly.  Top with a sprinkling of fleur de sel or sea salt (optional). 

4.  Refrigerate for about two hours or until firm; cut into small squares.

(Note - The pretzels do begin to soften after a couple of days.  It's still tasty after they soften, but just be aware that the pretzel 'crunch' fades.  So ... if you want to 'keep the crunch,' eat up within a day or two!)

Enjoy!

Check out the other Crazy Cooking Challenge participants through the links below. Looks like there are some delicious fudge variations. Hmmm ... which should I try first??

Photobucket

{Click to view my other Crazy Cooking Challenge entries.}

This post is linked with Wow Me Wednesday hosted by Polka Dots on Parade, These Chicks Cooked hosted by This Chick Cooks, Mrs. Fox's Sweet Party hosted by Mrs. Fox's Sweets, It's a Keeper Thursday hosted by It's a Keeper, Foodie Friday hosted by Designs by Gollum, Friday Favorites hosted by Simply Sweet Home, Sweets for a Saturday hosted by Sweet as Sugar Cookies, Christmas in the Kitchen hosted by At the Picket Fence, Sweet Indulgences Sunday hosted by A Well-Seasoned Life, Think Pink Sundays hosted by Flamingo Toes, Sundae Scoop hosted by I {heart} Naptime, Savvy Homemade Monday hosted by Home Savvy A to Z, Mangia Mondays hosted by Shine Your Light.


Well, hello there, Crazy Cooking Challenge time!  The challenge presented for December by our hostess, Tina of Mom's Crazy Cooking, was  FUDGE!  Gloriously decadent and totally indulgent fudge.

I'm new to making fudge ... I made my first fudge just last month, when I put two family recipes to a head-to-head taste and texture challenge.  (My mother-in-law's recipe beat my sister-in-law's!)  I always thought fudge was difficult to make, but ya know, it's not.  It's really pretty simple.

So, with just one batch of fudge under my belt, I set out to find a fudge flavor to play with for the Crazy Cooking Challenge.  I came across many interesting and intriguing flavors ... like eggnog, mocha, and cappuccino ... but being a choc-a-holic, I went with a good ol' chocolate variation ~ Dark Chocolate Pretzel Fudge, adapted from Beantown Baker's Oreo Pretzel Fudge.  When I saw the combination of fudge and pretzels, I just couldn't resist!  I left off Beantown Baker's Oreo cookies 'n cream layer, and went with just straight chocolate and pretzels.  Oh my.

This fudge is incredibly intense and rich, so just a little dab will do ya.  But my oh my, it's a choc-a-holic's dream.

To make it, start by preparing an 8"x8" pan with an aluminum foil or parchment paper sling.  This will make it easy to lift the finished fudge from the pan for cutting, and will make clean-up of your pan a breeze.

Melt some dark chocolate and combine it with sweetened condensed milk.  I used Baker's semi-sweet chocolate squares.


Then stir in about a cup of crushed pretzels.


Pour half of this mixture into your prepared pan and top it with a layer of whole pretzels.


Pour the remainder of the fudge mixture on top and smooth it out.


Now, Beantown Baker suggested sprinkling the top with sea salt.  And I agree.  I wish I had taken her advice and done that.  And next time I make this fudge, I will give it a little sprinkling.  While you indeed do get the beautiful chocolate-and-salt flavor from the dark chocolate and pretzels, I think another little kick of salt on the top would be totally fabulous.

Cool the completed fudge and cut it into small squares.  Pop it in your mouth and enjoy the salty goodness!


Dark Chocolate Pretzel Fudge
Source:  Adapted from The Beantown Baker
Ingredients
1 (8 oz.) package semi-sweet chocolate squares (I used Baker's brand)
1 (14 oz.) can sweetened condensed milk
1 c. crushed pretzel pieces (approximately 25 small twist pretzels)
Additional whole small twist pretzels (approximately 20 additional pretzels)
Fleur de sel or sea salt (optional)


Directions
1.  Line an 8"x8" pan with an aluminum foil or parchment paper sling.

2.  Melt the chocolate and condensed milk together in a small saucepan over low heat.  Remove from heat and stir in pretzel pieces. 

3.  Spread 1/2 of the chocolate mixture in the prepared pan; top with a layer of whole pretzels.  Pour remaining chocolate mixture on top and spread it evenly.  Top with a sprinkling of fleur de sel or sea salt (optional). 

4.  Refrigerate for about two hours or until firm; cut into small squares.

(Note - The pretzels do begin to soften after a couple of days.  It's still tasty after they soften, but just be aware that the pretzel 'crunch' fades.  So ... if you want to 'keep the crunch,' eat up within a day or two!)

Enjoy!

Check out the other Crazy Cooking Challenge participants through the links below. Looks like there are some delicious fudge variations. Hmmm ... which should I try first??

Photobucket

{Click to view my other Crazy Cooking Challenge entries.}

This post is linked with Wow Me Wednesday hosted by Polka Dots on Parade, These Chicks Cooked hosted by This Chick Cooks, Mrs. Fox's Sweet Party hosted by Mrs. Fox's Sweets, It's a Keeper Thursday hosted by It's a Keeper, Foodie Friday hosted by Designs by Gollum, Friday Favorites hosted by Simply Sweet Home, Sweets for a Saturday hosted by Sweet as Sugar Cookies, Christmas in the Kitchen hosted by At the Picket Fence, Sweet Indulgences Sunday hosted by A Well-Seasoned Life, Think Pink Sundays hosted by Flamingo Toes, Sundae Scoop hosted by I {heart} Naptime, Savvy Homemade Monday hosted by Home Savvy A to Z, Mangia Mondays hosted by Shine Your Light.

reade more... Résuméabuiyad

Chocolate Mint Pie


So the inspiration of this dessert was from watching Studio5 one morning.  It was before Thanksgiving & they were talking about the best pies in Utah & where to get them.  One of the pies was so unique & I am nowhere close enough to drive to go & get it, wherever it was, so I decided to make it up myself.  I have no idea if this is even comes remotely close to the pie that they talked about, but I think I made a nice version of a Christmas Chocolate Mint Pie.  


Now for the record, any real deal foodies/culinarian's out there will notice that my ganache is missing a key ingredient: heavy cream (& even corn syrup in some cases.)  I am very aware of that fact & in this case you can call it a cheater ganache, but this melted chocolate has similar qualities & is great for dipping your cake balls/pops or truffles in as well.  If you have a regular ganache recipe you can try that; it might be a little softer than my cheater ganache since this pie stays in the fridge due to the mint cream cheese mixture.   

This recipe seems long & has lots of steps, but if you have your mise en place ready & thoroughly read the recipe first, you should be able to pull it out in a timely manner.  It's a nice addition to any holiday party/meal.
p.s. This is very rich, so you might want to cut it into 16 pieces instead of 8.  I also adjusted the recipe b/c there was a lot of chocolate & that made it hard to cut or eat with a fork, so less chocolate & more mint filling.

Chocolate Mint Pie
Recipe by: Amber (Dessert Now, Dinner Later!)


Pie Dough
  • 1 1/4 cup all purpose flour
  • 1/2 tsp salt
  • 1/2 cup unsalted butter
  • 1/4 cup (+/-) ICE COLD water
  1. Mix flour & salt in a bowl.  Put some of flour mixture on a cutting board or counter top.  Roll stick of butter in flour.  Using a bench scrape/dough cutter, cut up butter into slices.  Cut slices into toothpick shaped twigs.  Cut twigs into pea size squares.  Rough chop all butter pieces to make sure they are small enough.
  2. Add ice water until your dough can be molded into a ball.  Flatten dough into a disk.  (Option:  Freeze disk for several hours before pulling out to roll & fit in pie dish.  If you use this option you will want to pull the dough from the freezer 10-20 minutes before working with it, but you will need to be fast to not heat the dough too much, or butter will melt before it bakes.)
  3. On a floured surface roll dough into a round circle.  Only roll from center to the edges & turn crust periodically so as to make sure it is not sticking to your surface.  Roll till 1/4" thick.
  4. Roll dough onto your rolling pin & unroll into pie dish.  Make sure it is fairly even with dough hanging 1-2" over the edges.  Trim any super long pieces. 
  5. Fold/tuck edges underneath for the crust's edge, & crimp all around for a nice finished look. (Option:  Cover crust with saran wrap & put in freezer for several hours - overnight.  Pull crust 10-20 min before baking; just enough that when you touch the crust it will give a little bit but still be really cold.  Don't thaw crust completely.)
  6. To BLIND BAKE the crust:  Dock crust with a fork or knife on the bottom & sides.  Place parchment paper into pie crust enough to cover most of the crust (I cut my piece in half & had it going opposite ways to form a "x" but you can cut a large circle if you wish.)  Fill your parchment paper with dry beans (I used pinto.)  You want to use enough beans as a weight to hold the crust down & keep the pies shape.  
  7. In a 375*F preheated oven (don't turn oven on too early or the room may get too warm for your crust) place prepared pie crust in the oven for 20 minutes.  Pull crust out of the oven & take out the parchment/bean layer.  Return crust to oven & bake an extra 10-15 minutes or until crust is golden brown & dry (if you kept your butter cold enough it shouldn't be greasy, but you want it to not be oily b/c that means your crust may not be done.)

Mise en Place (Everything in it's Place)
Mix flour & salt in a bowl.  Put some of flour mixture on a cutting board or counter top.  Roll stick of butter in flour.  Using a bench scrape/dough cutter, cut up butter into slices.  Cut slices into toothpick shaped twigs.  Cut twigs into pea size squares.  Rough chop all butter pieces to make sure they are small enough.

Add ice water until your dough can be molded into a ball.  Flatten dough into a disk.  (Option:  Freeze disk for several hours before pulling out to roll & fit in pie dish.  If you use this option you will want to pull the dough from the freezer 10-20 minutes before working with it, but you will need to be fast to not heat the dough too much, or butter will melt before it bakes.)

On a floured surface roll dough into a round circle.  Only roll from center to the edges & turn crust periodically so as to make sure it is not sticking to your surface.  Roll till 1/4" thick.

Roll dough onto your rolling pin & unroll into pie dish.  Make sure it is fairly even with dough hanging 1-2" over the edges.  Trim any super long pieces. 

Fold/tuck edges underneath for the crust's edge, & crimp all around for a nice finished look. (Option:  Cover crust with saran wrap & put in freezer for several hours - overnight.  Pull crust 10-20 min before baking; just enough that when you touch the crust it will give a little bit but still be really cold.  Don't thaw crust completely.)

To BLIND BAKE the crust:  Dock crust with a fork or knife on the bottom & sides.  Place parchment paper into pie crust enough to cover most of the crust (I cut my piece in half & had it going opposite ways to form a "x" but you can cut a large circle if you wish.)  Fill your parchment paper with dry beans (I used pinto.)  You want to use enough beans as a weight to hold the crust down & keep the pies shape.  

In a 375*F preheated oven (don't turn oven on too early or the room may get too warm for your crust) place prepared pie crust in the oven for 20 minutes.  Pull crust out of the oven & take out the parchment/bean layer.  Return crust to oven & bake an extra 10-15 minutes or until crust is golden brown & dry (if you kept your butter cold enough it shouldn't be greasy, but you want it to not be oily b/c that means your crust may not be done.)

*The key to an all butter crust is to keep EVERYTHING cold!  If you are going to do the crust from start to finish without putting it in the freezer/fridge to keep the butter cold you need to be quick & have all of your items cold: bowl, flour/salt/water/bench scrape/etc.  If you are not fast enough, have kids as a distraction, or the room is too warm the butter will melt too quickly & will make for a greasy, saggy crust that will be tough to eat instead of having the nice flaky layers that the butter makes between the dough.  (I guess I should probably do a pie dough 101 post...maybe in the future.)


Mint Filling

  • 2-8oz pkg Neufchatel Cream Cheese
  • 1 cup granulated sugar
  • 2 tsp pure mint extract (not peppermint oil/extract)
  • 4+ drops of green food coloring
  • 1 (8oz) tub cool whip (I use light cool whip)
  1. Cream the sugar & cream cheese until well blended.  
  2. Add mint extract & green food coloring to your preferred color green (I like mine lighter b/c you don't want your mouth turning green & the green does darken some the longer it sits.)
  3. Add cool whip & blend just until it comes together; sometimes the longer you blend it the soupier/stringier it will get.  So don't over do it!
  4. Refrigerate to keep cold until you build your pie.

hocolate "Ganache"
*Update 9/21/12: The chocolate layer in this pie is pretty solid coming out of the fridge.  I just made a similar pie & it is better to do ganache the traditional way with heavy cream so it won't harden in fridge.  To change this part of the recipe heat 1/2 cup heavy cream on the stove until simmering, then pour over 6oz (1 cup) semi-sweet chocolate chips in a bowl.  Let sit 1 minute & whisk until smooth.  Then spread on bottom of the crust.  I am still leaving the original directions, with the photos, but I highly recommend changing the ganache with the directions I just provided.
  • 3/4 cup semi-sweet chocolate chips
  • 3 Tbsp butter
  1. Using a double boiler put chocolate chips in your stainless steel bowl over your pot of water (water should NOT touch the bottom of your bowl) & add butter in cubes.  
  2. Let it sit until it all looks soft & melted; then stir.  (If you stir before everything gets melted, then it will cease up & you will most likely freak out.)
  3. Once everything is melted, pour ganache into your cooked pie crust.  Refrigerate/Freeze until the chocolate is solid enough to spread mint filling on top.
  4. Spread mint filling on top of solidified ganache, sprinkle Ande's baking chips on top & enjoy plain or with an extra dollop of whipped cream. 
Step 1 (I halved the recipe from what I originally did, that is why there is so much butter/chocolate in the picture)

Step 2

Assemble: Cooked Crust

Add Ganache & Refrigerate/Freeze till Semi-Solid

Spread Mint Layer over Ganache

Sprinkle Andes Mints on Top (Keep Refrigerated)

Remove from Fridge 10-15 min before cutting & serving.  ENJOY!

So the inspiration of this dessert was from watching Studio5 one morning.  It was before Thanksgiving & they were talking about the best pies in Utah & where to get them.  One of the pies was so unique & I am nowhere close enough to drive to go & get it, wherever it was, so I decided to make it up myself.  I have no idea if this is even comes remotely close to the pie that they talked about, but I think I made a nice version of a Christmas Chocolate Mint Pie.  


Now for the record, any real deal foodies/culinarian's out there will notice that my ganache is missing a key ingredient: heavy cream (& even corn syrup in some cases.)  I am very aware of that fact & in this case you can call it a cheater ganache, but this melted chocolate has similar qualities & is great for dipping your cake balls/pops or truffles in as well.  If you have a regular ganache recipe you can try that; it might be a little softer than my cheater ganache since this pie stays in the fridge due to the mint cream cheese mixture.   

This recipe seems long & has lots of steps, but if you have your mise en place ready & thoroughly read the recipe first, you should be able to pull it out in a timely manner.  It's a nice addition to any holiday party/meal.
p.s. This is very rich, so you might want to cut it into 16 pieces instead of 8.  I also adjusted the recipe b/c there was a lot of chocolate & that made it hard to cut or eat with a fork, so less chocolate & more mint filling.

Chocolate Mint Pie
Recipe by: Amber (Dessert Now, Dinner Later!)


Pie Dough
  • 1 1/4 cup all purpose flour
  • 1/2 tsp salt
  • 1/2 cup unsalted butter
  • 1/4 cup (+/-) ICE COLD water
  1. Mix flour & salt in a bowl.  Put some of flour mixture on a cutting board or counter top.  Roll stick of butter in flour.  Using a bench scrape/dough cutter, cut up butter into slices.  Cut slices into toothpick shaped twigs.  Cut twigs into pea size squares.  Rough chop all butter pieces to make sure they are small enough.
  2. Add ice water until your dough can be molded into a ball.  Flatten dough into a disk.  (Option:  Freeze disk for several hours before pulling out to roll & fit in pie dish.  If you use this option you will want to pull the dough from the freezer 10-20 minutes before working with it, but you will need to be fast to not heat the dough too much, or butter will melt before it bakes.)
  3. On a floured surface roll dough into a round circle.  Only roll from center to the edges & turn crust periodically so as to make sure it is not sticking to your surface.  Roll till 1/4" thick.
  4. Roll dough onto your rolling pin & unroll into pie dish.  Make sure it is fairly even with dough hanging 1-2" over the edges.  Trim any super long pieces. 
  5. Fold/tuck edges underneath for the crust's edge, & crimp all around for a nice finished look. (Option:  Cover crust with saran wrap & put in freezer for several hours - overnight.  Pull crust 10-20 min before baking; just enough that when you touch the crust it will give a little bit but still be really cold.  Don't thaw crust completely.)
  6. To BLIND BAKE the crust:  Dock crust with a fork or knife on the bottom & sides.  Place parchment paper into pie crust enough to cover most of the crust (I cut my piece in half & had it going opposite ways to form a "x" but you can cut a large circle if you wish.)  Fill your parchment paper with dry beans (I used pinto.)  You want to use enough beans as a weight to hold the crust down & keep the pies shape.  
  7. In a 375*F preheated oven (don't turn oven on too early or the room may get too warm for your crust) place prepared pie crust in the oven for 20 minutes.  Pull crust out of the oven & take out the parchment/bean layer.  Return crust to oven & bake an extra 10-15 minutes or until crust is golden brown & dry (if you kept your butter cold enough it shouldn't be greasy, but you want it to not be oily b/c that means your crust may not be done.)

Mise en Place (Everything in it's Place)
Mix flour & salt in a bowl.  Put some of flour mixture on a cutting board or counter top.  Roll stick of butter in flour.  Using a bench scrape/dough cutter, cut up butter into slices.  Cut slices into toothpick shaped twigs.  Cut twigs into pea size squares.  Rough chop all butter pieces to make sure they are small enough.

Add ice water until your dough can be molded into a ball.  Flatten dough into a disk.  (Option:  Freeze disk for several hours before pulling out to roll & fit in pie dish.  If you use this option you will want to pull the dough from the freezer 10-20 minutes before working with it, but you will need to be fast to not heat the dough too much, or butter will melt before it bakes.)

On a floured surface roll dough into a round circle.  Only roll from center to the edges & turn crust periodically so as to make sure it is not sticking to your surface.  Roll till 1/4" thick.

Roll dough onto your rolling pin & unroll into pie dish.  Make sure it is fairly even with dough hanging 1-2" over the edges.  Trim any super long pieces. 

Fold/tuck edges underneath for the crust's edge, & crimp all around for a nice finished look. (Option:  Cover crust with saran wrap & put in freezer for several hours - overnight.  Pull crust 10-20 min before baking; just enough that when you touch the crust it will give a little bit but still be really cold.  Don't thaw crust completely.)

To BLIND BAKE the crust:  Dock crust with a fork or knife on the bottom & sides.  Place parchment paper into pie crust enough to cover most of the crust (I cut my piece in half & had it going opposite ways to form a "x" but you can cut a large circle if you wish.)  Fill your parchment paper with dry beans (I used pinto.)  You want to use enough beans as a weight to hold the crust down & keep the pies shape.  

In a 375*F preheated oven (don't turn oven on too early or the room may get too warm for your crust) place prepared pie crust in the oven for 20 minutes.  Pull crust out of the oven & take out the parchment/bean layer.  Return crust to oven & bake an extra 10-15 minutes or until crust is golden brown & dry (if you kept your butter cold enough it shouldn't be greasy, but you want it to not be oily b/c that means your crust may not be done.)

*The key to an all butter crust is to keep EVERYTHING cold!  If you are going to do the crust from start to finish without putting it in the freezer/fridge to keep the butter cold you need to be quick & have all of your items cold: bowl, flour/salt/water/bench scrape/etc.  If you are not fast enough, have kids as a distraction, or the room is too warm the butter will melt too quickly & will make for a greasy, saggy crust that will be tough to eat instead of having the nice flaky layers that the butter makes between the dough.  (I guess I should probably do a pie dough 101 post...maybe in the future.)


Mint Filling

  • 2-8oz pkg Neufchatel Cream Cheese
  • 1 cup granulated sugar
  • 2 tsp pure mint extract (not peppermint oil/extract)
  • 4+ drops of green food coloring
  • 1 (8oz) tub cool whip (I use light cool whip)
  1. Cream the sugar & cream cheese until well blended.  
  2. Add mint extract & green food coloring to your preferred color green (I like mine lighter b/c you don't want your mouth turning green & the green does darken some the longer it sits.)
  3. Add cool whip & blend just until it comes together; sometimes the longer you blend it the soupier/stringier it will get.  So don't over do it!
  4. Refrigerate to keep cold until you build your pie.

hocolate "Ganache"
*Update 9/21/12: The chocolate layer in this pie is pretty solid coming out of the fridge.  I just made a similar pie & it is better to do ganache the traditional way with heavy cream so it won't harden in fridge.  To change this part of the recipe heat 1/2 cup heavy cream on the stove until simmering, then pour over 6oz (1 cup) semi-sweet chocolate chips in a bowl.  Let sit 1 minute & whisk until smooth.  Then spread on bottom of the crust.  I am still leaving the original directions, with the photos, but I highly recommend changing the ganache with the directions I just provided.
  • 3/4 cup semi-sweet chocolate chips
  • 3 Tbsp butter
  1. Using a double boiler put chocolate chips in your stainless steel bowl over your pot of water (water should NOT touch the bottom of your bowl) & add butter in cubes.  
  2. Let it sit until it all looks soft & melted; then stir.  (If you stir before everything gets melted, then it will cease up & you will most likely freak out.)
  3. Once everything is melted, pour ganache into your cooked pie crust.  Refrigerate/Freeze until the chocolate is solid enough to spread mint filling on top.
  4. Spread mint filling on top of solidified ganache, sprinkle Ande's baking chips on top & enjoy plain or with an extra dollop of whipped cream. 
Step 1 (I halved the recipe from what I originally did, that is why there is so much butter/chocolate in the picture)

Step 2

Assemble: Cooked Crust

Add Ganache & Refrigerate/Freeze till Semi-Solid

Spread Mint Layer over Ganache

Sprinkle Andes Mints on Top (Keep Refrigerated)

Remove from Fridge 10-15 min before cutting & serving.  ENJOY!
reade more... Résuméabuiyad

Rum Balls {with Spiced Rum}


It's beginning to look a lot like Christmas! ... And in our family, it's not Christmas without Rum Balls!!  My Mom has made Rum Ballls at Christmastime ever since I can remember.  I have happily continued the tradition.  Of course, once I got my hands on the recipe, I "Tracey-ified" it, as I like to do.  Isn't it so fun to tinker with a recipe to make it your own?  To me, that's what cooking and baking is all about!  So, I changed the regular white rum in the original recipe to dark spiced rum, and added some extra ~ ya know, just for good measure.

I make these each year to include in the Christmas treat bags I give to friends.  At this point, I don't think I would get away with not putting them in there without some form of a riot.  The extra beauty of these?  They're so easy.  A bit time consuming if you're making several batches, like I do ... but easy.  And hey, you can just turn on your favorite Christmas movies and roll away to your heart's content while getting in the holiday 'spirit' (pun intended! ... I know, it was a bit of a weak one).

But do be warned, I love my Rum Balls quite 'spirited' (aka: I make 'em a wee bit strong).  You can adjust the amount of spiced rum to taste, if you'd like.  Happy holidays!!


Rum Balls (the Tracey way!)
(Source: My Mom)
Ingredients
1 c. crushed vanilla wafers
1 c. confectioner's sugar
1 1/2 c. finely chopped walnuts
2 T. cocoa
2 T. honey
1/4 c. + an extra splash of dark spiced rum


Directions
1.  Mix all ingredients together.  Chill one hour in the refrigerator.

2.  Form into small smalls (I use a small cookie scoop to measure out each one).  Roll each ball in additional confectioner's sugar.

3.  Store in an airtight container.  These can be made in advance and stored in the freezer until needed.

Note:  Each batch makes about 3 dozen Rum Balls, give-or-take a few depending on the size you make each one.  I usually make at least a double or triple batch.  Enjoy!

This post is linked with Sweet Indulgences Sunday hosted by A Well-Seasoned Life, Sundae Scoop hosted by I {heart} Naptime, Think Pink Sundays hosted by Flamingo Toes, The Cure for the Common Monday hosted by Lines Across My Face, Market Yourself Monday hosted by Sumo's Sweet Stuff, Mangia Mondays hosted by Shine Your Light, Savvy Homemade Monday hosted by Home Savvy A to Z, Mingle Monday hosted by Add a Pinch, A Themed Baker's Sunday hosted by Cupcake Apothecary, Tuesday Tutorials hosted by The Kurtz Corner, Tuesday Talent Show hosted by Chef in Training, Crazy Sweet Tuesday hosted by Crazy for Crust, Tasty Tuesday hosted by For the Love of Blogs, 12 Days of Christmas Goodies hosted by Mom's Crazy Cooking, Wow Me Wednesday hosted by Polka Dots on Parade, These Chicks Cooked hosted by This Chick Cooks, Share Your Creations hosted by Kristen's Creations, Full Plate Thursday hosted by Miz Helen's Country Cottage, It's a Keeper Thursday hosted by It's a Keeper, Foodie Friday hosted by Designs by Gollum, Friday Favorites hosted by Simply Sweet Home, Sweets for a Saturday hosted by Sweet as Sugar Cookies, Christmas in the Kitchen hosted by At the Picket Fence, Holly Bloggy Christmas Recipe Party hosted by Chef in Training, This Week's Cravings hosted by Mom's Crazy Cooking, Creative Juice Thursday hosted by Momnivore's Dilemma, Christmas in JulyChristmas Link Party12 Days of Christmas CookiesHomespun Christmas.


It's beginning to look a lot like Christmas! ... And in our family, it's not Christmas without Rum Balls!!  My Mom has made Rum Ballls at Christmastime ever since I can remember.  I have happily continued the tradition.  Of course, once I got my hands on the recipe, I "Tracey-ified" it, as I like to do.  Isn't it so fun to tinker with a recipe to make it your own?  To me, that's what cooking and baking is all about!  So, I changed the regular white rum in the original recipe to dark spiced rum, and added some extra ~ ya know, just for good measure.

I make these each year to include in the Christmas treat bags I give to friends.  At this point, I don't think I would get away with not putting them in there without some form of a riot.  The extra beauty of these?  They're so easy.  A bit time consuming if you're making several batches, like I do ... but easy.  And hey, you can just turn on your favorite Christmas movies and roll away to your heart's content while getting in the holiday 'spirit' (pun intended! ... I know, it was a bit of a weak one).

But do be warned, I love my Rum Balls quite 'spirited' (aka: I make 'em a wee bit strong).  You can adjust the amount of spiced rum to taste, if you'd like.  Happy holidays!!


Rum Balls (the Tracey way!)
(Source: My Mom)
Ingredients
1 c. crushed vanilla wafers
1 c. confectioner's sugar
1 1/2 c. finely chopped walnuts
2 T. cocoa
2 T. honey
1/4 c. + an extra splash of dark spiced rum


Directions
1.  Mix all ingredients together.  Chill one hour in the refrigerator.

2.  Form into small smalls (I use a small cookie scoop to measure out each one).  Roll each ball in additional confectioner's sugar.

3.  Store in an airtight container.  These can be made in advance and stored in the freezer until needed.

Note:  Each batch makes about 3 dozen Rum Balls, give-or-take a few depending on the size you make each one.  I usually make at least a double or triple batch.  Enjoy!

This post is linked with Sweet Indulgences Sunday hosted by A Well-Seasoned Life, Sundae Scoop hosted by I {heart} Naptime, Think Pink Sundays hosted by Flamingo Toes, The Cure for the Common Monday hosted by Lines Across My Face, Market Yourself Monday hosted by Sumo's Sweet Stuff, Mangia Mondays hosted by Shine Your Light, Savvy Homemade Monday hosted by Home Savvy A to Z, Mingle Monday hosted by Add a Pinch, A Themed Baker's Sunday hosted by Cupcake Apothecary, Tuesday Tutorials hosted by The Kurtz Corner, Tuesday Talent Show hosted by Chef in Training, Crazy Sweet Tuesday hosted by Crazy for Crust, Tasty Tuesday hosted by For the Love of Blogs, 12 Days of Christmas Goodies hosted by Mom's Crazy Cooking, Wow Me Wednesday hosted by Polka Dots on Parade, These Chicks Cooked hosted by This Chick Cooks, Share Your Creations hosted by Kristen's Creations, Full Plate Thursday hosted by Miz Helen's Country Cottage, It's a Keeper Thursday hosted by It's a Keeper, Foodie Friday hosted by Designs by Gollum, Friday Favorites hosted by Simply Sweet Home, Sweets for a Saturday hosted by Sweet as Sugar Cookies, Christmas in the Kitchen hosted by At the Picket Fence, Holly Bloggy Christmas Recipe Party hosted by Chef in Training, This Week's Cravings hosted by Mom's Crazy Cooking, Creative Juice Thursday hosted by Momnivore's Dilemma, Christmas in JulyChristmas Link Party12 Days of Christmas CookiesHomespun Christmas.
reade more... Résuméabuiyad

Chocolate Chip Cookie Dough Ice Cream


We were having guests for dinner recently and I was contemplating what to make for dessert.  As I perused my blog for inspiration, Chocolate Chip Cookie Dough Cheesecake Squares caught my eye.
I couldn't stop thinking about how fabulous those are, but I just didn't have the time to make them. 

Then I thought, "Why not make cookie dough ice cream?"  I've made cookie dough truffles before (in my pre-blog days) that were egg-free and fantastic, so I knew it couldn't be too hard to make some cookie dough ice-cream.   This was what I came up with.

The cookie dough is really wonderful - I had a hard time keeping from eating the chunks just plain. 
Had to make sure they were suitable for the ice cream, you know.  Right.

This makes a delectable dessert, which could only be made better with the addition of a chocolate swirl.  I thought about that too, but didn't have the time to make that either.  Regardless, this is one of my favorite ice creams and everyone really enjoyed it. 

Recipe:
yields: 2 quarts

Ice Cream Base: (from Cuisinart manual)
1 cup sugar
1-1/2 cups whole milk
1 T. vanilla extract
3 cups heavy cream

Combine sugar and milk in a large mixing bowl.  Use a hand mixer or a whisk to beat until sugar dissolves completely, which can take several minutes. 
Gently stir in the extract and cream. 
Freeze in ice-cream maker as explained in your owner's manual. 
Meanwhile, make cookie dough.

Cookie Dough: (from serving-ice-cream.com)
1/2 cup butter, room temperature
1/2 cup brown sugar, packed
1/4 cup granulated sugar
1/2 tsp vanilla
1 cup flour
1/2 tsp salt

1/2 cup miniature chocolate chips

Cream butter, sugars, and vanilla until blended.
Add flour and salt.
Stir until well mixed.
Form into a long log, wrap with plastic wrap, and put in the freezer until ready to use. 
Cut off slices about 1/8" thick and cut each slice into small pieces. 
You may not need all of them in the ice cream - you can save the remaining dough in the freezer for your next batch, or just munching!

When there is about 5 minutes left before the ice cream is done, add in small chunks of cookie dough.

Ice cream will be soft-serve consistency - if you want it firmer and scoopable, put in a plastic container and freeze until firm, at least 2 hours. 


We were having guests for dinner recently and I was contemplating what to make for dessert.  As I perused my blog for inspiration, Chocolate Chip Cookie Dough Cheesecake Squares caught my eye.
I couldn't stop thinking about how fabulous those are, but I just didn't have the time to make them. 

Then I thought, "Why not make cookie dough ice cream?"  I've made cookie dough truffles before (in my pre-blog days) that were egg-free and fantastic, so I knew it couldn't be too hard to make some cookie dough ice-cream.   This was what I came up with.

The cookie dough is really wonderful - I had a hard time keeping from eating the chunks just plain. 
Had to make sure they were suitable for the ice cream, you know.  Right.

This makes a delectable dessert, which could only be made better with the addition of a chocolate swirl.  I thought about that too, but didn't have the time to make that either.  Regardless, this is one of my favorite ice creams and everyone really enjoyed it. 

Recipe:
yields: 2 quarts

Ice Cream Base: (from Cuisinart manual)
1 cup sugar
1-1/2 cups whole milk
1 T. vanilla extract
3 cups heavy cream

Combine sugar and milk in a large mixing bowl.  Use a hand mixer or a whisk to beat until sugar dissolves completely, which can take several minutes. 
Gently stir in the extract and cream. 
Freeze in ice-cream maker as explained in your owner's manual. 
Meanwhile, make cookie dough.

Cookie Dough: (from serving-ice-cream.com)
1/2 cup butter, room temperature
1/2 cup brown sugar, packed
1/4 cup granulated sugar
1/2 tsp vanilla
1 cup flour
1/2 tsp salt

1/2 cup miniature chocolate chips

Cream butter, sugars, and vanilla until blended.
Add flour and salt.
Stir until well mixed.
Form into a long log, wrap with plastic wrap, and put in the freezer until ready to use. 
Cut off slices about 1/8" thick and cut each slice into small pieces. 
You may not need all of them in the ice cream - you can save the remaining dough in the freezer for your next batch, or just munching!

When there is about 5 minutes left before the ice cream is done, add in small chunks of cookie dough.

Ice cream will be soft-serve consistency - if you want it firmer and scoopable, put in a plastic container and freeze until firm, at least 2 hours. 

reade more... Résuméabuiyad

(Cheap) Korean Beef


This recipe is already one my hubby has asked me to make again.  He LOVED it!  I got it from this gal.  This recipe is so easy, so cheap & has LOADS of flavor!  Yum!  We are for sure making this again, & if we don't feel so cheap, we will cut up some flank steak in thin strips instead of the ground beef.


Cheap Korean Beef
1 lb LEAN ground beef (I used 85/15.  Apparently the fattier the beef the greasier/oilier the dish is & apparently it will look gross, so don't do that.)
3 cloves garlic, minced
1 Tbsp sesame oil
1/4 - 1/2 cup brown sugar (I actually did 1/4 cup, which was still sweet, but doesn't look as glazed as the original poster's.)
1/4 cup soy sauce (I use less sodium soy sauce.)
1/2 tsp fresh ginger, minced (You can buy a piece of ginger root, peel it, & cut it into 1-inch cubes, freeze & pull what you need. [Rachael Ray tip of the day.]  It freezes well & actually grates easily too.)
1/2 - 1 tsp crushed red pepper (To desired spiciness; I am a wimp & did 1/2 tsp, whereas my hubby wished it was a little spicier.)
Salt & Pepper
Green Onions (Don't skip this!)


1.  Brown meat in skillet with garlic & sesame oil.  Drain any excess grease/oil.
2.  Add brown sugar, soy sauce, ginger, red peppers, salt & pepper.  Simmer a few minutes to marry the flavors & serve over rice; top with green onions.  YUM!


*Update 8/4/2013: My family has this meal quite frequently.  We enjoy ours with extra sauce & some vegetables which kind of stretches the dish.  We still gobble it all up, but it's more of a well rounded meal this way.  Here is the slightly varied version:

Cheap Korean Beef with Vegetables
  • 1 lb lean ground beef
  • 3 cloves garlic, minced
  • 1 Tbsp sesame oil
  • 1/2 cup brown sugar
  • 1/2 cup low-sodium soy sauce
  • 1 tsp minced ginger
  • 1/2 tsp crushed red pepper
  • 1 Tbsp cornstarch
  • 1 (16oz) bag frozen California vegetables
  1. Brown meat in skillet with garlic & sesame oil.  Drain any excess grease/oil.
  2. Add frozen vegetables to the empty skillet & cover with a lid.  Cook stirring occasionally for 5 minutes or until just tender.
  3. Push vegetables to the outer edge of the pan.  Return beef back into the center of the pan & then add the brown sugar, soy sauce, ginger, crushed red pepper, & cornstarch over the beef.  Stir & allow the sauce on the beef to come to a boil.  
  4. Once everything is heated & the sauce is thick (about 1-2 minutes), toss the saucy beef with the vegetables, then serve over rice & top with green onions.

This recipe is already one my hubby has asked me to make again.  He LOVED it!  I got it from this gal.  This recipe is so easy, so cheap & has LOADS of flavor!  Yum!  We are for sure making this again, & if we don't feel so cheap, we will cut up some flank steak in thin strips instead of the ground beef.


Cheap Korean Beef
1 lb LEAN ground beef (I used 85/15.  Apparently the fattier the beef the greasier/oilier the dish is & apparently it will look gross, so don't do that.)
3 cloves garlic, minced
1 Tbsp sesame oil
1/4 - 1/2 cup brown sugar (I actually did 1/4 cup, which was still sweet, but doesn't look as glazed as the original poster's.)
1/4 cup soy sauce (I use less sodium soy sauce.)
1/2 tsp fresh ginger, minced (You can buy a piece of ginger root, peel it, & cut it into 1-inch cubes, freeze & pull what you need. [Rachael Ray tip of the day.]  It freezes well & actually grates easily too.)
1/2 - 1 tsp crushed red pepper (To desired spiciness; I am a wimp & did 1/2 tsp, whereas my hubby wished it was a little spicier.)
Salt & Pepper
Green Onions (Don't skip this!)


1.  Brown meat in skillet with garlic & sesame oil.  Drain any excess grease/oil.
2.  Add brown sugar, soy sauce, ginger, red peppers, salt & pepper.  Simmer a few minutes to marry the flavors & serve over rice; top with green onions.  YUM!


*Update 8/4/2013: My family has this meal quite frequently.  We enjoy ours with extra sauce & some vegetables which kind of stretches the dish.  We still gobble it all up, but it's more of a well rounded meal this way.  Here is the slightly varied version:

Cheap Korean Beef with Vegetables
  • 1 lb lean ground beef
  • 3 cloves garlic, minced
  • 1 Tbsp sesame oil
  • 1/2 cup brown sugar
  • 1/2 cup low-sodium soy sauce
  • 1 tsp minced ginger
  • 1/2 tsp crushed red pepper
  • 1 Tbsp cornstarch
  • 1 (16oz) bag frozen California vegetables
  1. Brown meat in skillet with garlic & sesame oil.  Drain any excess grease/oil.
  2. Add frozen vegetables to the empty skillet & cover with a lid.  Cook stirring occasionally for 5 minutes or until just tender.
  3. Push vegetables to the outer edge of the pan.  Return beef back into the center of the pan & then add the brown sugar, soy sauce, ginger, crushed red pepper, & cornstarch over the beef.  Stir & allow the sauce on the beef to come to a boil.  
  4. Once everything is heated & the sauce is thick (about 1-2 minutes), toss the saucy beef with the vegetables, then serve over rice & top with green onions.
reade more... Résuméabuiyad