Pages

French Onion Pasta

Anything with caramelized onions has my name written all over it!  This recipe is absolutely amazing!  So full of flavor & probably one of my new favorites.  I saw the recipe on Pinterest.  I knew I wanted to change it up a tad because it just didn't seem quite "onion-y" enough to be like a french onion soup in pasta form, so I adjusted it to my likings.  This doesn't make a lot, just enough for 4 people, so if you want to use a whole 16oz box of penne, double the sauce & use a 9x13" baking dish, but put this on your make soon list because it is that good!


French Onion Pasta
Recipe adjusted from Stephanie Cooks by: Amber (Dessert Now, Dinner Later!)
  • 1 Tbsp extra virgin olive oil
  • 1 large sweet onion, julienned
  • 1/2 tsp kosher salt
  • *1/2 tsp sugar, optional
  • 2 cloves garlic, minced
  • 2 Tbsp flour
  • 1 packet onion soup mix
  • 2 cups chicken stock (or beef stock)
  • 1 cup half & half
  • 1/2 cup shredded mozzarella cheese
  • 2 cups whole wheat penne pasta

    1. In a large non-stick pot or skillet, heat oil & add onion.  Cook on medium-low heat for 10 minutes.  Add kosher salt & sugar if desired, stir & continue cooking, uncovered, for another 20 minutes (30 minutes total) stirring every five to ten minutes.  You will want to caramelize the onions LOW & SLOW.  If they look dry at all, add a tablespoon or two of water occasionally.  If the onions start to stick to your pan, add a little more olive oil.  
    2. After onions have reached a nice golden brown, add the minced garlic & stir until fragrant, about 30 seconds.  Add flour & onion soup mix to the onion mixture.  
    3. Start boiling water in a separate pot for the noodles.  To the pot of onions: whisk in chicken stock slowly to prevent the flour from clumping.  Keep heat on medium & wait for the mixture to bubble.  
    4. Add half & half, & let simmer while noodles cook according to directions on the package.  (Mine said 10-12 minutes.)  Don't let the mixture reach a rolling boil, just a light simmer.  You don't want to evaporate all that yummy sauce you are making.
    5. Once the noodles are cooked & drained, add them to the sauce mixture.  The sauce should be thick enough to coat a spoon.  Stir the noodles in the sauce & place in a 7x11" baking dish.  
    6. Sprinkle cheese over the top of the noodles.  Heat cheese under the broiler in your oven until browned & bubbling.  Serve & enjoy!  Yields 4 servings.


    Anything with caramelized onions has my name written all over it!  This recipe is absolutely amazing!  So full of flavor & probably one of my new favorites.  I saw the recipe on Pinterest.  I knew I wanted to change it up a tad because it just didn't seem quite "onion-y" enough to be like a french onion soup in pasta form, so I adjusted it to my likings.  This doesn't make a lot, just enough for 4 people, so if you want to use a whole 16oz box of penne, double the sauce & use a 9x13" baking dish, but put this on your make soon list because it is that good!


    French Onion Pasta
    Recipe adjusted from Stephanie Cooks by: Amber (Dessert Now, Dinner Later!)
    • 1 Tbsp extra virgin olive oil
    • 1 large sweet onion, julienned
    • 1/2 tsp kosher salt
    • *1/2 tsp sugar, optional
    • 2 cloves garlic, minced
    • 2 Tbsp flour
    • 1 packet onion soup mix
    • 2 cups chicken stock (or beef stock)
    • 1 cup half & half
    • 1/2 cup shredded mozzarella cheese
    • 2 cups whole wheat penne pasta

      1. In a large non-stick pot or skillet, heat oil & add onion.  Cook on medium-low heat for 10 minutes.  Add kosher salt & sugar if desired, stir & continue cooking, uncovered, for another 20 minutes (30 minutes total) stirring every five to ten minutes.  You will want to caramelize the onions LOW & SLOW.  If they look dry at all, add a tablespoon or two of water occasionally.  If the onions start to stick to your pan, add a little more olive oil.  
      2. After onions have reached a nice golden brown, add the minced garlic & stir until fragrant, about 30 seconds.  Add flour & onion soup mix to the onion mixture.  
      3. Start boiling water in a separate pot for the noodles.  To the pot of onions: whisk in chicken stock slowly to prevent the flour from clumping.  Keep heat on medium & wait for the mixture to bubble.  
      4. Add half & half, & let simmer while noodles cook according to directions on the package.  (Mine said 10-12 minutes.)  Don't let the mixture reach a rolling boil, just a light simmer.  You don't want to evaporate all that yummy sauce you are making.
      5. Once the noodles are cooked & drained, add them to the sauce mixture.  The sauce should be thick enough to coat a spoon.  Stir the noodles in the sauce & place in a 7x11" baking dish.  
      6. Sprinkle cheese over the top of the noodles.  Heat cheese under the broiler in your oven until browned & bubbling.  Serve & enjoy!  Yields 4 servings.


      reade more... Résuméabuiyad

      Caramel-Walnut Squares {for Pediatric Cancer Research}


      Mmmmmmmmmm ... ooey-gooey Caramel-Walnut Squares. They're one of my family's absolute, absolute favorites. And want to know what's extra special about this batch? They were baked up for a great cause - Cookies for Kids' Cancer! Cookies for Kids' Cancer is an organization dedicated to raising funds for pediatric cancer research. A very worthy cause in my book.

      And I think it is totally and completely super awesome that a group of kids in my town ...

      Continue Reading >>


      Mmmmmmmmmm ... ooey-gooey Caramel-Walnut Squares. They're one of my family's absolute, absolute favorites. And want to know what's extra special about this batch? They were baked up for a great cause - Cookies for Kids' Cancer! Cookies for Kids' Cancer is an organization dedicated to raising funds for pediatric cancer research. A very worthy cause in my book.

      And I think it is totally and completely super awesome that a group of kids in my town ...

      Continue Reading >>
      reade more... Résuméabuiyad

      12 Days of Christmas Sweets!


      There is going to be some CHRISTMAS CHAOS going on at my house these next couple weeks. 
      I am going all out & compiling 12 delicious holiday treats, sweets, & drinks for you to enjoy! 
      There will be one new recipe each day until Christmas starting Thursday, December 13th.

      You won't want to miss out! Share this picture/post, tell your friends, & keep coming back for all the holiday goodies you won't want to miss! 
      I can't wait to share them with you! 

      There is going to be some CHRISTMAS CHAOS going on at my house these next couple weeks. 
      I am going all out & compiling 12 delicious holiday treats, sweets, & drinks for you to enjoy! 
      There will be one new recipe each day until Christmas starting Thursday, December 13th.

      You won't want to miss out! Share this picture/post, tell your friends, & keep coming back for all the holiday goodies you won't want to miss! 
      I can't wait to share them with you! 
      reade more... Résuméabuiyad

      Mint Chocolate Krispies


      Christmas is approaching & it's time to get in the kitchen & bake treats!  These are a super quick treat that will please kids and adults alike.  I am a huge fan of mint or creme de menthe anything.  Peppermint is okay, but I love my mint.  I could eat Ande's mint chocolates all day long.  These have mint & semi-sweet chocolate chips & they are so good.  Enjoy!


      Mint Chocolate Krispies
      Recipe by: Amber (Dessert Now, Dinner Later!)
      • 1/4 cup butter
      • 1 (10.5oz) bag mini marshmallows
      • 6 cups rice cereal
      • 1 tsp creme de menthe/mint extract
      • 3/4 cup mint chips, plus 1/3 cup for melting
      • 3/4 cup semi-sweet chocolate chips, plus 1/4 cup for melting
      • Optional: Green or Red Sugar Crystals
      1. Melt butter with marshmallows in a large non-stick pot.  Add 1 tsp mint extract.  Stir frequently with a spatula, until everything is melted & smooth.  Remove from heat.  *Heat just long enough to melt everything, you want the mixture to be warm, not hot.
      2. Add rice cereal & mix lightly.
      3. Add 3/4 cup mint & semi-sweet chocolate chips, each.  Fold in gently. *This is why you want the marshmallow mixture to be warm & not hot, or your chips will melt. 
      4. Spread mixture into a greased 13x9" pan.  Pat down with spatula. 
      5. In a small bowl, microwave 1/3 cup mint chips on HALF POWER for 30-60 seconds.  Stirring after 30 seconds.  Heat until melted.  Spoon mixture into a plastic sandwich bag, with the corner tip cut off.  Drizzle over the top of rice krispies.  Repeat with 1/4 cup semi-sweet chocolate chips.
      6. *Optional:  Sprinkle green or red sugar crystals over the top of warm chocolate drizzle for extra fancy rice krispies.


      Christmas is approaching & it's time to get in the kitchen & bake treats!  These are a super quick treat that will please kids and adults alike.  I am a huge fan of mint or creme de menthe anything.  Peppermint is okay, but I love my mint.  I could eat Ande's mint chocolates all day long.  These have mint & semi-sweet chocolate chips & they are so good.  Enjoy!


      Mint Chocolate Krispies
      Recipe by: Amber (Dessert Now, Dinner Later!)
      • 1/4 cup butter
      • 1 (10.5oz) bag mini marshmallows
      • 6 cups rice cereal
      • 1 tsp creme de menthe/mint extract
      • 3/4 cup mint chips, plus 1/3 cup for melting
      • 3/4 cup semi-sweet chocolate chips, plus 1/4 cup for melting
      • Optional: Green or Red Sugar Crystals
      1. Melt butter with marshmallows in a large non-stick pot.  Add 1 tsp mint extract.  Stir frequently with a spatula, until everything is melted & smooth.  Remove from heat.  *Heat just long enough to melt everything, you want the mixture to be warm, not hot.
      2. Add rice cereal & mix lightly.
      3. Add 3/4 cup mint & semi-sweet chocolate chips, each.  Fold in gently. *This is why you want the marshmallow mixture to be warm & not hot, or your chips will melt. 
      4. Spread mixture into a greased 13x9" pan.  Pat down with spatula. 
      5. In a small bowl, microwave 1/3 cup mint chips on HALF POWER for 30-60 seconds.  Stirring after 30 seconds.  Heat until melted.  Spoon mixture into a plastic sandwich bag, with the corner tip cut off.  Drizzle over the top of rice krispies.  Repeat with 1/4 cup semi-sweet chocolate chips.
      6. *Optional:  Sprinkle green or red sugar crystals over the top of warm chocolate drizzle for extra fancy rice krispies.


      reade more... Résuméabuiyad

      Almond Cake


      One of my big concerns about our move has been the sale of our home.  
      What if it didn't sell?
      What if we had to drop the price drastically and take even more of a hit?  (since we built it at the peak of the market, we've lost quite bit of appraised value in six years.)
      The agent warned us not to be discouraged if there weren't even any showings in December, since it's not a popular month for buying a home.....that with the market being what it is, not to be surprised if it took 3-6 months to sell.

      So it was listed last Monday.  
      On Friday, we had an offer. (!!!!)
      Not a full price offer, mind you, but not a terrible one, either.  
      We counter-offered, they accepted, and the papers were all signed on Saturday.  

      Extra confirmation that we are doing exactly what God had planned for us.  Wow!

      We put in an offer on a home here on Sunday - we're still in negotiations with it. It's a lovely home that Grant had his eye on for a couple of months - he even got to look through it when he came out here for his interview.  He fell in love with it and it's been his top choice all along.  I really like it too....I think it's a great choice for our family.  So we'll pray and see what happens!


      So about this cake.

      We don't celebrate Halloween.  In the past, we've just had a candlelight dinner with the kids and watched a movie - they LOVE doing something different like that.  But last year, Miranda was just 3 weeks old and a friend from church asked if she could bring us dinner that night.  We happily accepted and she brought us a huge "Thanksgiving"ish turkey feast and their family stayed and ate with us.  We had so much fun!

      This year, she asked if we could do it again - and another family joined us as well.  We had a turkey potluck again - which was especially nice for us, since we didn't really get a Thanksgiving dinner this year.
      I was in charge of desserts.  I made Pumpkin Snickerdoodle Blondies - and this Almond Cake.

      See, my precious friend sister Ellen was there....and almonds are one of her favorites.  She had given me a tube of almond paste to try out since I had never eaten it, and I wanted her to get to enjoy whatever I made.

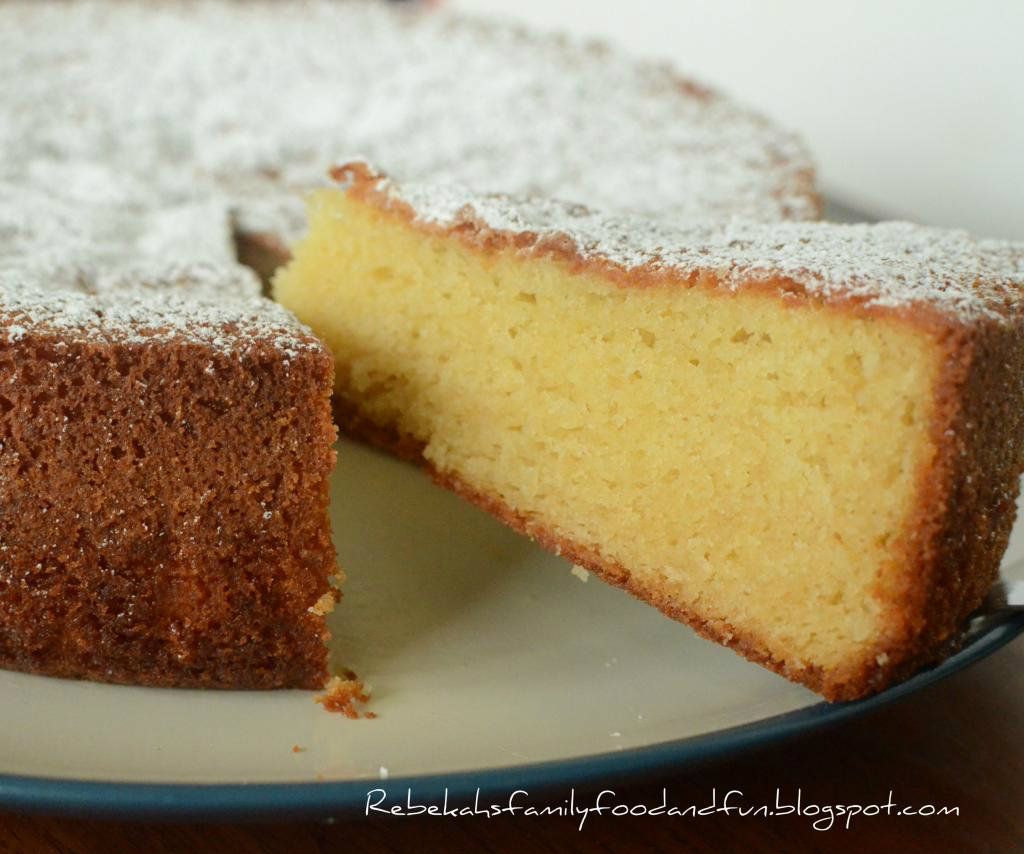
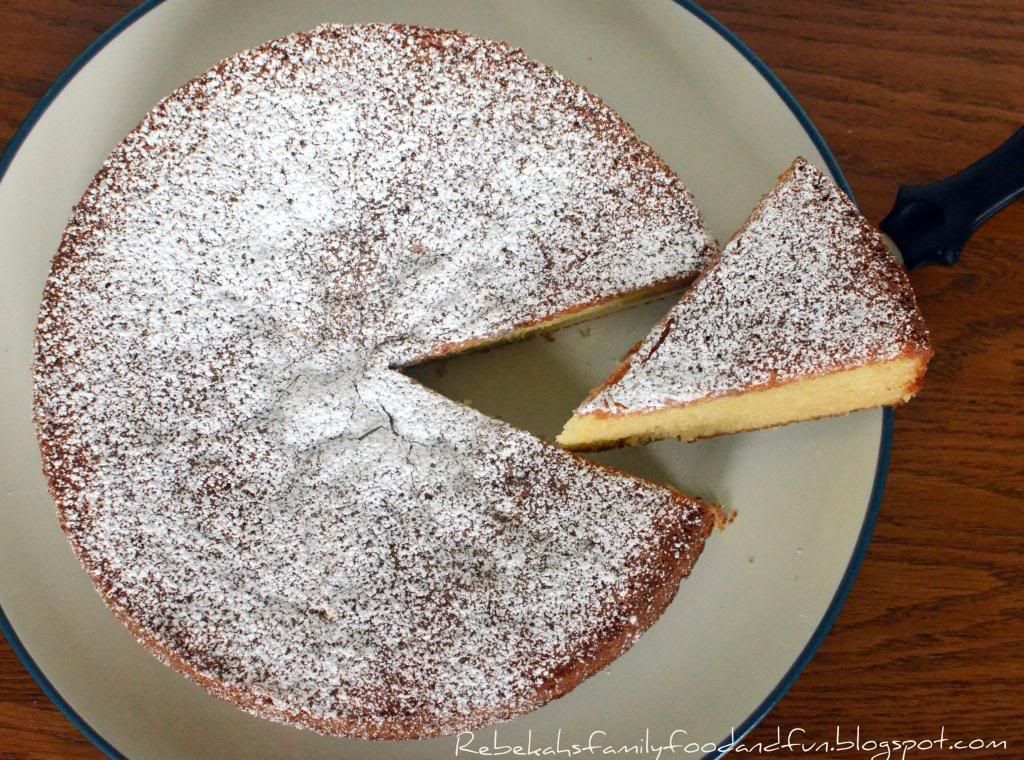
      This cake is very simple, like an almond pound cake really, but it's such a treat.  It's moist, rich, and dense, has a tender crumb, and a wonderful almond flavor.  It's actually great to make a day or two ahead of time, as the flavor develops over time and the cake maintains its lovely texture for several days.

      You can serve it with berries and whipped cream, plain with the powdered sugar dusting, and it's also delicious with some Strawberry Freezer Jam drizzled over the top.

      The most important thing to do in the baking of this cake is to really break up the almond paste as much as possible.  It's recommended to use a food processor, but since I don't have one, I used my Kitchenaid mixer and just beat it for about 10 minutes.  Large clumps of almond paste will decrease your chance of having a nice crumb in the cake - so you have to try to get the paste to about the consistency of sand.  Mine was still a little clumpy - a mixer can only do so much - but the cake turned out wonderfully, so I guess it was okay.

      Note: You should use a 9 or 10" pan with at least 2" sides for this cake.  Standard layer cake pans will not be tall enough and the cake will probably overflow.  I used a 9" spring form pan with perfect results.  

      Almond Cake (adapted slightly from David Lebovitz)

      1-1/3 cups sugar
      1 (7 ounce)  box almond paste (I used Odense brand)
      1 cup flour, divided
      1 cup (2 sticks) unsalted butter, at room temperature, cubed
      1-1/2 tsp. baking powder
      3/4 tsp. salt
      1 tsp. vanilla extract
      1 tsp. almond extract
      6 large eggs, at room temperature
      Powdered sugar, for garnish

      Preheat oveo to 325°F.  Grease a 9 or 10 inch spring form pan with butter, dust it with flour, and tap out any excess.  Line the bottom of the pan with a round of parchment paper.

      In the bowl of a food processor or a stand mixer, grind the sugar, almond paste, and 1/4 cup of flour until the almond paste is finely ground and the mixture resembles sand.

      In a small bowl, whisk together the remaining 3/4 cup flour, baking powder, and salt.

      Once the almond paste is completely broken up, add the cubes of butter and the vanilla and almond extracts, then beat until the batter is very smooth and fluffy.

      Add the eggs one at a time, beating a bit before the next addition.  Scrape down the sides as needed to make sure the eggs get fully incorporated.  After you add all the eggs, the mixture may look curdled.  Don't worry, it will come back together after the next step.

      Add half the flour mixture and stir a few times - then add the rest, stirring until the dry ingredients are just incorporated.  Do not overmix!

      Pour the batter into the prepared cake pan and bake the cake for 65 minutes, or until the top is deep brown and feels set when you press in the center.

      Remove the cake from the oven and run a sharp or serrated knife around the perimeter, loosing the cake from the sides of the pan.  Let the cake cool completely in the pan.

      Once cool, tap the cake out of the pan, remove the parchment paper, and set on a cake plate until ready to serve. (Tip: If necessary, warm the bottom of the cake pan directly on the stovetop for just a few seconds, which will help the cake release.)

      Sift a little powdered sugar over the top before serving.

      Storage:  This cake will keep for 4-5 days at room temperature, well wrapped.  It can also be frozen for up to two months.


      Linked to Trick or Treat Tuesday and Crazy Sweet Tuesday


      One of my big concerns about our move has been the sale of our home.  
      What if it didn't sell?
      What if we had to drop the price drastically and take even more of a hit?  (since we built it at the peak of the market, we've lost quite bit of appraised value in six years.)
      The agent warned us not to be discouraged if there weren't even any showings in December, since it's not a popular month for buying a home.....that with the market being what it is, not to be surprised if it took 3-6 months to sell.

      So it was listed last Monday.  
      On Friday, we had an offer. (!!!!)
      Not a full price offer, mind you, but not a terrible one, either.  
      We counter-offered, they accepted, and the papers were all signed on Saturday.  

      Extra confirmation that we are doing exactly what God had planned for us.  Wow!

      We put in an offer on a home here on Sunday - we're still in negotiations with it. It's a lovely home that Grant had his eye on for a couple of months - he even got to look through it when he came out here for his interview.  He fell in love with it and it's been his top choice all along.  I really like it too....I think it's a great choice for our family.  So we'll pray and see what happens!


      So about this cake.

      We don't celebrate Halloween.  In the past, we've just had a candlelight dinner with the kids and watched a movie - they LOVE doing something different like that.  But last year, Miranda was just 3 weeks old and a friend from church asked if she could bring us dinner that night.  We happily accepted and she brought us a huge "Thanksgiving"ish turkey feast and their family stayed and ate with us.  We had so much fun!

      This year, she asked if we could do it again - and another family joined us as well.  We had a turkey potluck again - which was especially nice for us, since we didn't really get a Thanksgiving dinner this year.
      I was in charge of desserts.  I made Pumpkin Snickerdoodle Blondies - and this Almond Cake.

      See, my precious friend sister Ellen was there....and almonds are one of her favorites.  She had given me a tube of almond paste to try out since I had never eaten it, and I wanted her to get to enjoy whatever I made.

      This cake is very simple, like an almond pound cake really, but it's such a treat.  It's moist, rich, and dense, has a tender crumb, and a wonderful almond flavor.  It's actually great to make a day or two ahead of time, as the flavor develops over time and the cake maintains its lovely texture for several days.

      You can serve it with berries and whipped cream, plain with the powdered sugar dusting, and it's also delicious with some Strawberry Freezer Jam drizzled over the top.

      The most important thing to do in the baking of this cake is to really break up the almond paste as much as possible.  It's recommended to use a food processor, but since I don't have one, I used my Kitchenaid mixer and just beat it for about 10 minutes.  Large clumps of almond paste will decrease your chance of having a nice crumb in the cake - so you have to try to get the paste to about the consistency of sand.  Mine was still a little clumpy - a mixer can only do so much - but the cake turned out wonderfully, so I guess it was okay.

      Note: You should use a 9 or 10" pan with at least 2" sides for this cake.  Standard layer cake pans will not be tall enough and the cake will probably overflow.  I used a 9" spring form pan with perfect results.  

      Almond Cake (adapted slightly from David Lebovitz)

      1-1/3 cups sugar
      1 (7 ounce)  box almond paste (I used Odense brand)
      1 cup flour, divided
      1 cup (2 sticks) unsalted butter, at room temperature, cubed
      1-1/2 tsp. baking powder
      3/4 tsp. salt
      1 tsp. vanilla extract
      1 tsp. almond extract
      6 large eggs, at room temperature
      Powdered sugar, for garnish

      Preheat oveo to 325°F.  Grease a 9 or 10 inch spring form pan with butter, dust it with flour, and tap out any excess.  Line the bottom of the pan with a round of parchment paper.

      In the bowl of a food processor or a stand mixer, grind the sugar, almond paste, and 1/4 cup of flour until the almond paste is finely ground and the mixture resembles sand.

      In a small bowl, whisk together the remaining 3/4 cup flour, baking powder, and salt.

      Once the almond paste is completely broken up, add the cubes of butter and the vanilla and almond extracts, then beat until the batter is very smooth and fluffy.

      Add the eggs one at a time, beating a bit before the next addition.  Scrape down the sides as needed to make sure the eggs get fully incorporated.  After you add all the eggs, the mixture may look curdled.  Don't worry, it will come back together after the next step.

      Add half the flour mixture and stir a few times - then add the rest, stirring until the dry ingredients are just incorporated.  Do not overmix!

      Pour the batter into the prepared cake pan and bake the cake for 65 minutes, or until the top is deep brown and feels set when you press in the center.

      Remove the cake from the oven and run a sharp or serrated knife around the perimeter, loosing the cake from the sides of the pan.  Let the cake cool completely in the pan.

      Once cool, tap the cake out of the pan, remove the parchment paper, and set on a cake plate until ready to serve. (Tip: If necessary, warm the bottom of the cake pan directly on the stovetop for just a few seconds, which will help the cake release.)

      Sift a little powdered sugar over the top before serving.

      Storage:  This cake will keep for 4-5 days at room temperature, well wrapped.  It can also be frozen for up to two months.


      Linked to Trick or Treat Tuesday and Crazy Sweet Tuesday
      reade more... Résuméabuiyad

      Creamy Ham & Vegetable Tortellini Soup


      So this is one of those, I want a recipe, but can't find what I want, so I made it up type recipe.  I was so pleased with the results I had to share it here.  I really wanted a creamy soup with tortellini.  Every recipe I found had mushrooms in it & I can't stand the texture of mushrooms, so that was a no for me.  I also wanted some type of meat & some vegetables in it, so I opted to try easy things that required no prep work, like pre-diced ham & frozen peas & carrots.  I bought my ingredients, threw this together & it came out really well!  I will definitely be making this again soon for even just the ease of making it, but the flavors are simple yet perfect.  My husband really wants me to make this again soon; he loved it!  

      The written recipe below will feed a young family of four.  If you have hungry teenagers, you may want to double this.  


      Creamy Ham & Vegetable Tortellini Soup
      Recipe by: Amber (Dessert Now, Dinner Later!)
      • 2 Tbsp butter
      • 3 Tbsp flour
      • 3 cups chicken broth
      • 2 cups milk
      • 2 Tbsp dehydrated onion
      • 1/4 tsp pepper
      • 1/2 tsp salt
      • 1 tsp garlic powder
      • 1/2 tsp oregano
      • 1/2 tsp basil
      • 8oz frozen peas & carrots
      • 8oz diced ham
      • 9.5oz (half of a 19oz pkg) frozen cheese tortellini

      1. In a large stock pot, melt butter & add flour.  Whisk for one minute.  Add chicken broth & milk.  Bring to a boil.
      2. Add dehydrated onion, pepper, salt, garlic powder, oregano, basil.  Whisk together.  Add frozen peas & carrots and diced ham.  Allow to return to a rolling boil.
      3. Add frozen tortellini.  Boil until tortellini float.  3-5 minutes.  Taste & adjust seasonings, if desired.  Serve hot.

      So this is one of those, I want a recipe, but can't find what I want, so I made it up type recipe.  I was so pleased with the results I had to share it here.  I really wanted a creamy soup with tortellini.  Every recipe I found had mushrooms in it & I can't stand the texture of mushrooms, so that was a no for me.  I also wanted some type of meat & some vegetables in it, so I opted to try easy things that required no prep work, like pre-diced ham & frozen peas & carrots.  I bought my ingredients, threw this together & it came out really well!  I will definitely be making this again soon for even just the ease of making it, but the flavors are simple yet perfect.  My husband really wants me to make this again soon; he loved it!  

      The written recipe below will feed a young family of four.  If you have hungry teenagers, you may want to double this.  


      Creamy Ham & Vegetable Tortellini Soup
      Recipe by: Amber (Dessert Now, Dinner Later!)
      • 2 Tbsp butter
      • 3 Tbsp flour
      • 3 cups chicken broth
      • 2 cups milk
      • 2 Tbsp dehydrated onion
      • 1/4 tsp pepper
      • 1/2 tsp salt
      • 1 tsp garlic powder
      • 1/2 tsp oregano
      • 1/2 tsp basil
      • 8oz frozen peas & carrots
      • 8oz diced ham
      • 9.5oz (half of a 19oz pkg) frozen cheese tortellini

      1. In a large stock pot, melt butter & add flour.  Whisk for one minute.  Add chicken broth & milk.  Bring to a boil.
      2. Add dehydrated onion, pepper, salt, garlic powder, oregano, basil.  Whisk together.  Add frozen peas & carrots and diced ham.  Allow to return to a rolling boil.
      3. Add frozen tortellini.  Boil until tortellini float.  3-5 minutes.  Taste & adjust seasonings, if desired.  Serve hot.
      reade more... Résuméabuiyad

      Layered Mocha Fudge Pie


      Before we get into just how absolutely scrumptious this layered Mocha Fudge Pie is, I'd like to share a couple of really exciting 'technical' changes here at The Kitchen is My Playground. Did you notice? Did you notice?? No? Well, then please allow me to share!

      First ... I'm very excited to share that I've created a photo recipe index. Yup ... photos! Instead of just links. Photos for each and every recipe on The Kitchen is My Playground, all in one convenient place. Hopefully this will make it easier for you all to locate those delicious dishes here that pique your interest. Click on over to check it out, and let me know what you think. I hope you like it!

      Second ...

      Continue Reading >>


      Before we get into just how absolutely scrumptious this layered Mocha Fudge Pie is, I'd like to share a couple of really exciting 'technical' changes here at The Kitchen is My Playground. Did you notice? Did you notice?? No? Well, then please allow me to share!

      First ... I'm very excited to share that I've created a photo recipe index. Yup ... photos! Instead of just links. Photos for each and every recipe on The Kitchen is My Playground, all in one convenient place. Hopefully this will make it easier for you all to locate those delicious dishes here that pique your interest. Click on over to check it out, and let me know what you think. I hope you like it!

      Second ...

      Continue Reading >>
      reade more... Résuméabuiyad